Sustainable living for a healthy planet.

Plain and simple, pâtés and terrines are a mix of finely chopped pieces of meat, vegetables, herbs, spices and sometimes alcohols (such as Armagnac or Cognac) cooked in a vessel called a terrine.
A terrine usually has larger chunks of meat, while a pâté is of a much smoother consistency (and often contains liver). Think of a beautiful little meat loaf – for that is ultimately what pâté is. It just sounds better in French, doesn't it?
The first pâté dates back to the Romans (Nero was very fond of it) but the recipe has evolved over the centuries. During the Middle Ages, the French chefs have made the pâté a true masterpiece, beautifully decorated for the ceremonial feasts. And though pâtés and terrines might seem intimidating to make at home, it's actually quite easy.
Both are perfect for entertaining and sure to impress your guests: Because pâtés and terrines are served cold, they must be prepared way in advance of the meal. Serve them on a cutting board as an appetizer or sliced as an opening course. Meat-based pâtés (like duck, pork, wild boar, chicken, fish) go well with fresh baguette or rustic bread, mustard and tart, crisp cornichons (small French pickles), whereas we like to serve fish-based terrines with greens.
Basic Technique: What you need to know
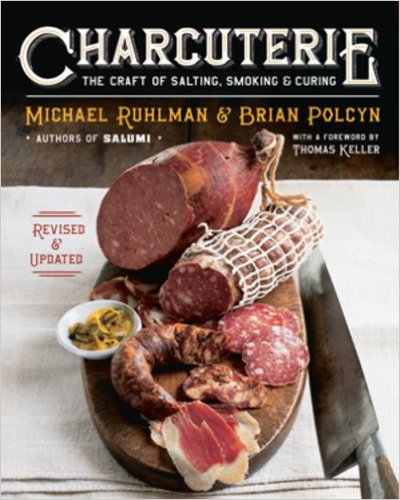
We have been following the instructions and tips published in Charcuterie: The Craft of Salting, Smoking, and Curing by Michael Ruhlman and Brian Polcyn.
Seasoning.
Season the chunks of meat and fat aggressively and well in advance, refrigerate.
Keep it cool!
It is imperative to watch the temperature. Keep your bowls, blades and ingredients cold (until they go into the oven), otherwise the fat may liquefy out of the pâté turning it into a rubberish and dry rather than smooth and rich dish.
Grinding / pureeing.
The only special equipment you need to make the forcemeat is a meat grinder (e.g. as attachment to a Kitchen Aid) or food processor, depending on the kind of pâté. Again, cool/freeze all parts that come in contact with the meat before using them. If processing larger amounts, keep portions of the forcemeat in the fridge and take a break to freeze blades in between.
Quenelle test.
Check your seasoning before committing your pate to the oven: Form a small ball or dumpling of the final mixture, wrap it in cellophane and poached in stock or water.
Garnish. Some recipes call for interior garnishes to add different colors or textures to the forcemeat.
Choose a vessel.
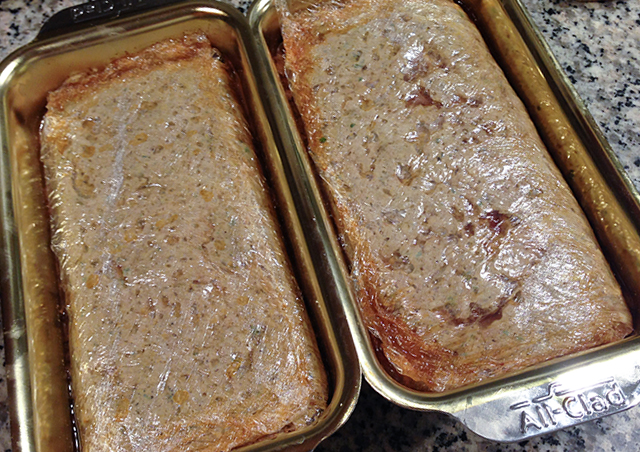
A terrine mold is nice to have but not necessary. Almost any rectangular mold will do; we have been using the All Clad Loaf Pan. But keep in mind that size and shape will effect the outcome: You do not want the pâté to be overcooked on the sides and still raw in the middle.
Cooking.
Pâtés must be cooked gently in a water bath or they will "break" (the fat will separate). Line the mold with cellophane, cut off generously. Fill in the forcemeat / garnish and fold cellophane over the mixture. Place mold into high-sided roasting pan filled with very hot water to come halfway up the sides of the mold. Put roasting pan in preheated over (300 degrees F / 150 degrees C). Cook according to recipe - anywhere from 45 to 90 minutes.
Cooling down.
Remove the mold from the water bath and set it on a rack to cool. The cooked pâté should be weighted down while it cools to remove any remaining air pockets and give it a smooth and uniform texture. Again, no need to get something fancy: We use a clean brick wrapped in aluminum foil.

What's in the picture?
Although we have cooked quite a few variants with meat and liver, the seafood-based pâté and terrine featured here are much more colorful.
The Salmon Pâté In Basil Cornmeal Crust (pictured on top) is a little more involved due to the pastry crust, but the Shrimp and Salmon Terrine with Spinach and Mushrooms (bottom/right) is probably the simplest terrine to make at home. It has a rich, smooth shrimp and salmon flavor, and the garnish – a mosaic of green spinach surrounding the salmon fillet in the center – is visually dramatic.
For both, we followed the recipe from Charcuterie: The Craft of Salting, Smoking, and Curing by Michael Ruhlman and Brian Polcyn (pages 242 and 239).
Ingredients
1 tablespoon vegetable oil
8 ounces mushrooms, trimmed and sliced 1/4 -inch thick
1 tablespoon/15 grams kosher salt (divided)
1 pound small (26-30 count) shrimp, peeled and deveined, or rock shrimp
1 large egg white
1 1/4 cups heavy cream
Pinch of white pepper
4 ounces spinach leaves (about 2 cups), stems removed and cut into chiffonade (slivered)
10 ounces skinless salmon fillet or buy 2 (5-ounce) center-cut pieces salmon fillet
Decoration
Serve with a small side salad or sprouts. Sprouts are very easy to grow (we grow them in a 4-8 tray sprouter which allows a timed harvest) and versatile (try different sprouting seed mixes). A nice source of something fresh and green once the lettuce in the green house is frozen!
Shrimp and Salmon Terrine with Spinach and Mushrooms
Directions
Freeze all your blades and bowls before gathering and measuring your ingredients. Heat a large saute pan, then add the oil and heat until almost smoking. Add the mushrooms, season with salt, and saute until soft. Remove from the pan and chill. Preheat the oven to 300 degrees.
Place the shrimp and egg white in the food processor and puree. While the machine is running, add the cream in a steady slow stream.
Season with the remaining salt and the white pepper and process to smooth paste. (For an exquisite texture, pass this mixture through a fine sieve.)
Transfer the shrimp mixture to a bowl and fold in the cooled mushrooms and spinach.
Line a 1 1/2-quart terrine mold with plastic wrap, leaving enough overhang on the two long sides to cover the filled mold (moistening the mold first will help the plastic wrap adhere to the corners). Fill with two thirds of the shrimp mixture, lay the salmon fillet in the center (if using 2 fillets, lay them end to end, trimming them as necessary to fit) and push down with your hands so the mousse mixture comes up around the sides of the salmon. Top with the remaining shrimp mixture and fold the plastic wrap cover to cover. Cover with the lid or foil.
Place the terrine in a high-sided roasting pan and add enough hot water (very hot tap water, 150 to 160 degrees) to the pan to come halfway up the sides of the mold.
Put the roasting pan in the oven and bake until an instant-read thermometer inserted into the center of the pate registers 150 degrees (about 45 minutes).
Remove the pate from the oven, remove from the water bath and set a weight of 2 pounds on top of it. Allow to cool, then refrigerate.
To serve, remove the pate from the mold and pat dry with paper towels. Cut into 1/4 -inch thick slices.
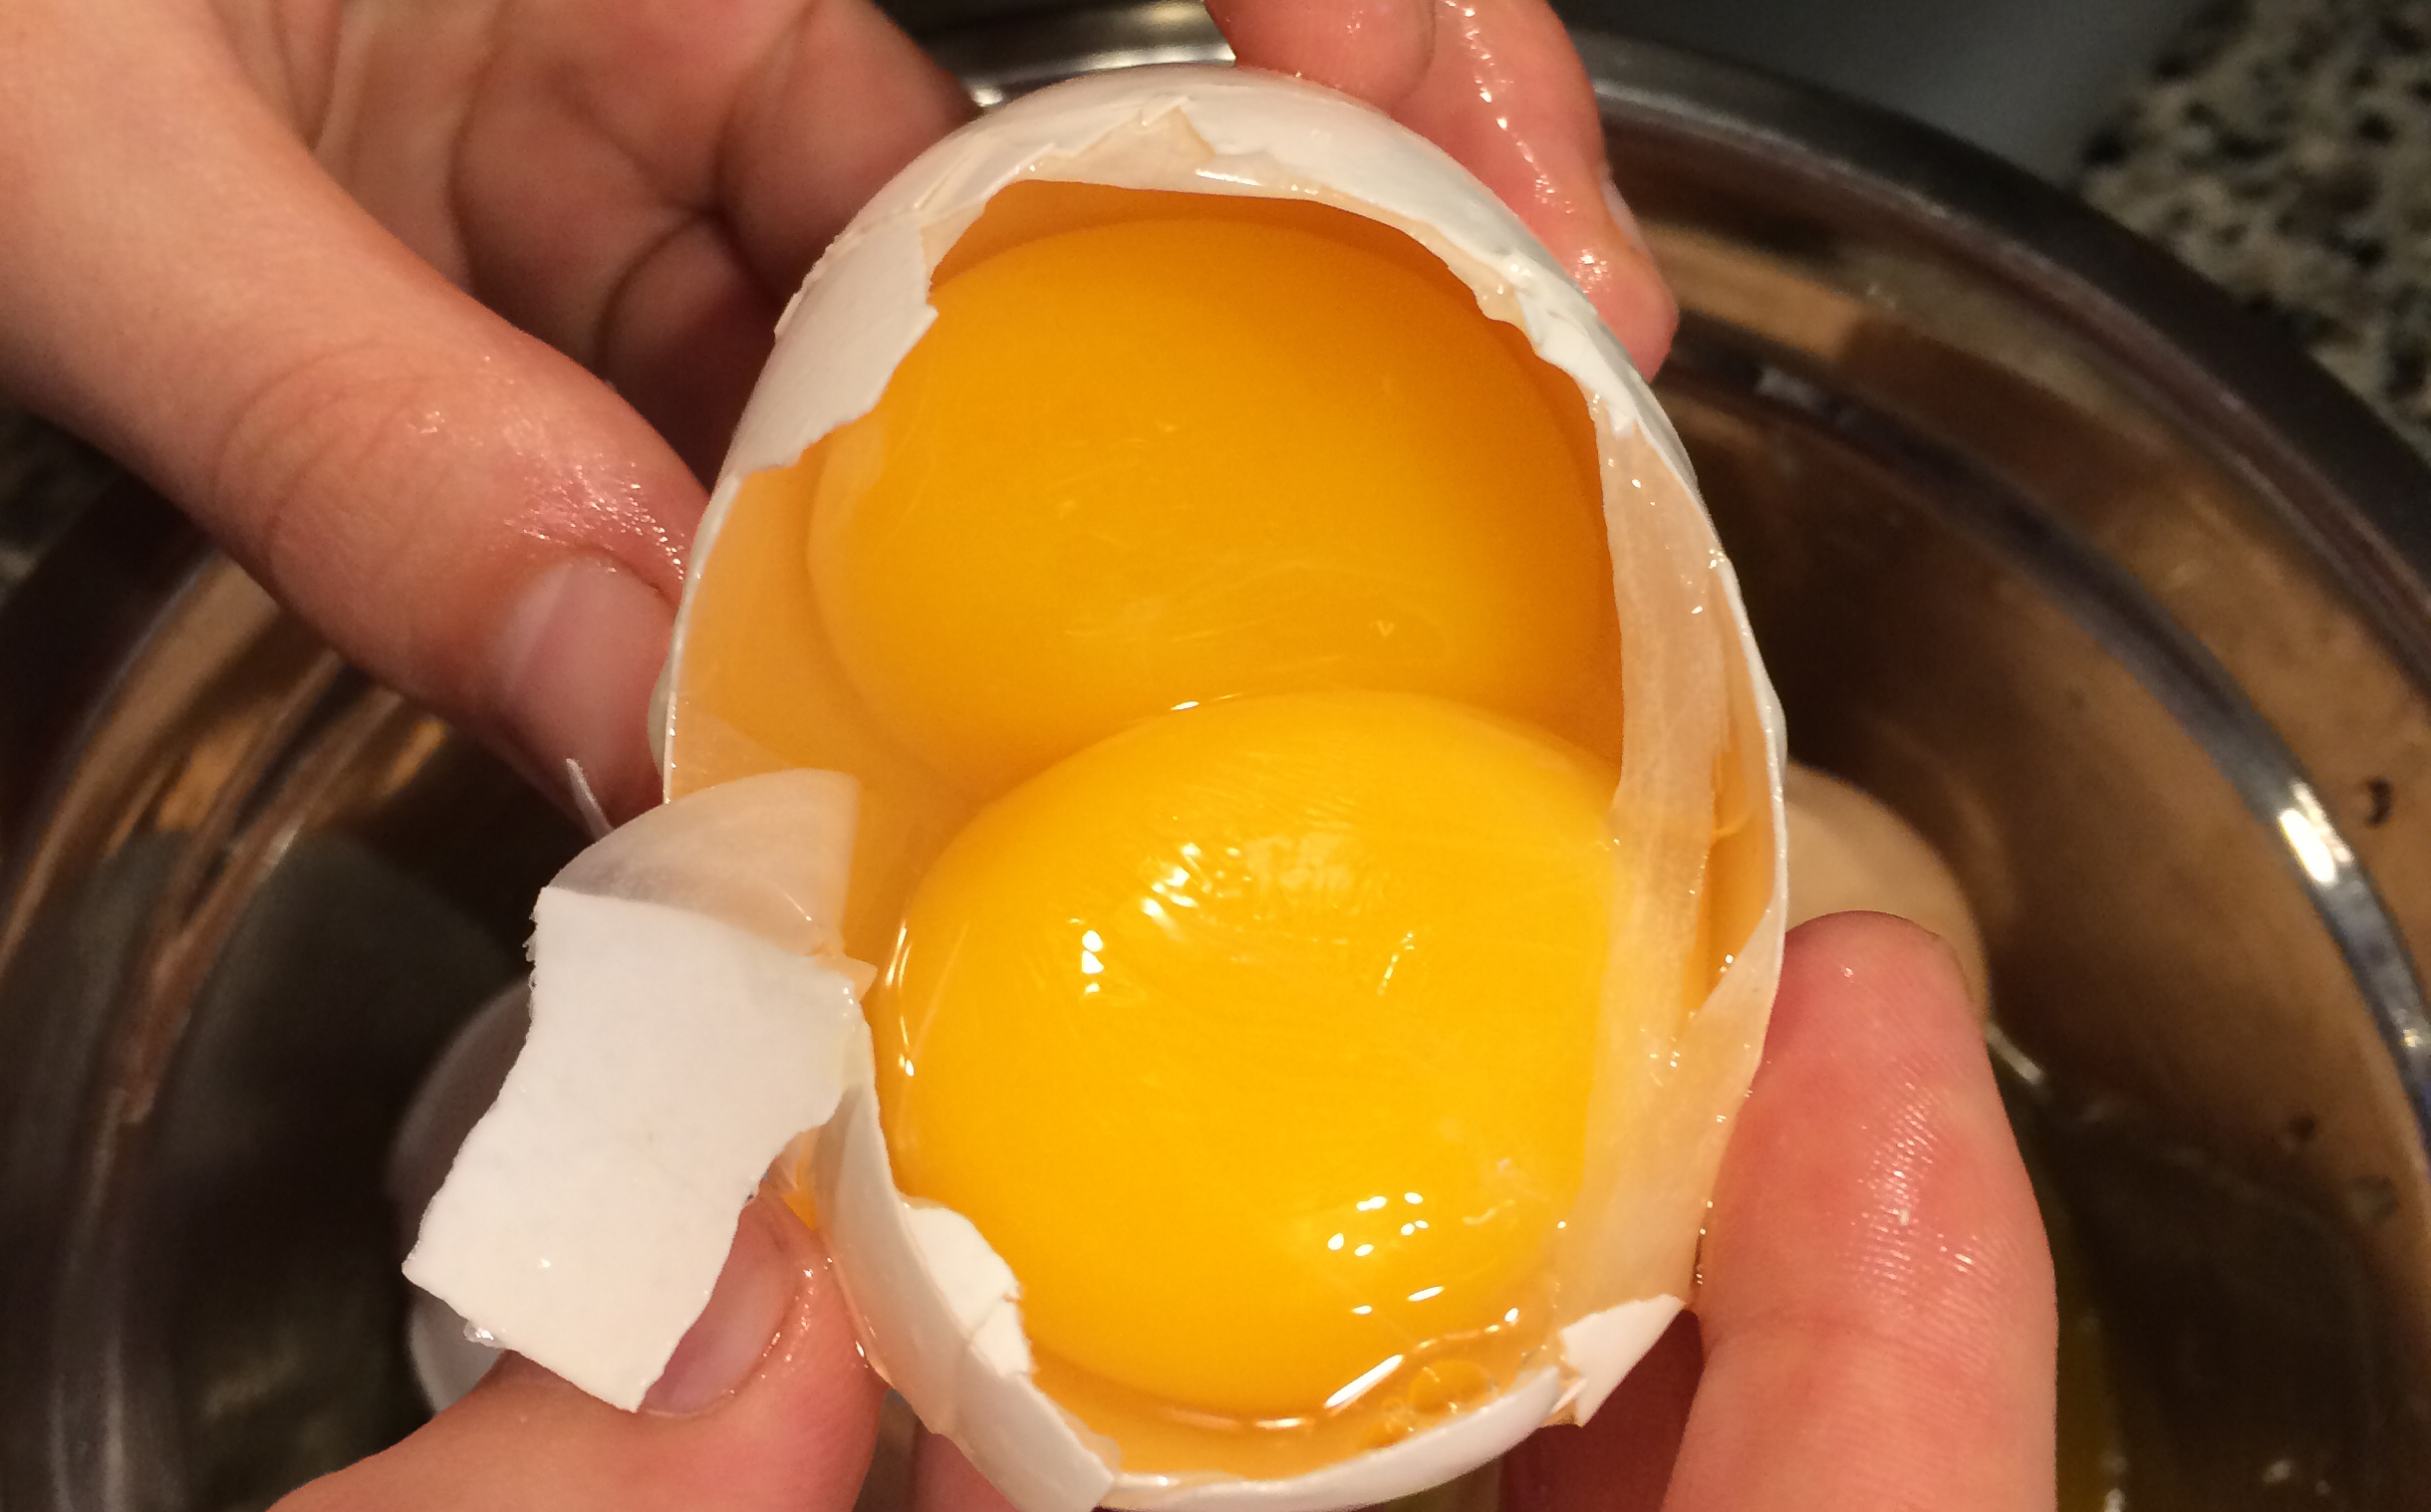
If you are raising chickens, you'll eventually end up with eggs.
Lot's of eggs!
Sophia has raised our last batch of 20 egg-laying hens and three (!) roosters with lots of love and taken good care of them. In their prime-time, it was not unusual for us to collect 16 eggs... per day. Which raises an important question: What do you do with so many eggs?
Later this year, we will feature pasta and quiche, but in honor of Valentine's Day, we decided to showcase a few of our favorite (egg-rich) desserts: Home-made ice cream, Blackberry Ripple Mousse and Créme Brûlée.
Let' begin with the family's favorite and most versatile of the three desserts, which can be eaten alone (at any time of day) or used in smoothies and shakes.

Home-made Ice Cream
We start out by following the "base recipe" of
The Ciao Bella Book of Gelato and Sorbetto: Bold, Fresh Flavors to Make at Home by F. W. Pearce, Danilo Zecchin.
To this base, more vanilla paste or beans, fruit pieces and sirups, chopped nuts or other goodies can be added to create a variety of rich flavors.
Ingredients for the Simple Vanilla Base
2 cups whole milk
I cup heavy creom
4 large egg yolks
2/3 cup sugar
2 Tbsp Madagascar vanilla paste or bean
pinch of salt
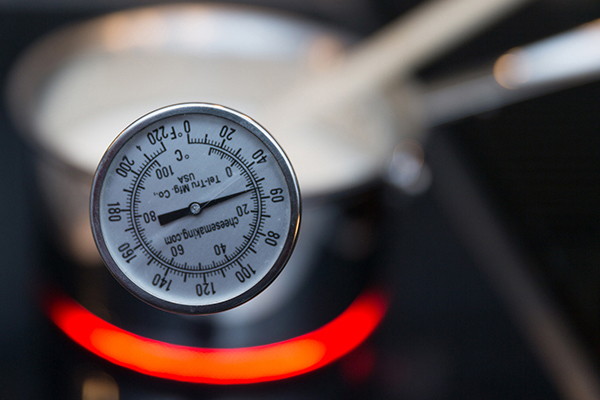 In a heavy-bottom saucepan, combine the milk and cream. Place over medium-low heat and cook, stirring occasionally so a skin doesn't form, until you reach 170 F.
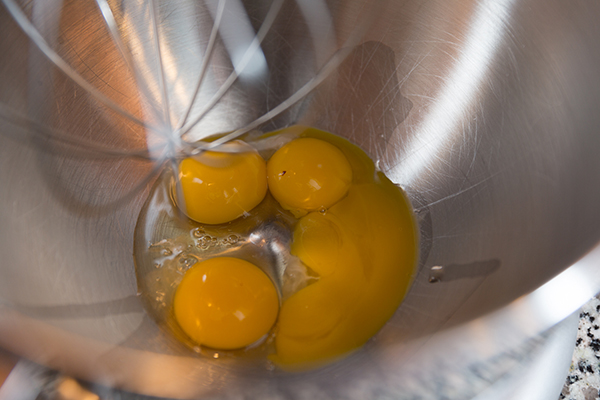 While doing this, whisk the egg yolks until smooth.
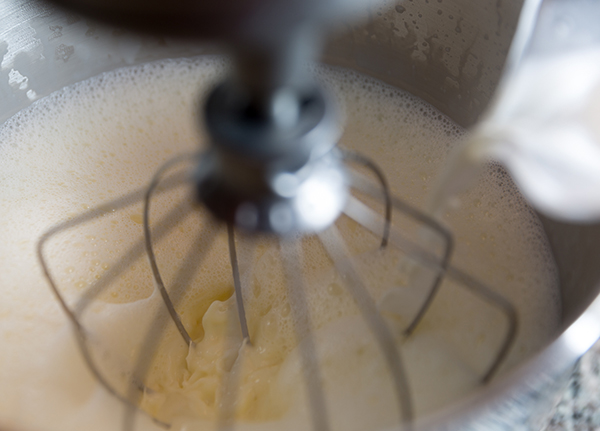 Gradually whisk in the sugar until it is well incorporated and the mixture is thick and pale yellow.
 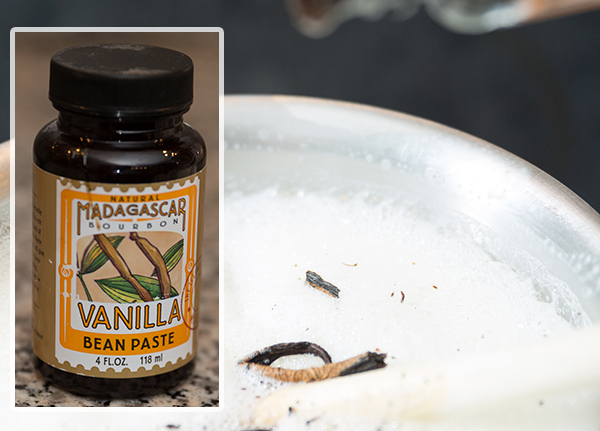 Return the custard to the saucepan and place over low heat. Add the split vanilla bean and/or the vanilla paste.
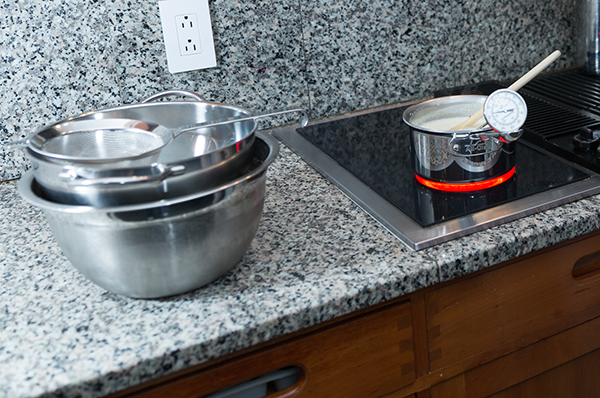 Cook, stirring frequently with a wooden spoon, until the custard reaches 185 F.
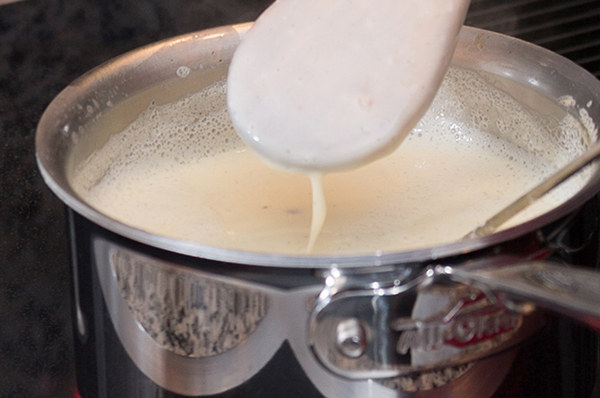 The custard should be thick enough to coat the back the spoon. Do not bring to a boil.
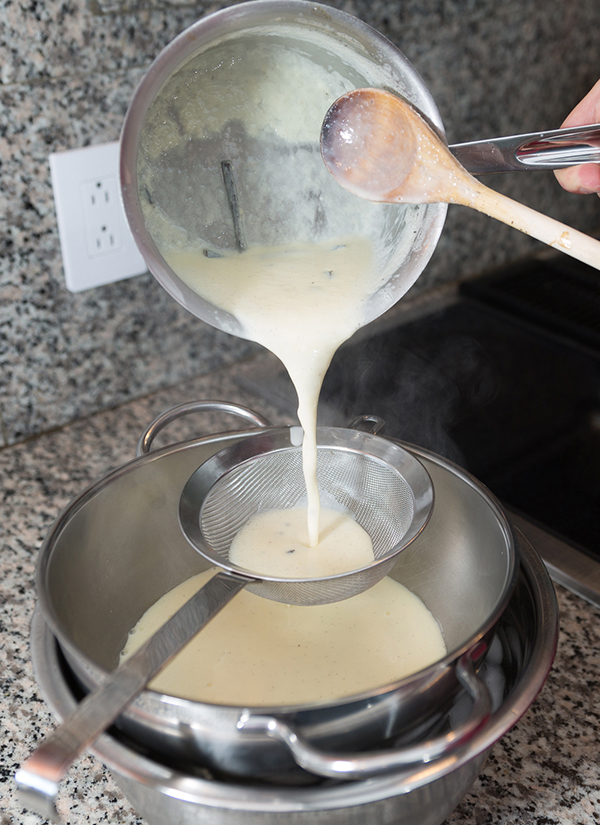 Pour the mixture through a fine-mesh strainer into a clean bowl and let cool to room temperature, stirring every 5 minutes or so. To cool the custard quickly, make an ice bath by filling a large bowl with ice and water and placing the bowl with the custard in it; stir the custard until cooled.
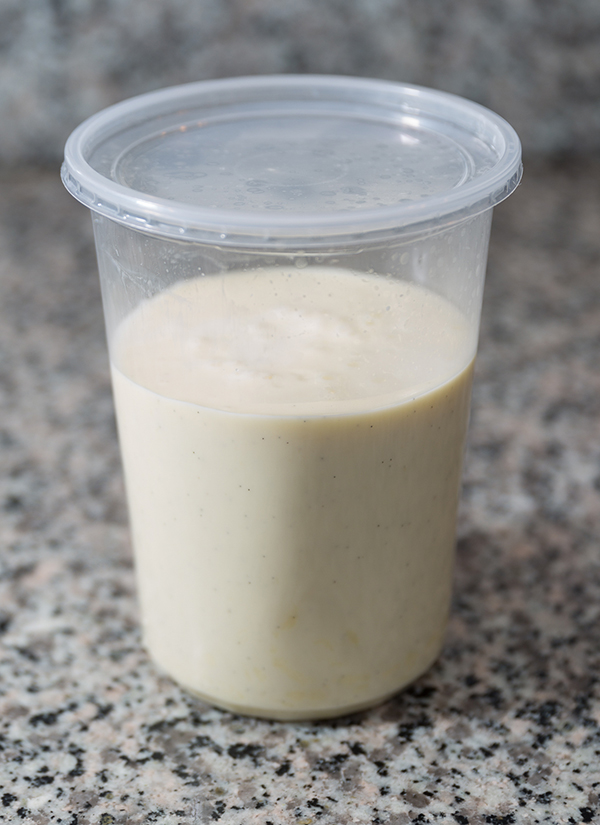 Once completely cooled, cover and refrigerate until very cold, at least 8 hours or overnight.
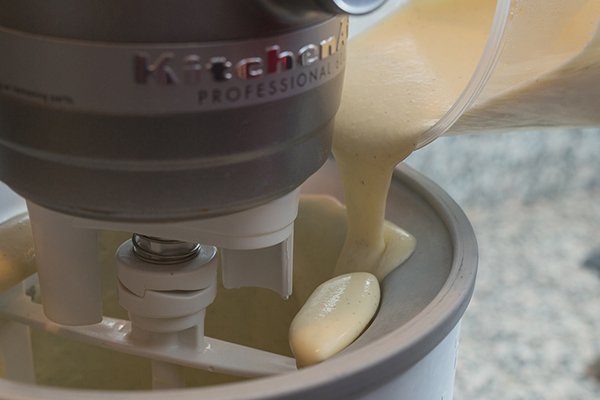 The next morning, use the ice maker (attachment for Kitchen Aid) to create a thick mass.
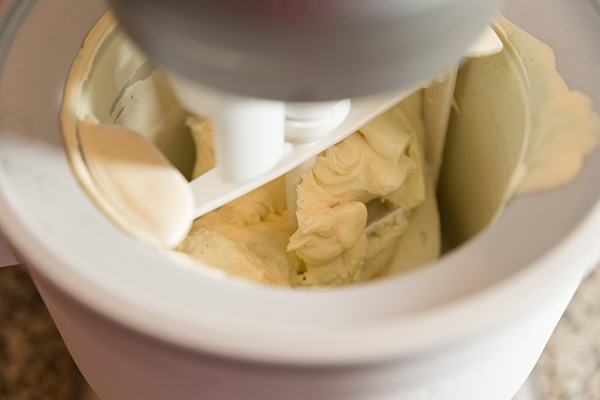 Remove from bowl when the ice cream is not liquid anymore.
Have a pre-cooled freezer-safe container ready.
Refrigerate for at least 2 hours prior to serving.
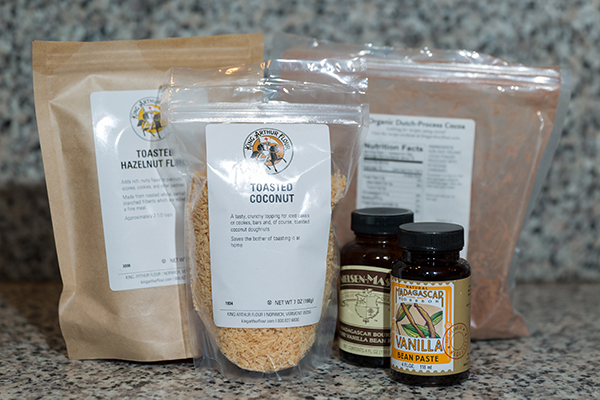
Be adventurous - Try different flavors!
Unsweetened Belgium cocoa powder and chopped up chocolate (90% cocao) make a great chocolate ice cream.
When we have a plentyful harvest, we make a thick, sirup-like coulis from our berries and peaches, preserve it and use it later in ice cream or sorbets. If you feel more adventurous, try adding pistaccio or hazelnut paste (and pieces) or cook small pieces of dried figs in rum and add the thickened mixture into the vanilla base!
If you want to impress guests, arrange scoops of 2 or 3 different ice cream flavors on a big plate, decorate each differently (for instance, drizzle berry coulis over the vanilla or sprinkle chopped nuts over the chocolate ice cream, add an edible flower or mint leaves) or choose one of the next dessert options.
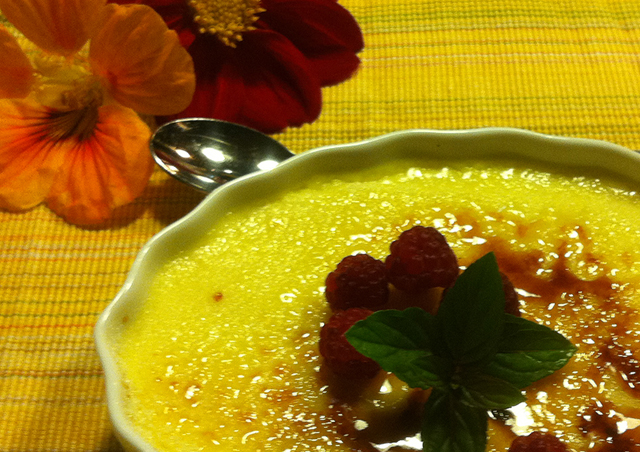
Créme Brûlée
Ingredients
1 pint heavy cream
1 pint half & half
8 egg yolks
1/2 cup sugar
Pinch of salt
1 tsp. vanilla concentrate
Heat heavy cream and half & half to the boiling point. Lightly beat egg yolks with sugar and a pinch of salt; Add vanilla. pour the hot cream over them, stirring constantly with KitchenAid wire whisk until well blended. Strain the custard into a 1 1/2 quart heat-proof baking dish; stand the dish in a pan of warm water and bake in a 350 degree oven for 25 minutes or until the custard is completely set but not over cooked. Remove from the oven; cool and then chill in the refrigerator. Up to this point, the dessert can be prepared upfront. If placed in the refrigerator, do not cover the dishes to avoid condensation.
When you are ready to serve, put sugar on top and burn with torch.

Here's a rule of thumb: Heiko needs one new hobby per year.
First, there's the new idea. Next comes the realization and fine-tuning process. And finally the idea is woven into our daily lives (At this stage, and more often than not, the execution is delegated to other members of the family...) to make room for a new idea.
This happened to growing your own produce, extending the Pittsburgh growing season by building a root cellar and green house, raising chickens and meat rabbits, making your own sausages, pasta products, ice cream...
Making cheese has been on Heiko's wish list for a long time.
In the beginning, Heiko experimented with different milk but wasn't happy with the results.
The break-through came about 3 years ago, when Heiko finally found a some-what local dairy farm which sells pasteurized (but not ultra-pasteurized) milk.
We ordered cultures and equiment online from the New England Cheese Making Supply Co., aka "Ricky, the Cheese Queen" and also follow their detailed recipes (all posted online). Their e-Newsletter contains a great wealth of tips as well.
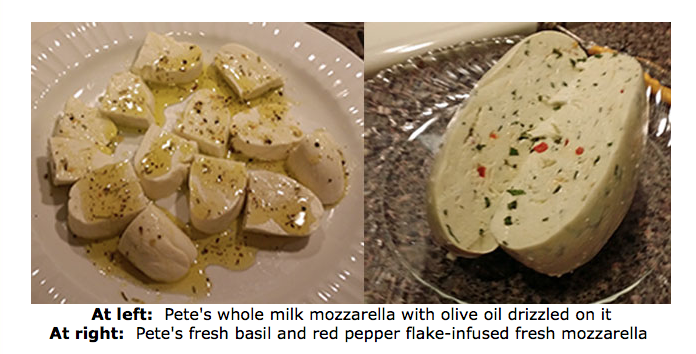
Mozarella:
Prep time 20 min, ready to eat after a few hours
We did not realize that some cheeses such as Mozarella and Queso Fresco are very easy (and quickly) to make. The same applies to dairy products such as yoghurt, Quark or crème fraîche (every European depending on US supermarket selections will appreciate the effort!).
Ingredients:
- milk
- rennet
- citric acid
- salt
Recipe:
We follow the step-by-step illustrated directions ny Ricky, the Cheese Queen.
Mozarella doesn't have to be plain, once in a while we add fresh herbs or some hot pepper.
If you are interested in trying this recipe, check out the "30 Minute Mozarella Kit" along with the FAQ and tips
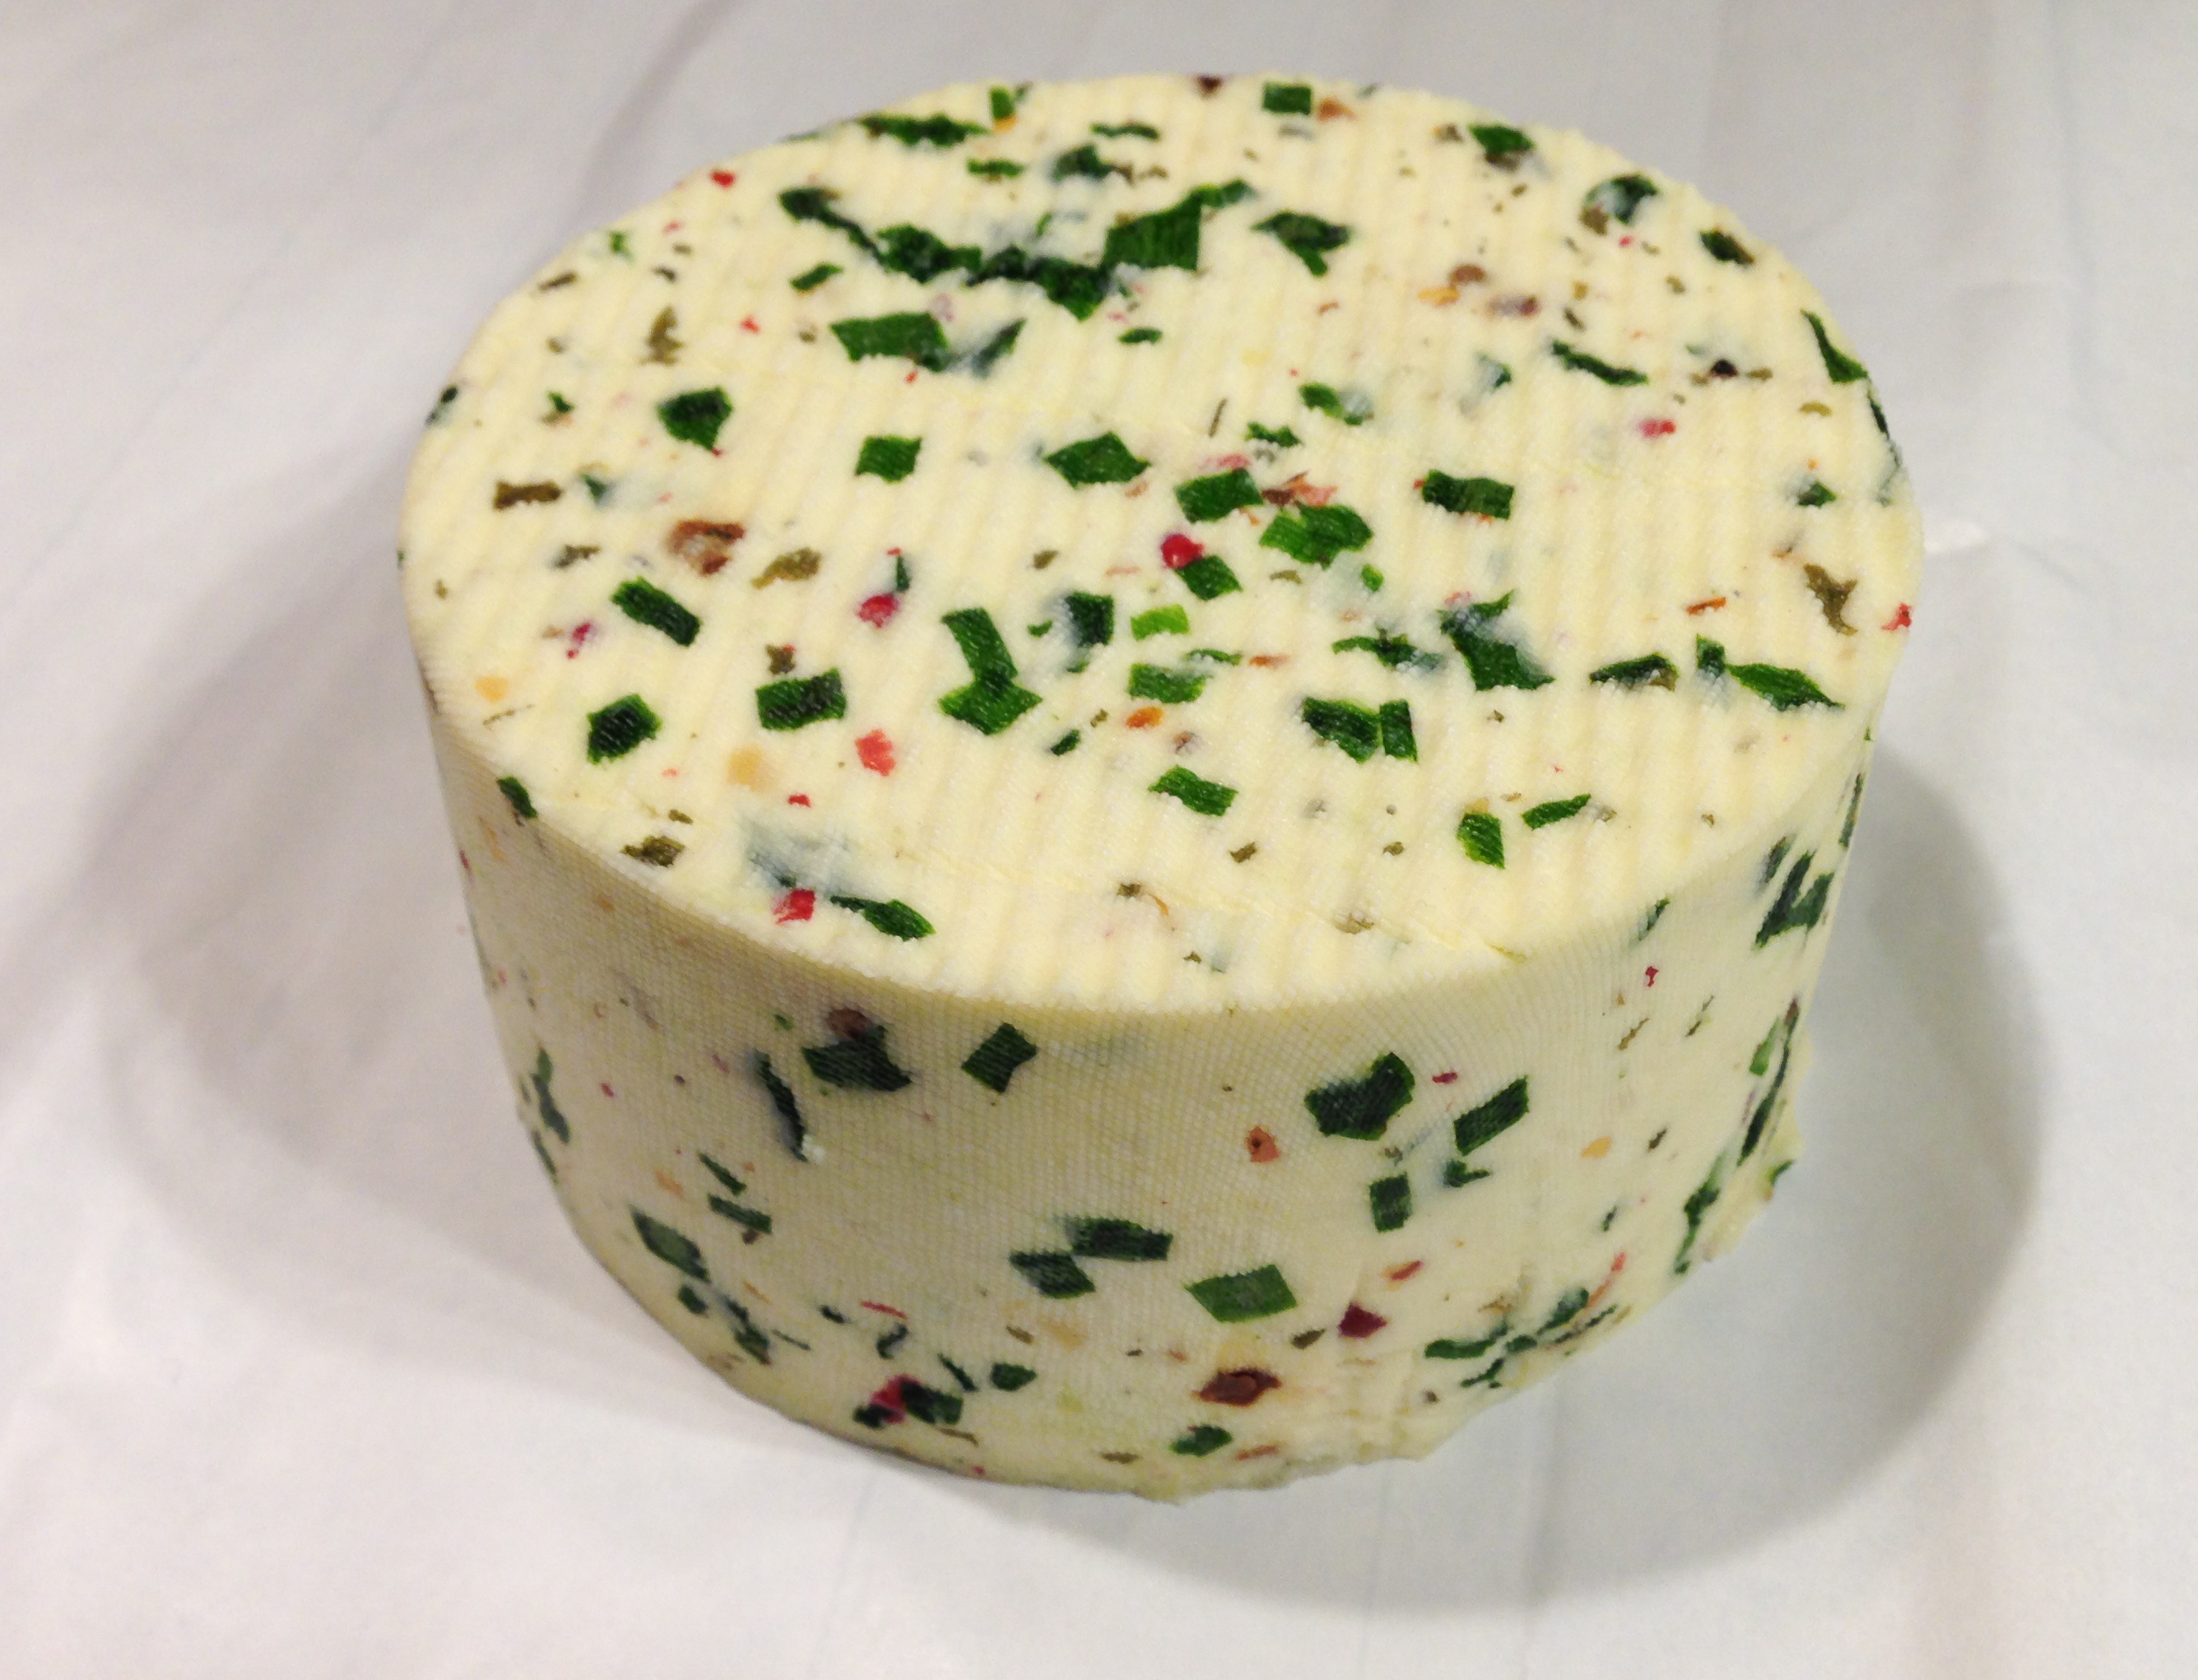
Queso fresco: Similarly easy to make, no aging required
Recipe:
Variations
Queso Fresco is a very mild and fresh cheese. Don't be afraid to experiment by adding herbs and spices to this basic recipe. We like the version with red (pink) peppercorns and chives or garlic greens as well as one with fresh thyme. Adding some hot pepper can give it a little kick.
In the beginning, we never added enough of the spices - don't be afraid!
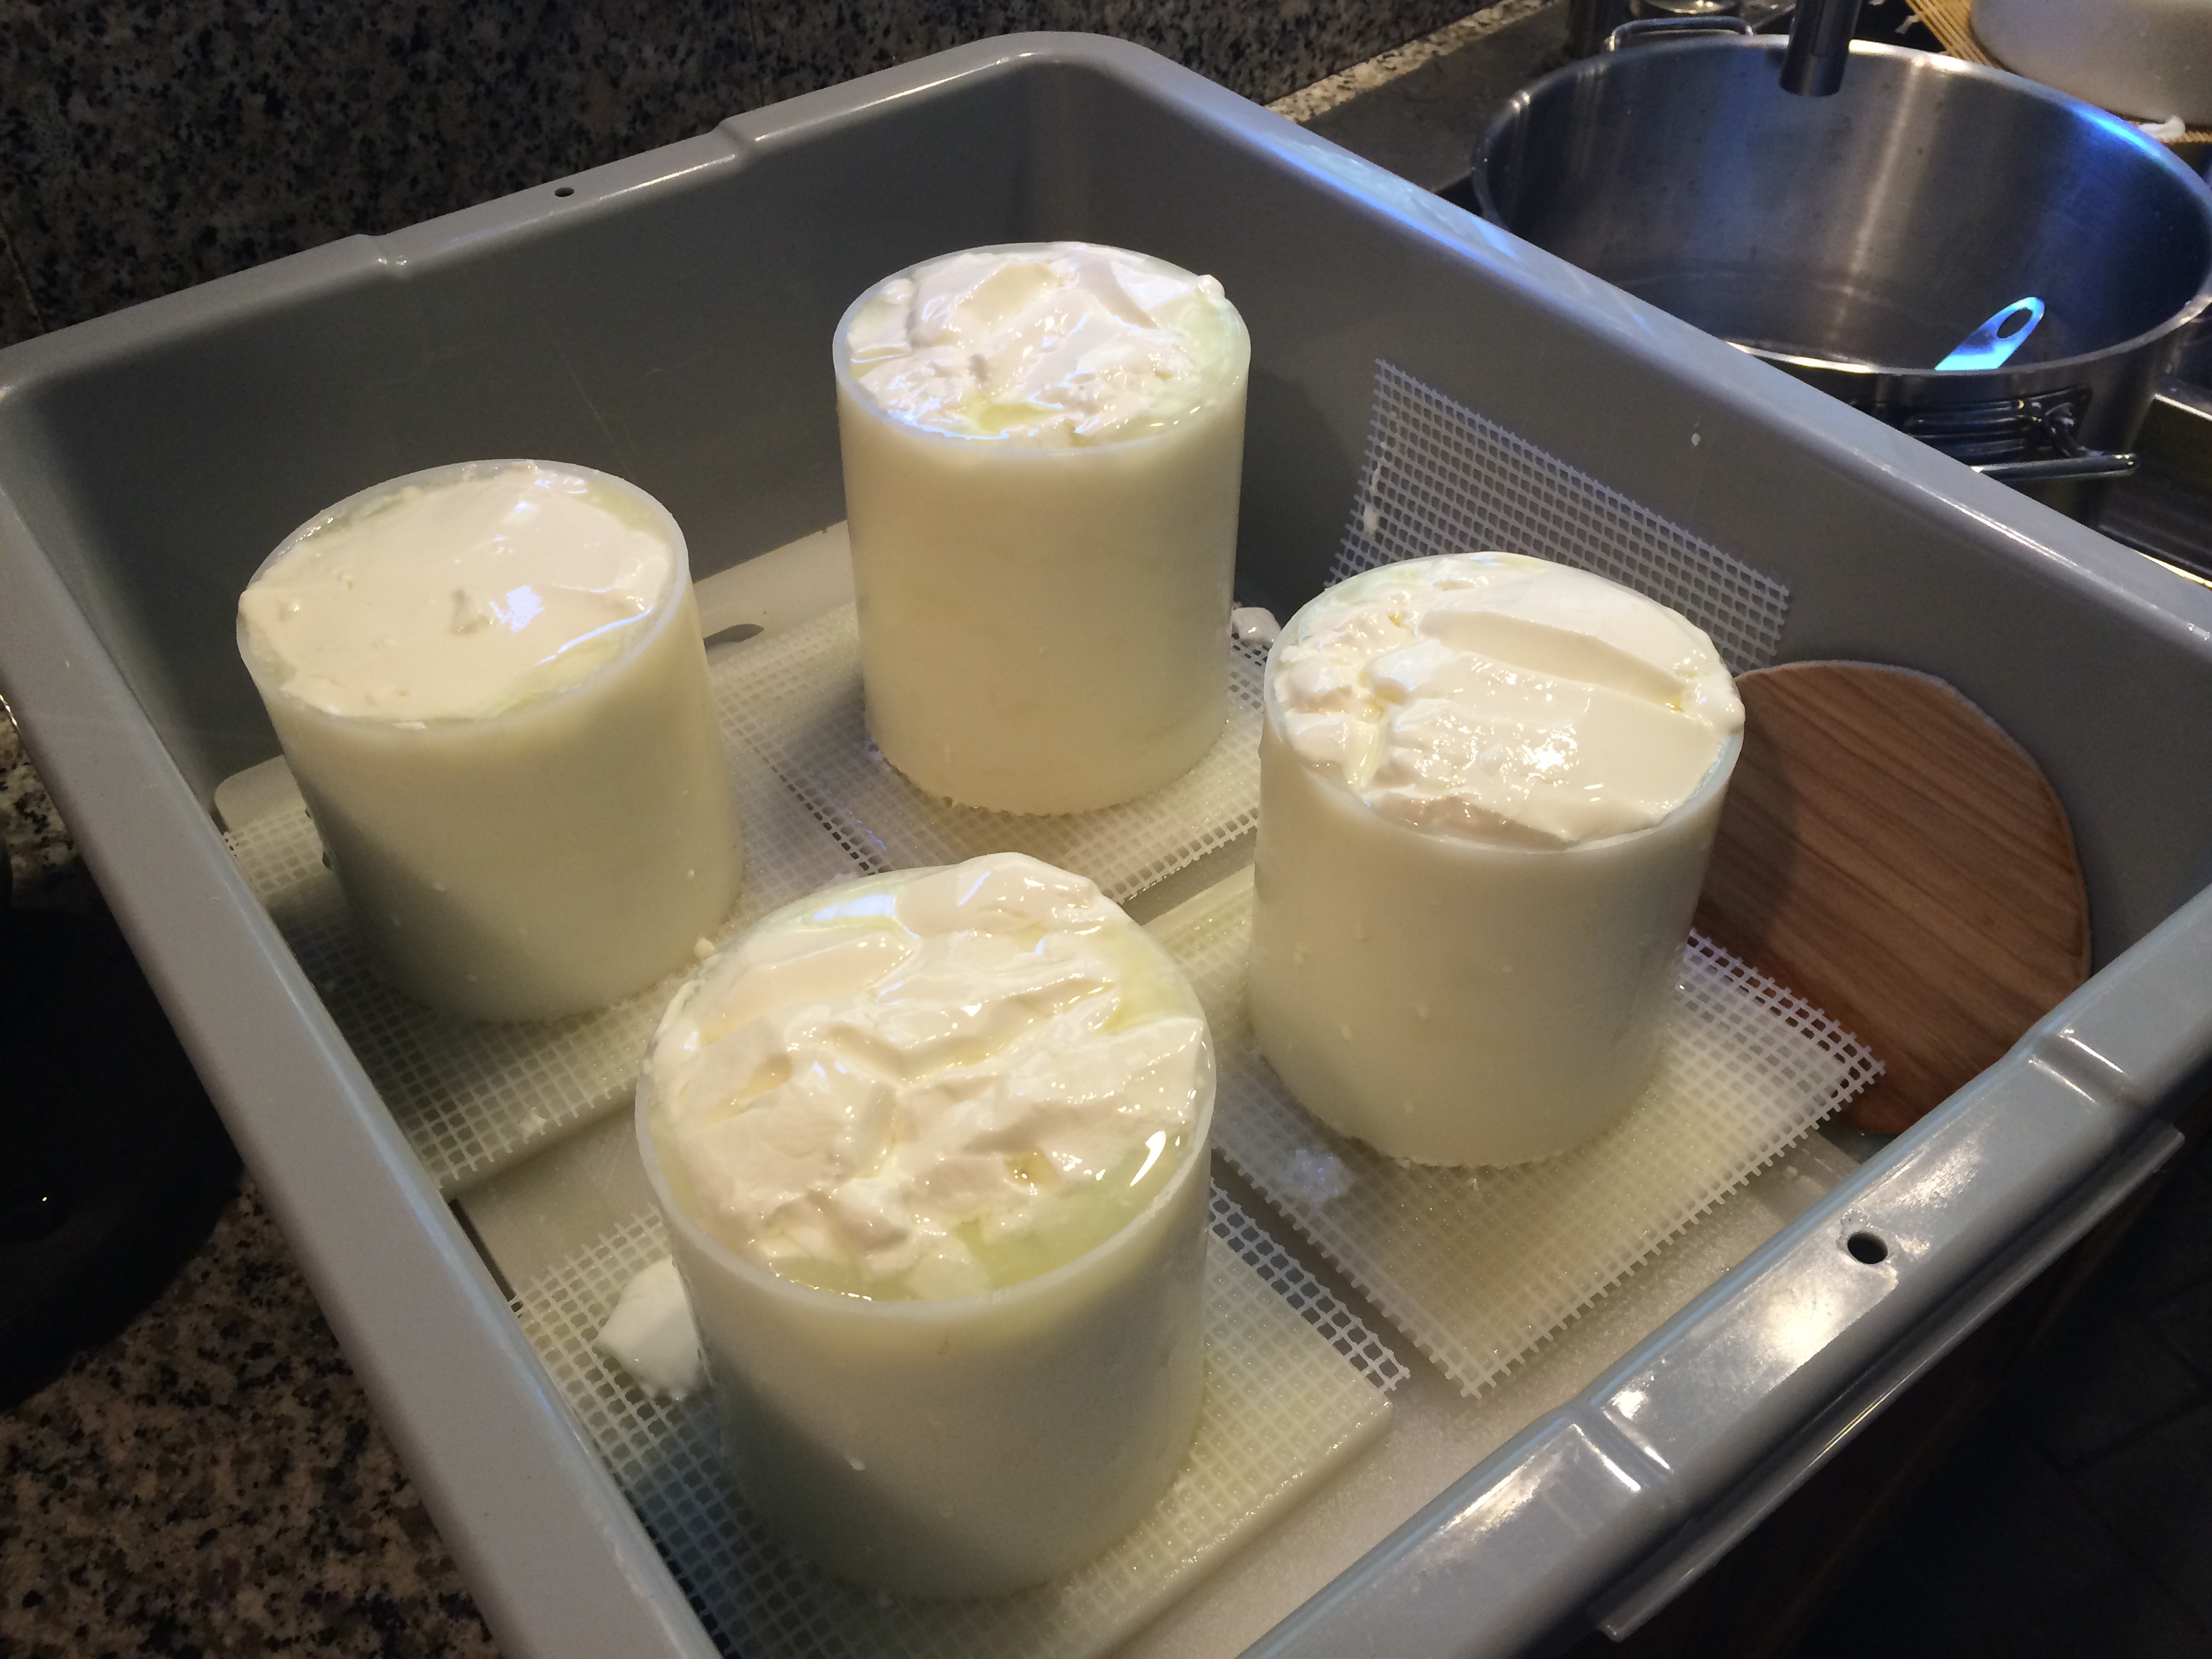
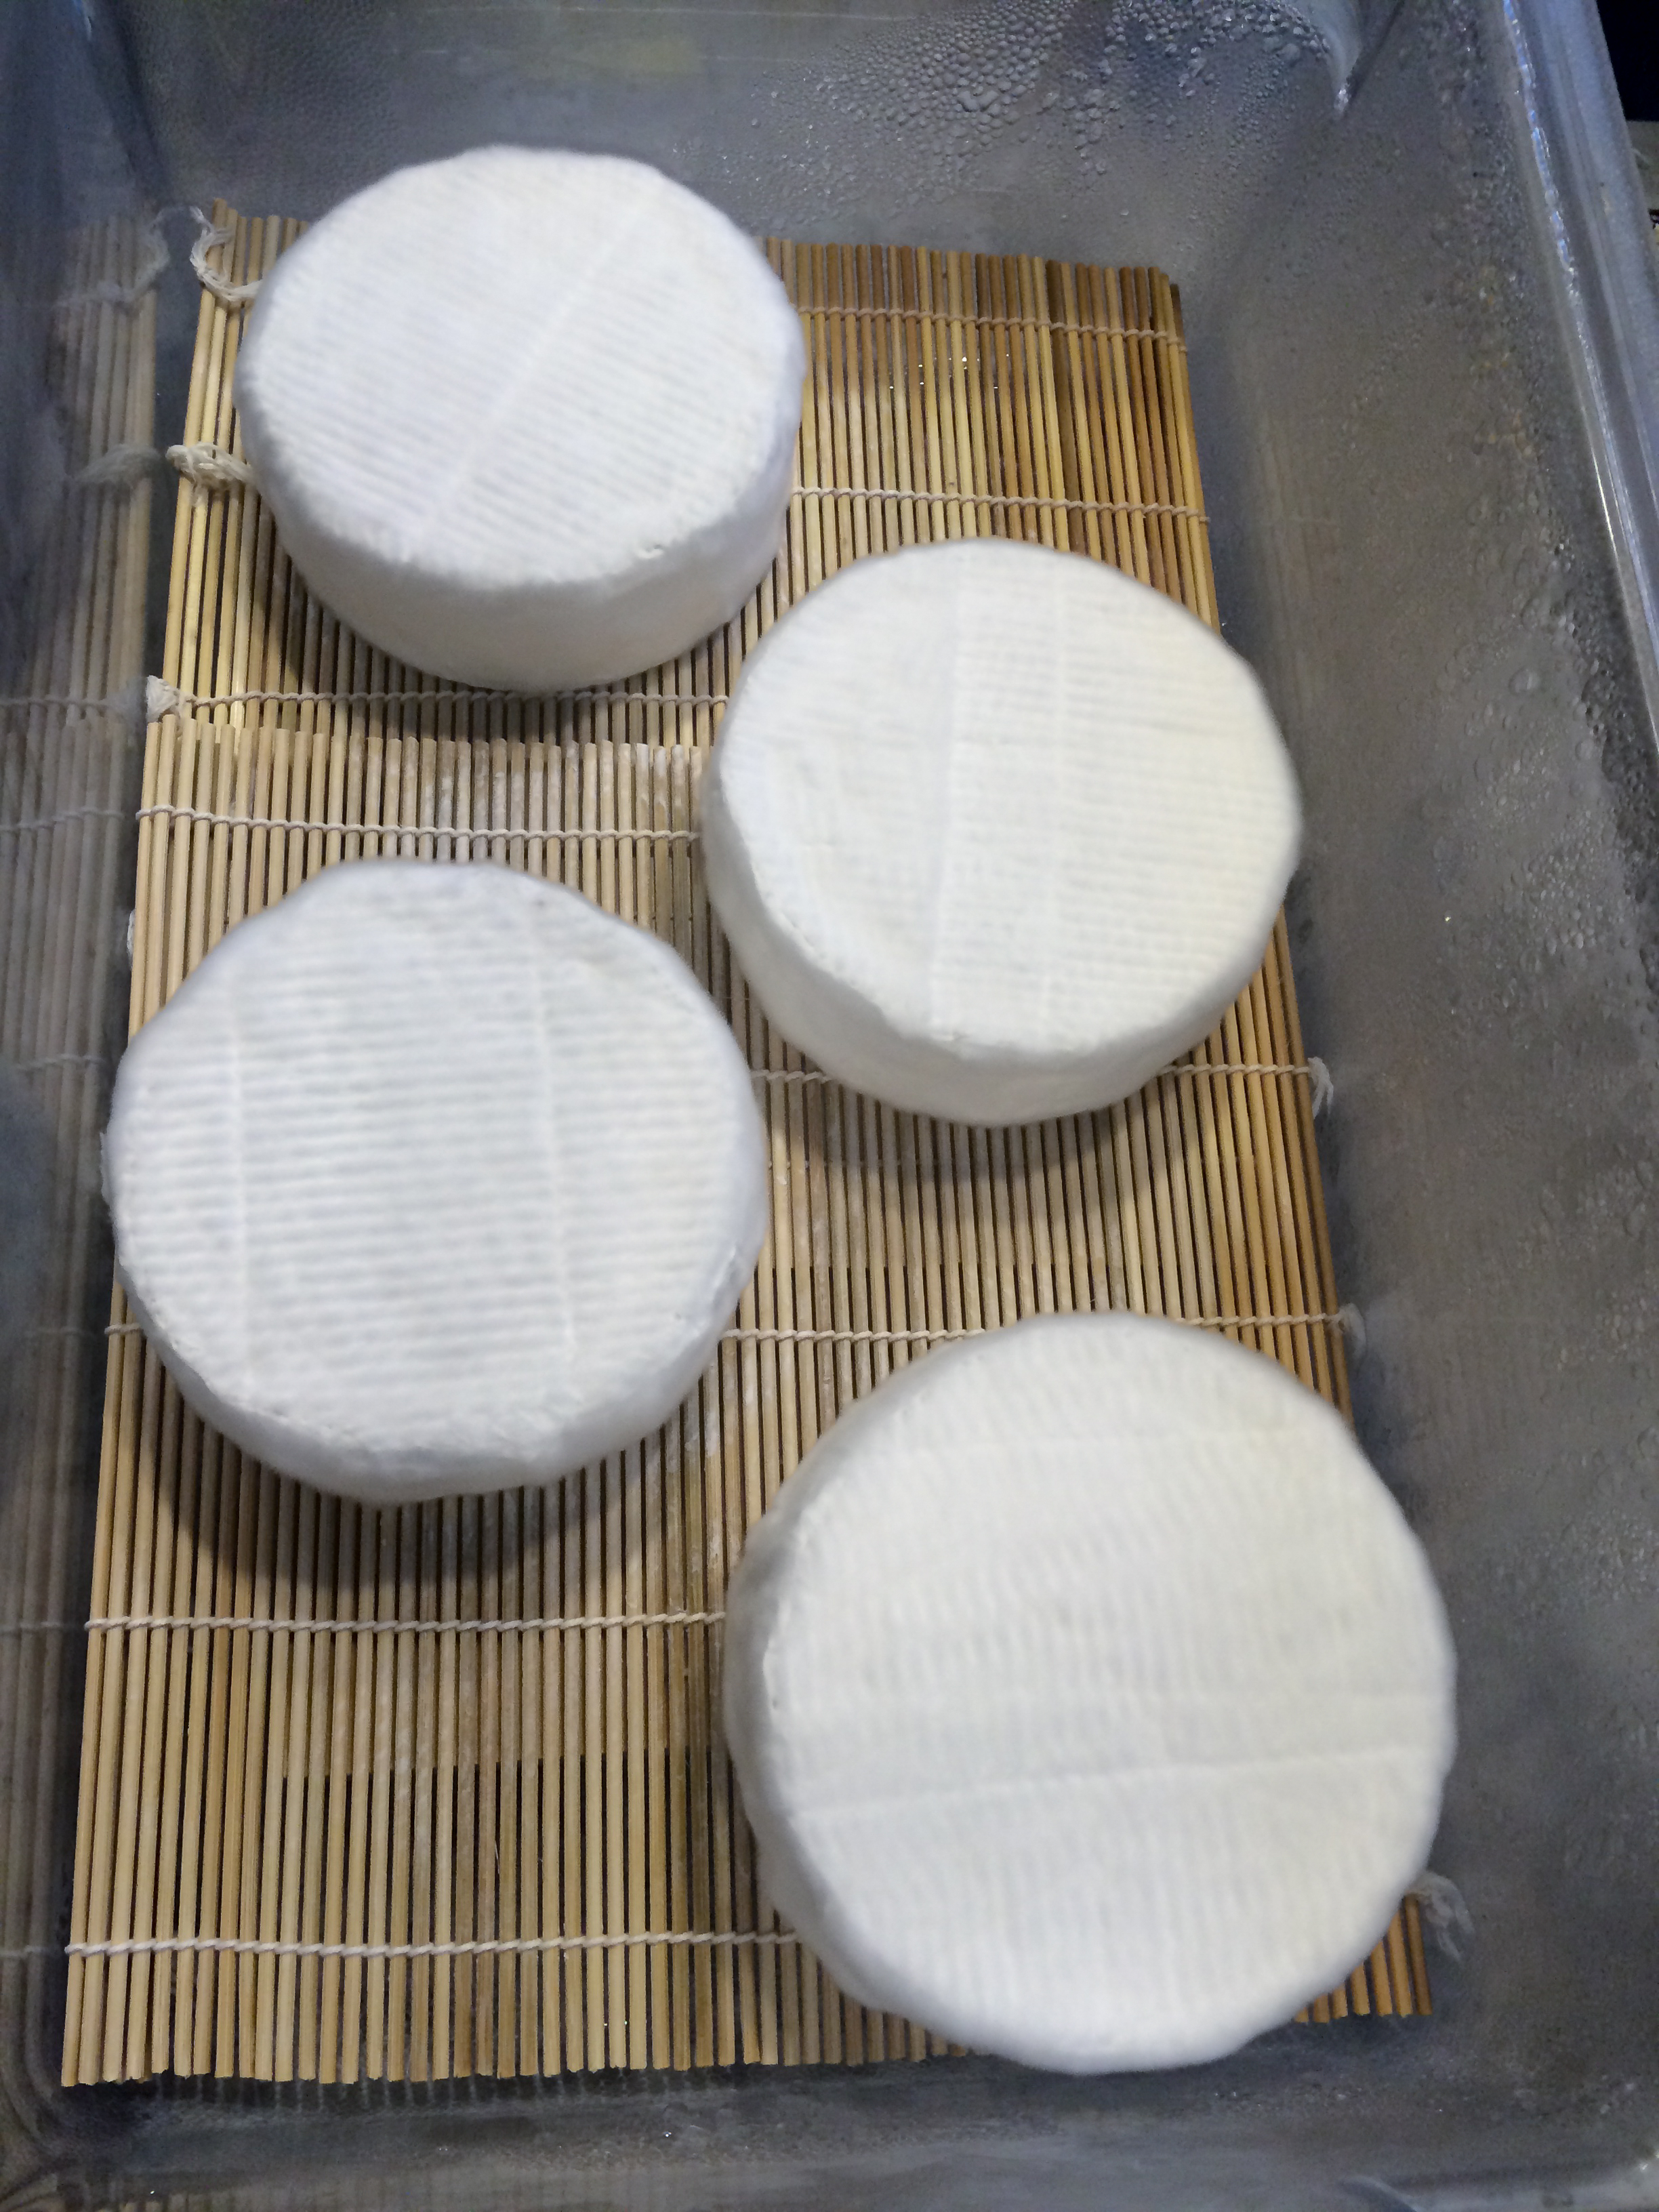
Camembert and CamBlue (soft blue cheese): More involved
The goal in making Camembert is to create a young cheese that retains as much of the milk fat and moisture as possible while the final acid develops. It takes many more steps spread out over days and weeks to complete this process, plus an aging period.
Ingredients and recipe:
Again, we follow the recipe of Ricky, the Cheese Queen.
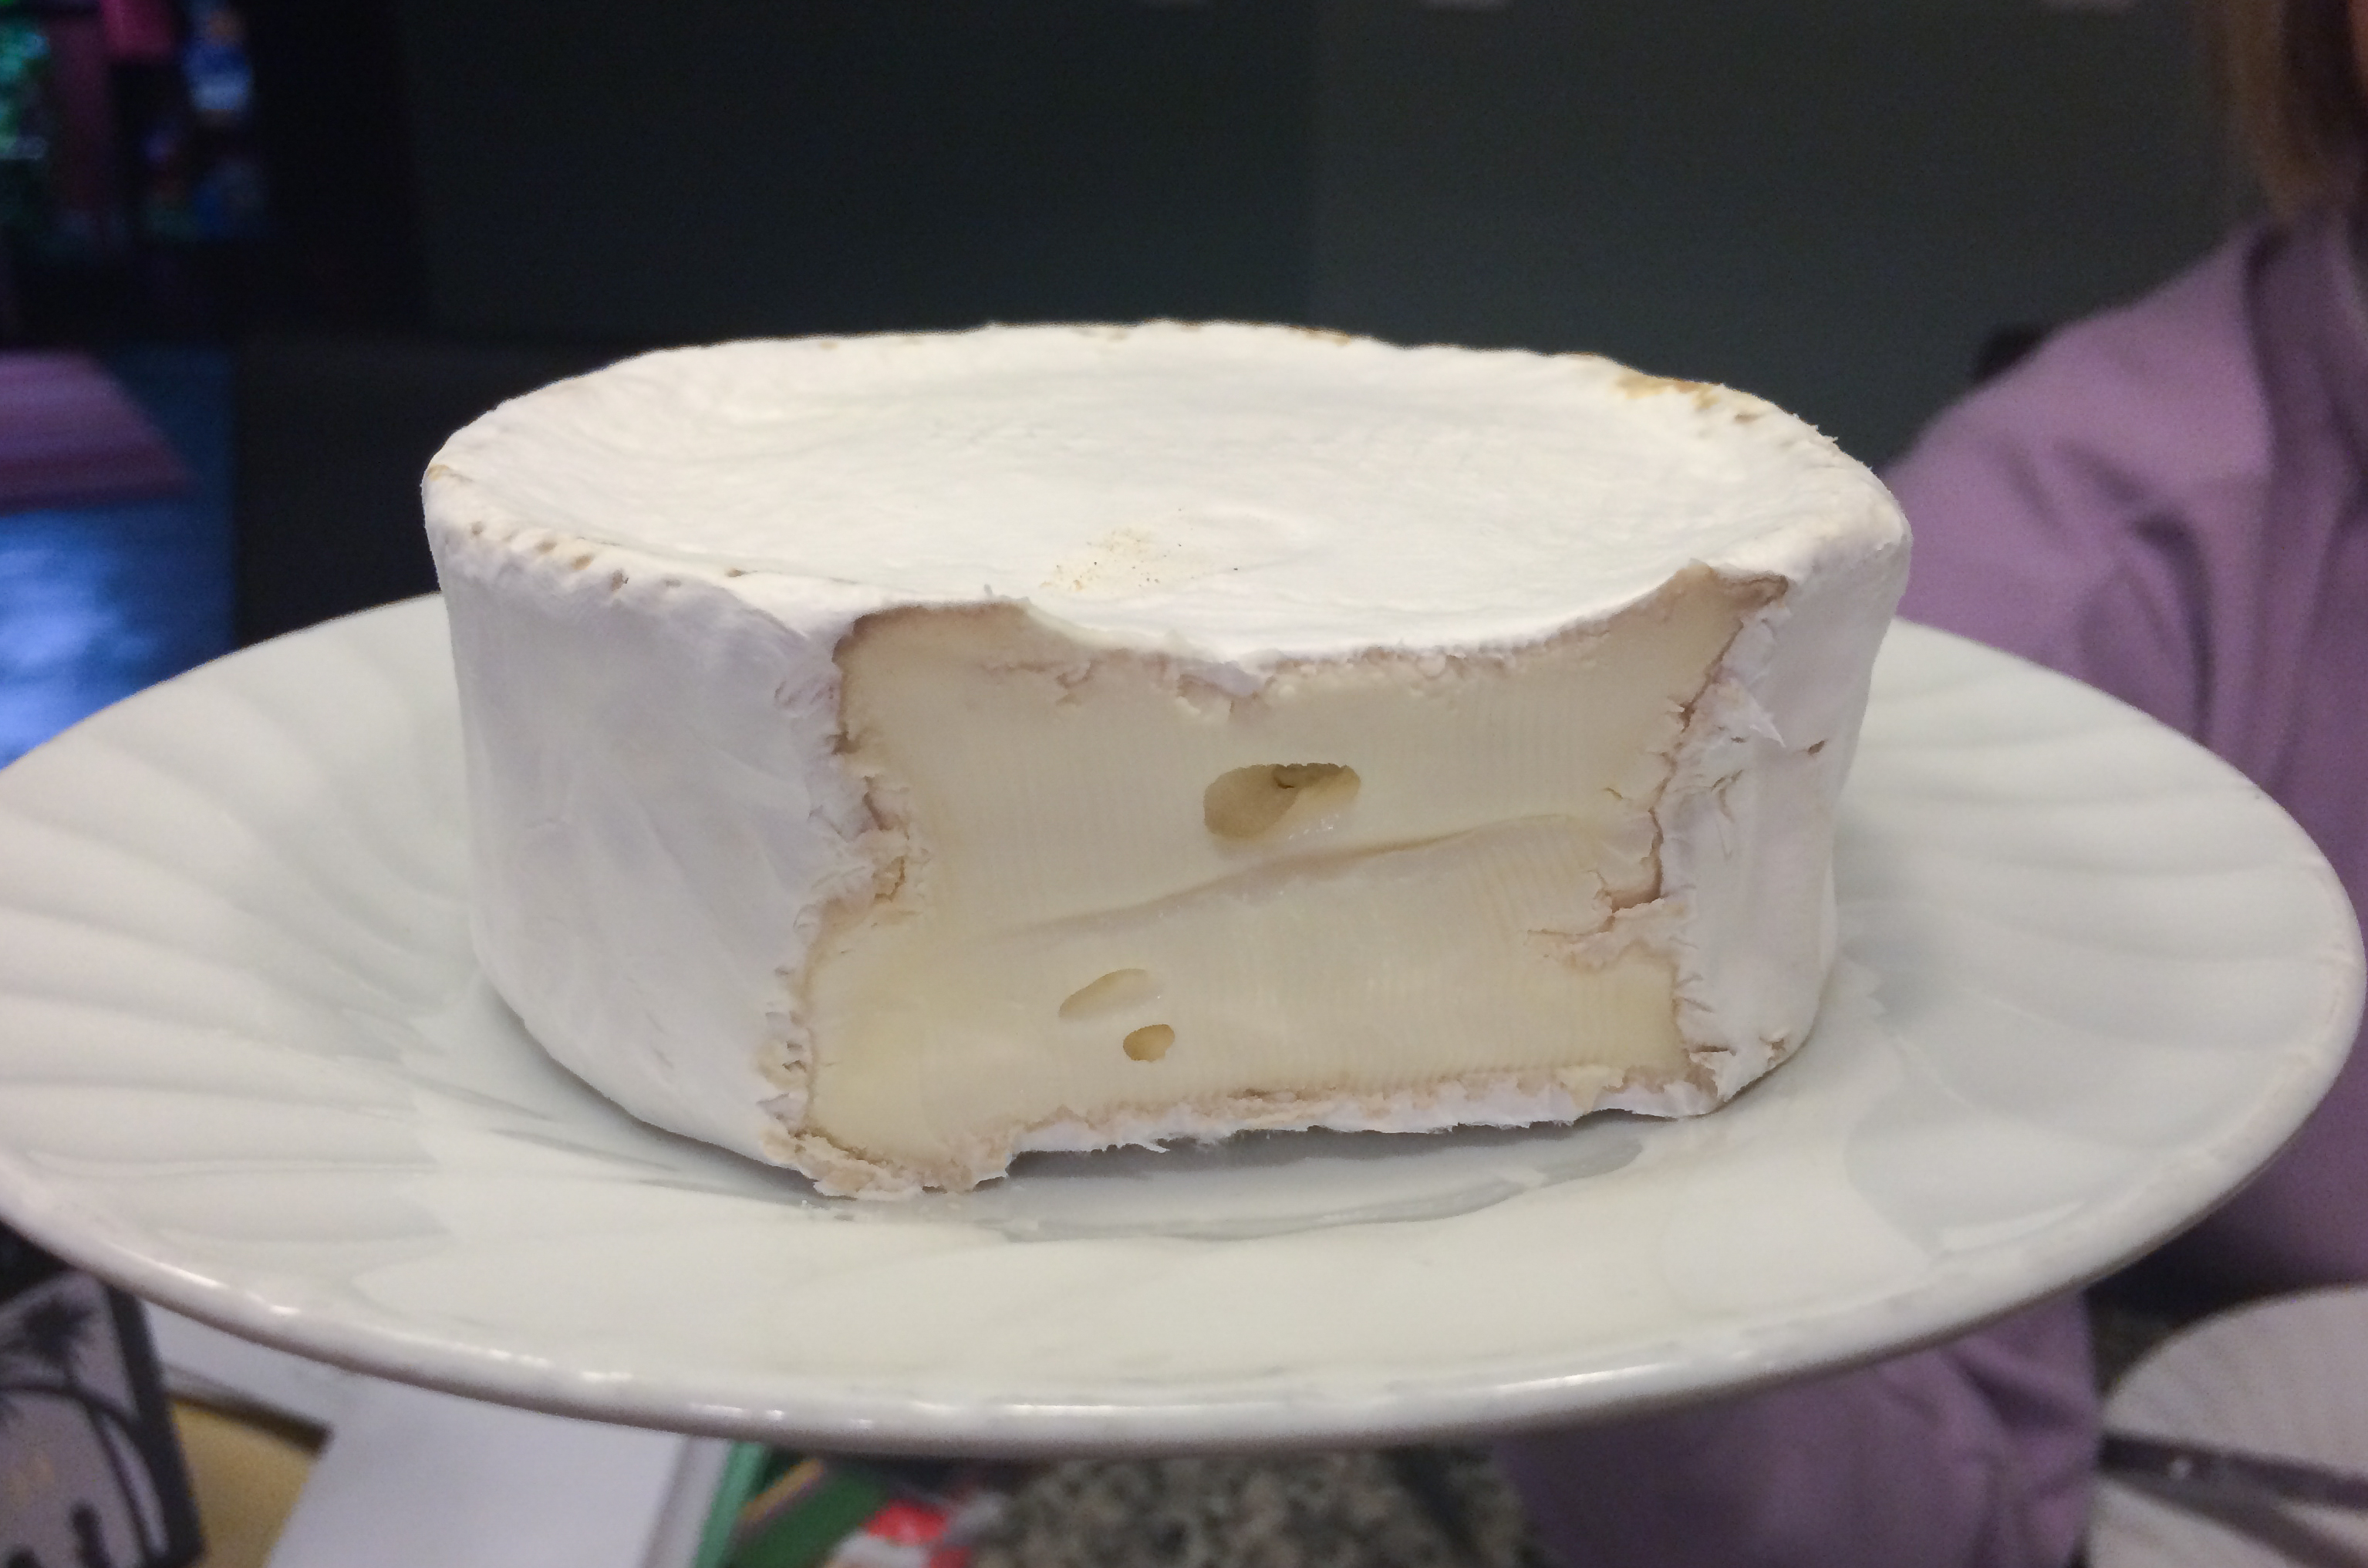 CamBlue (below) is basically a Camembert (above) with added cultures such as Flora danica.
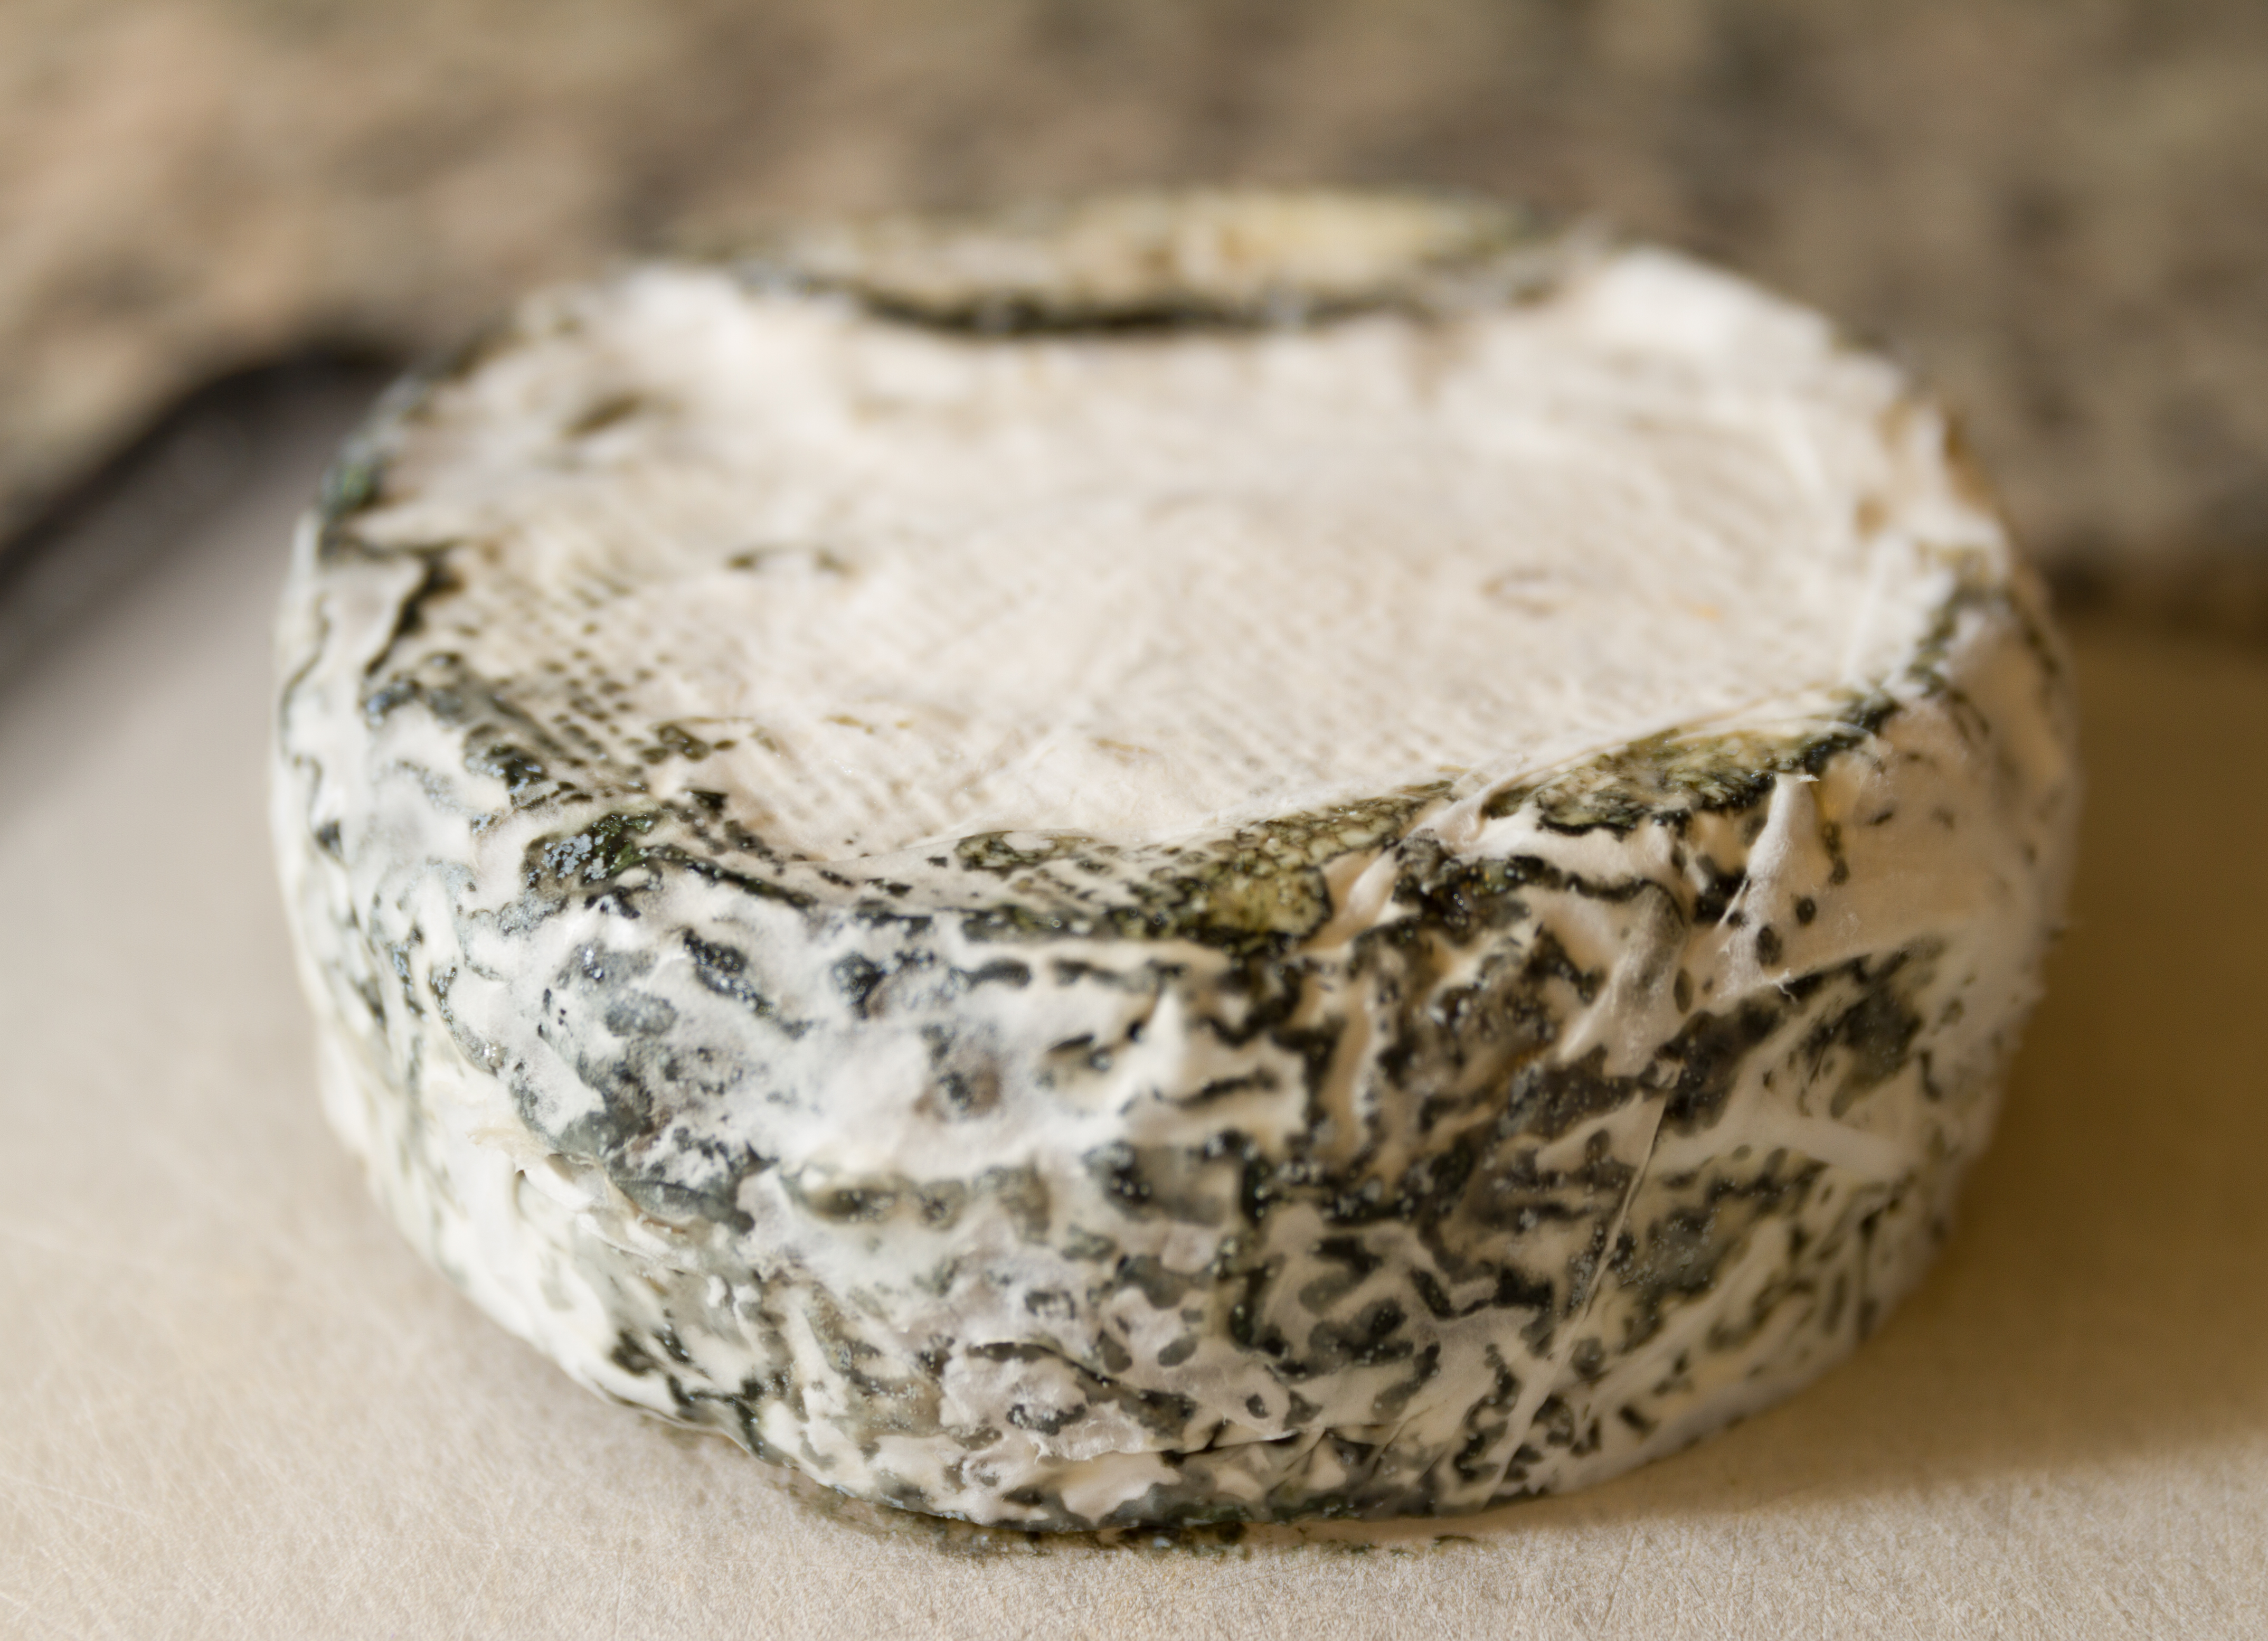
Ripening / aging:
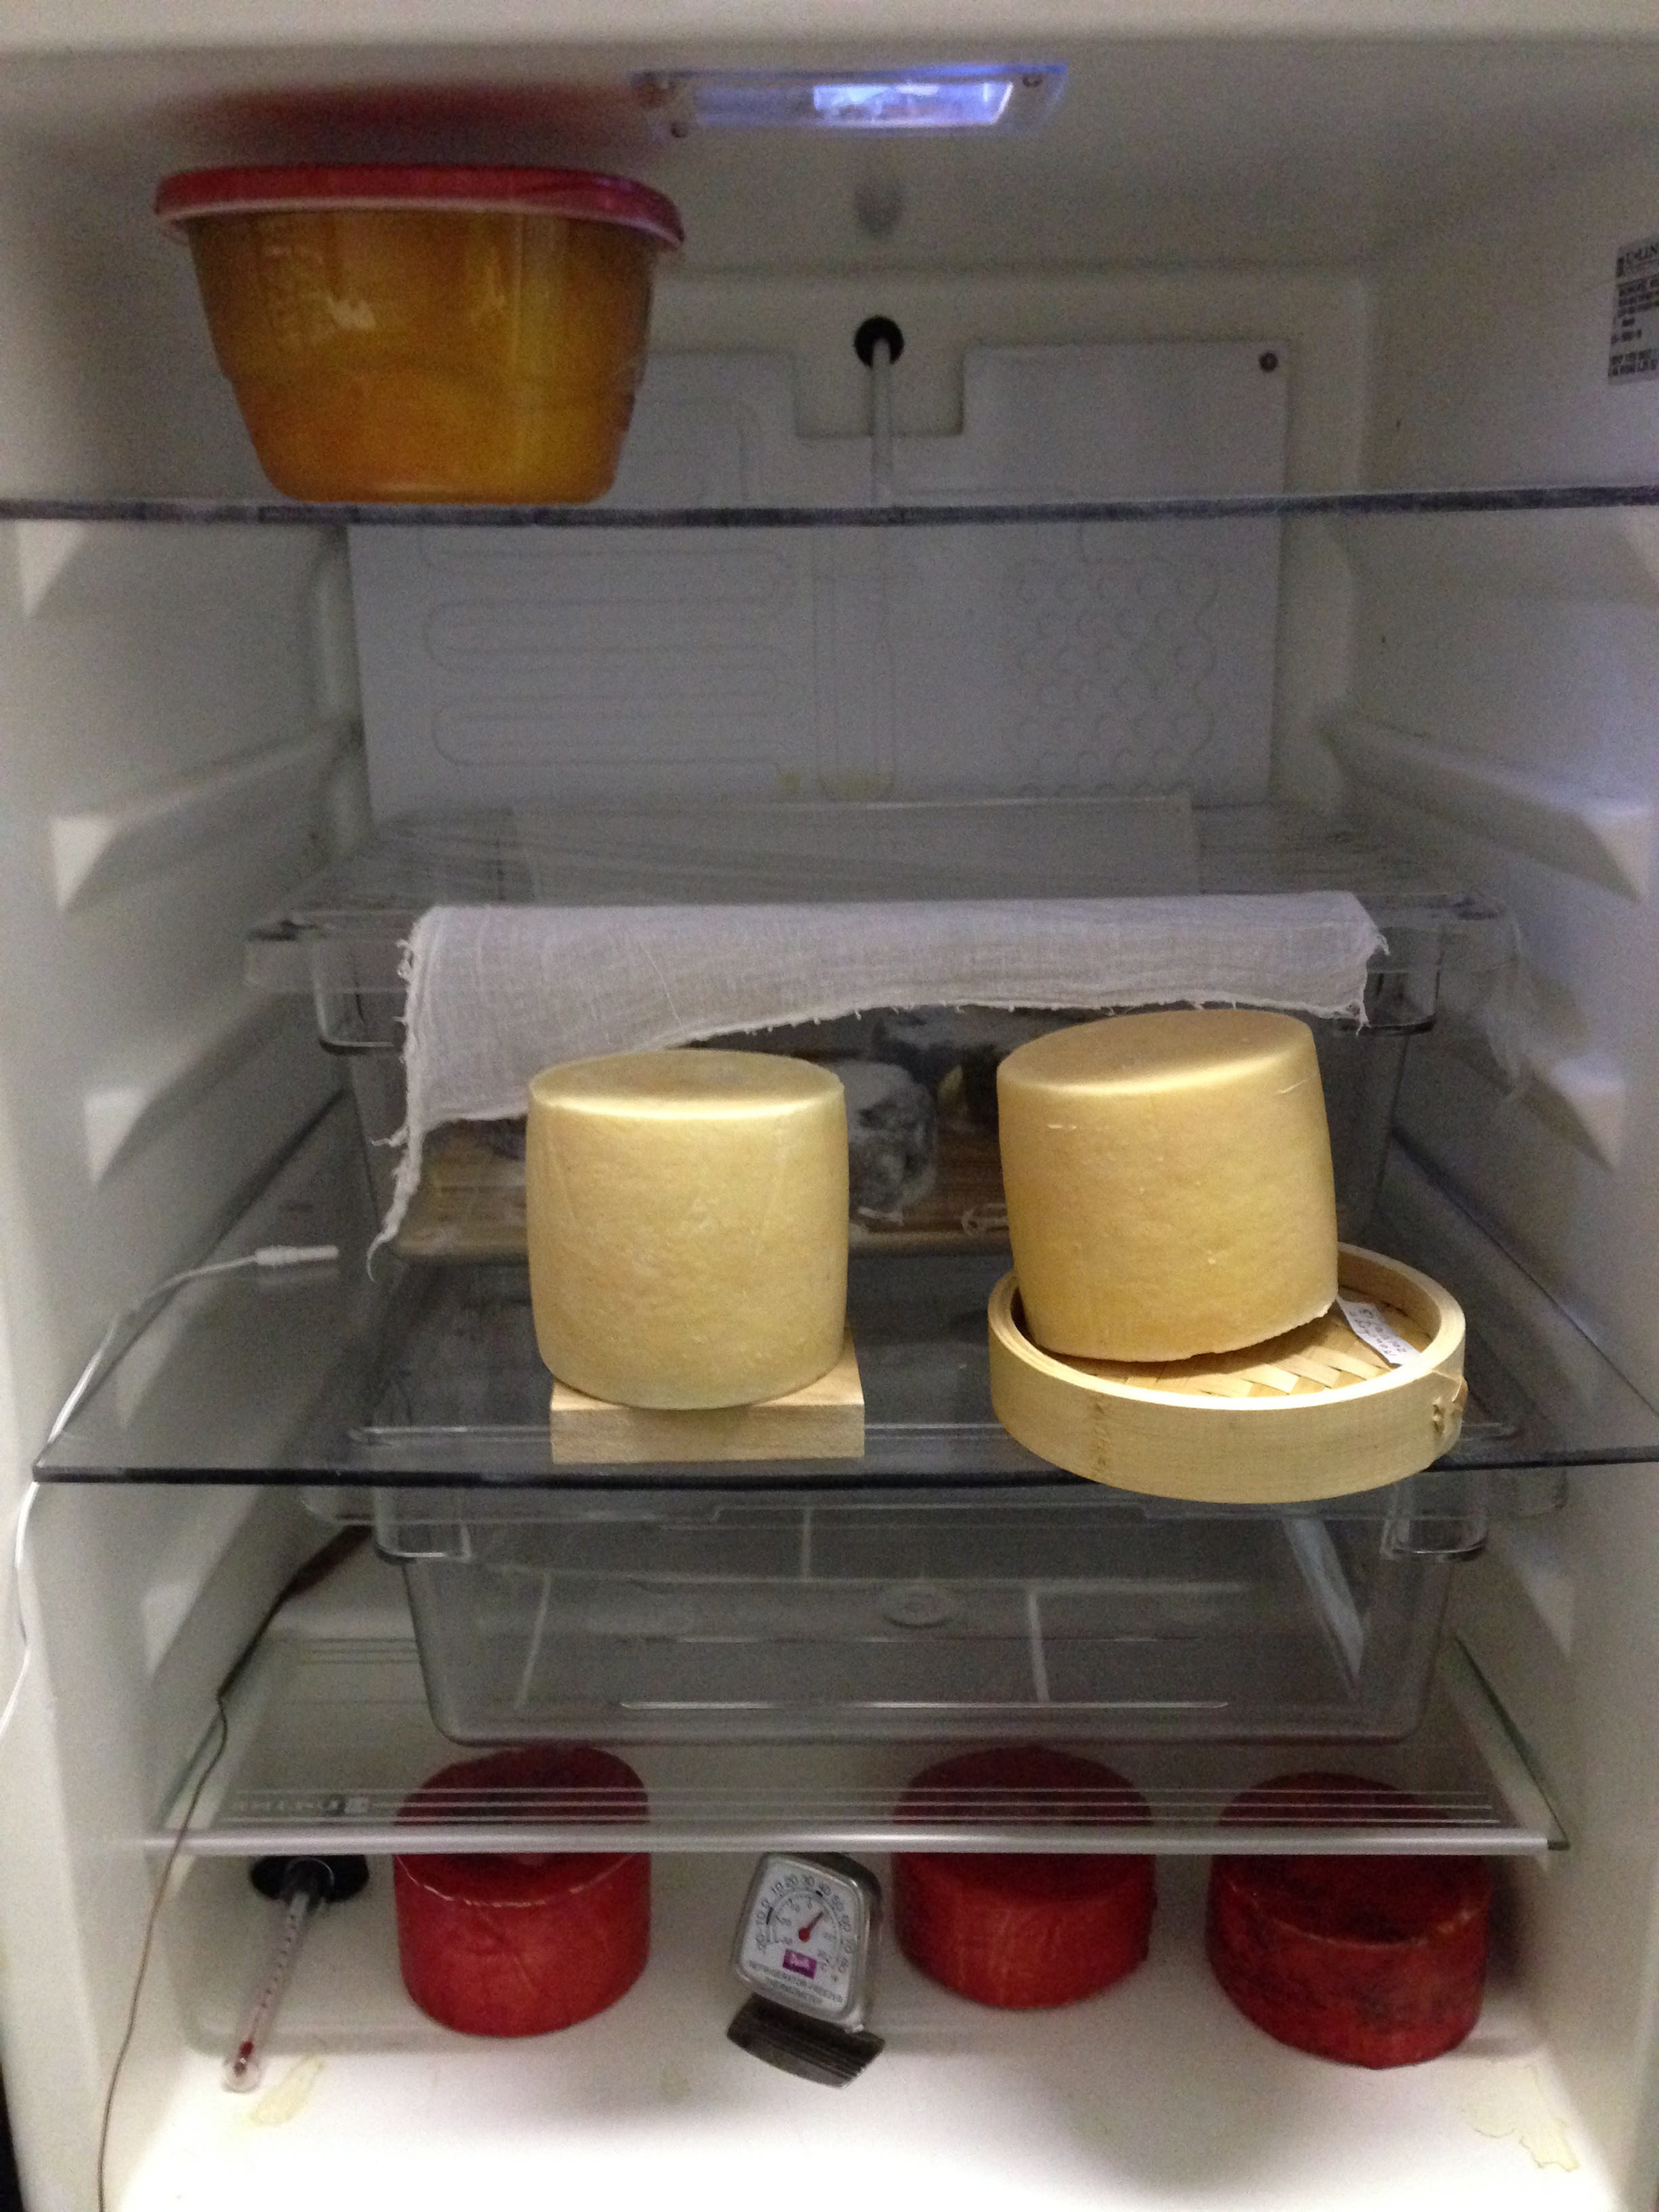
Heiko's adventure into cheese making coincided with our kitchen remodel, which freed up our small wine refridgerator. Its new purpose: Spallek's Cheese Cave!
The only disadvantage:
Different cheeses need slightly different temperatures to age. And since some cheese take months to develop, the cave is blocked. In the perfect world, we would like to have a cheese cave with different compartments, each of which can be temperature controlled... or more than one old wine fridge to spare!
Semi-hard and Hard Cheese
Their making requires patience as some have to ripe or age over months.
Heiko tried quite a few - the Taleggio and Manchego are our family favorites!
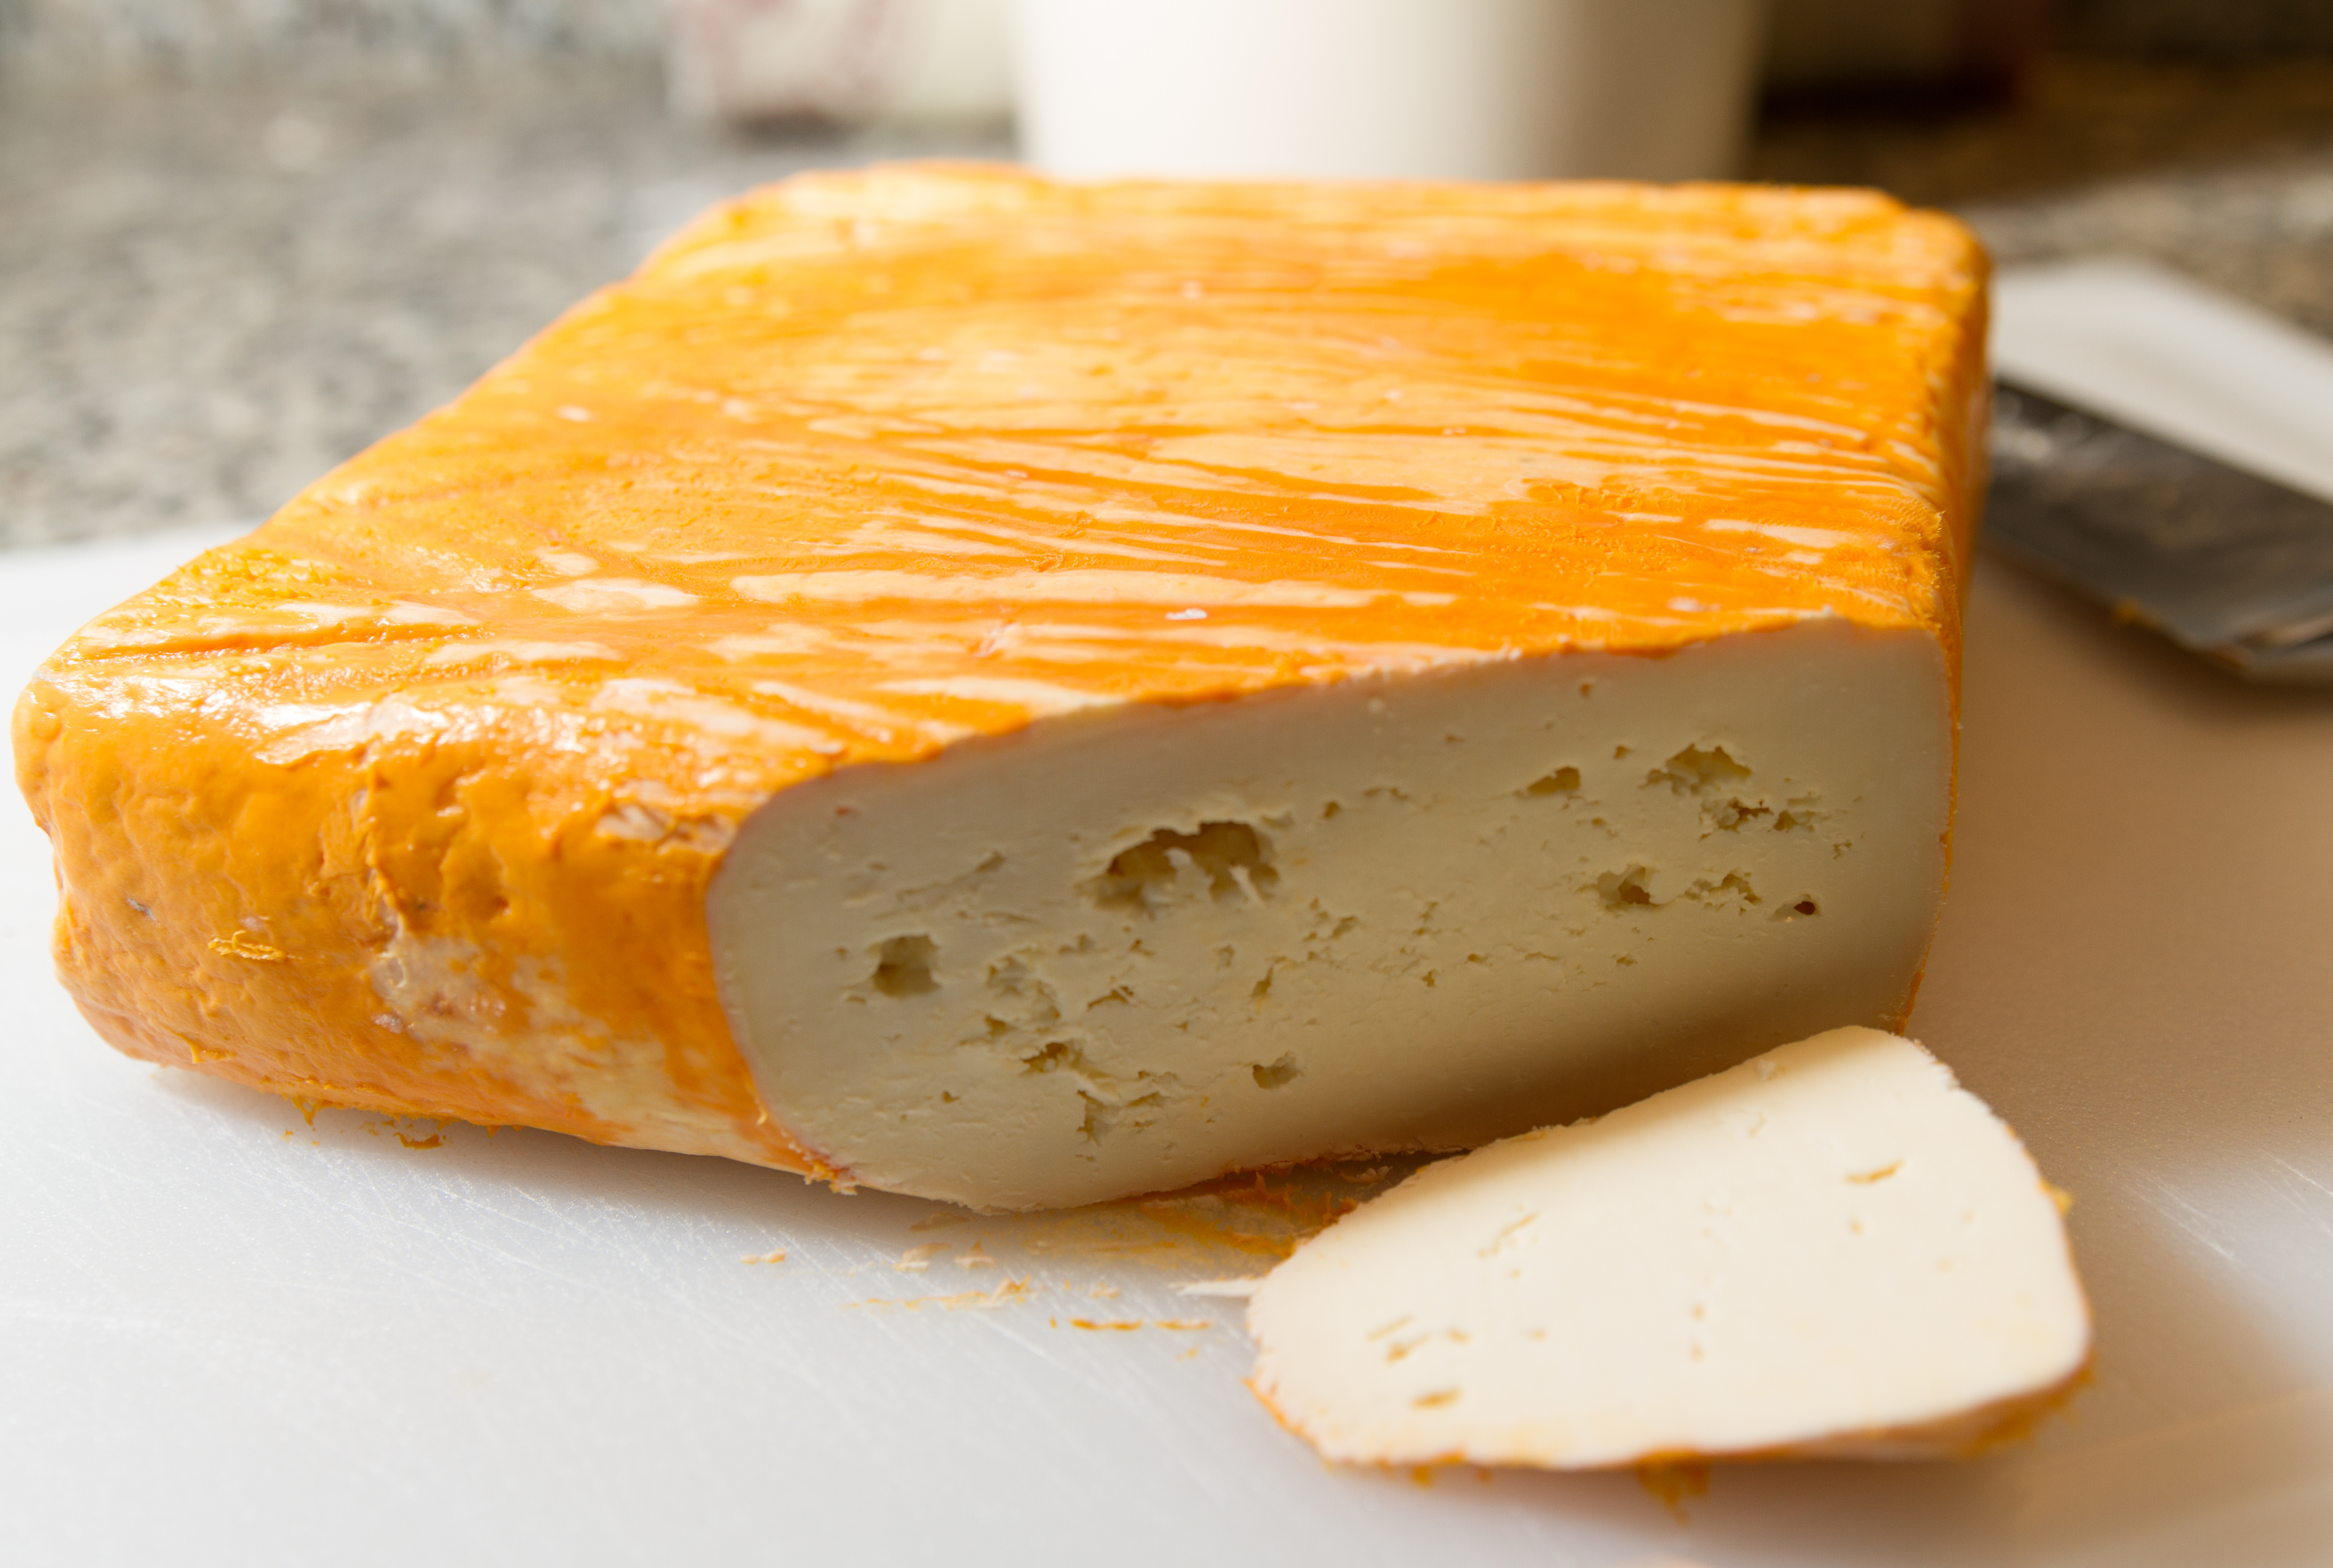 Taleggio
 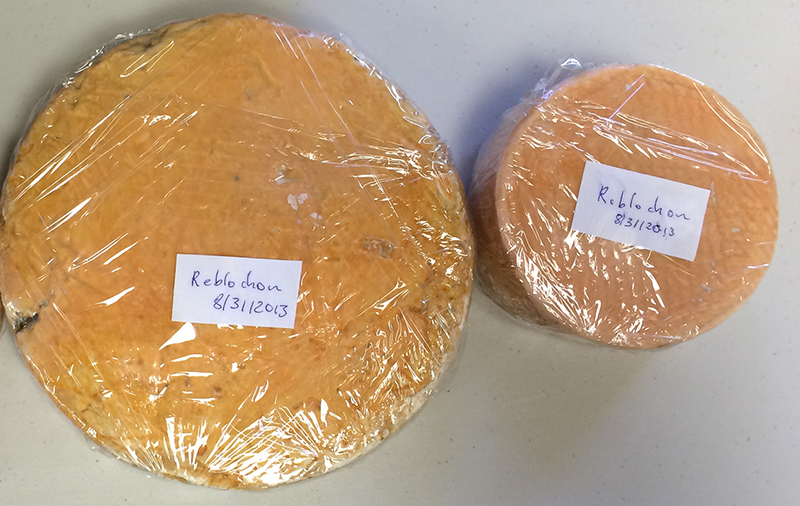 Reblochon
 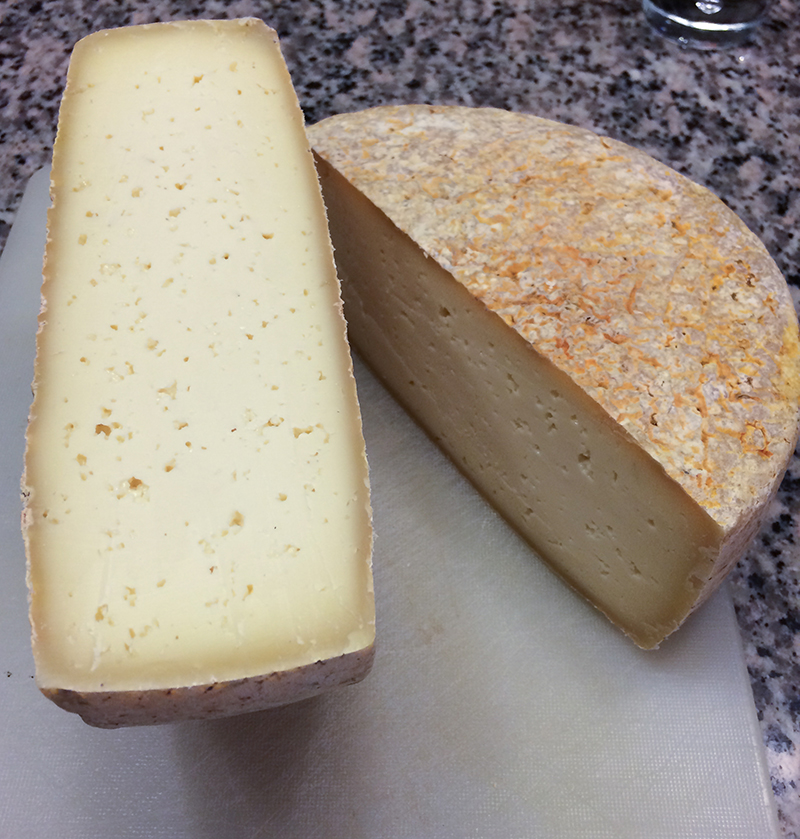 Baby Swiss
 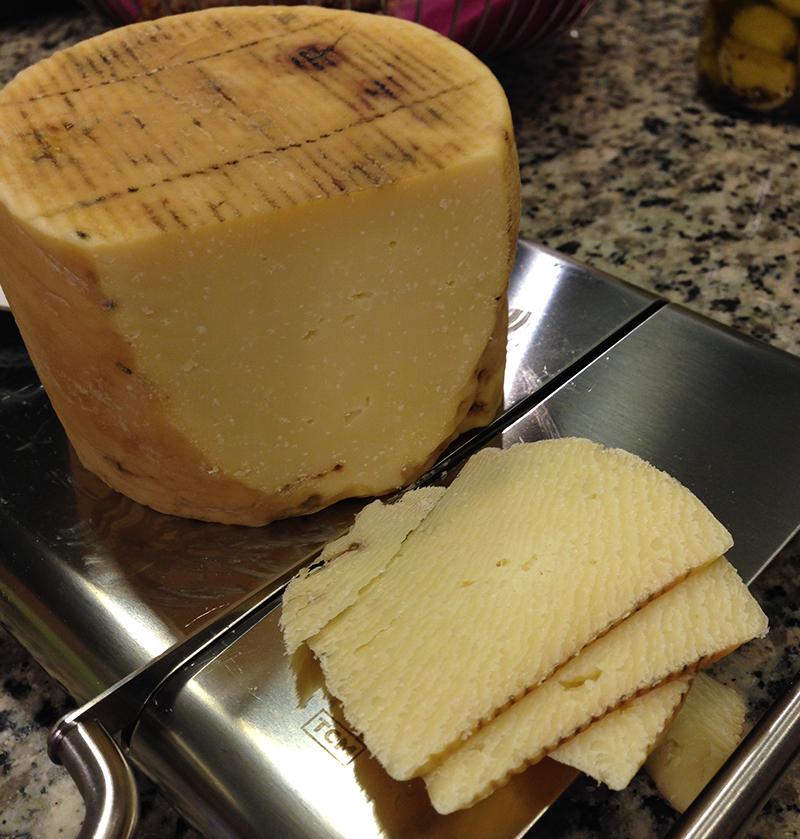 Manchego
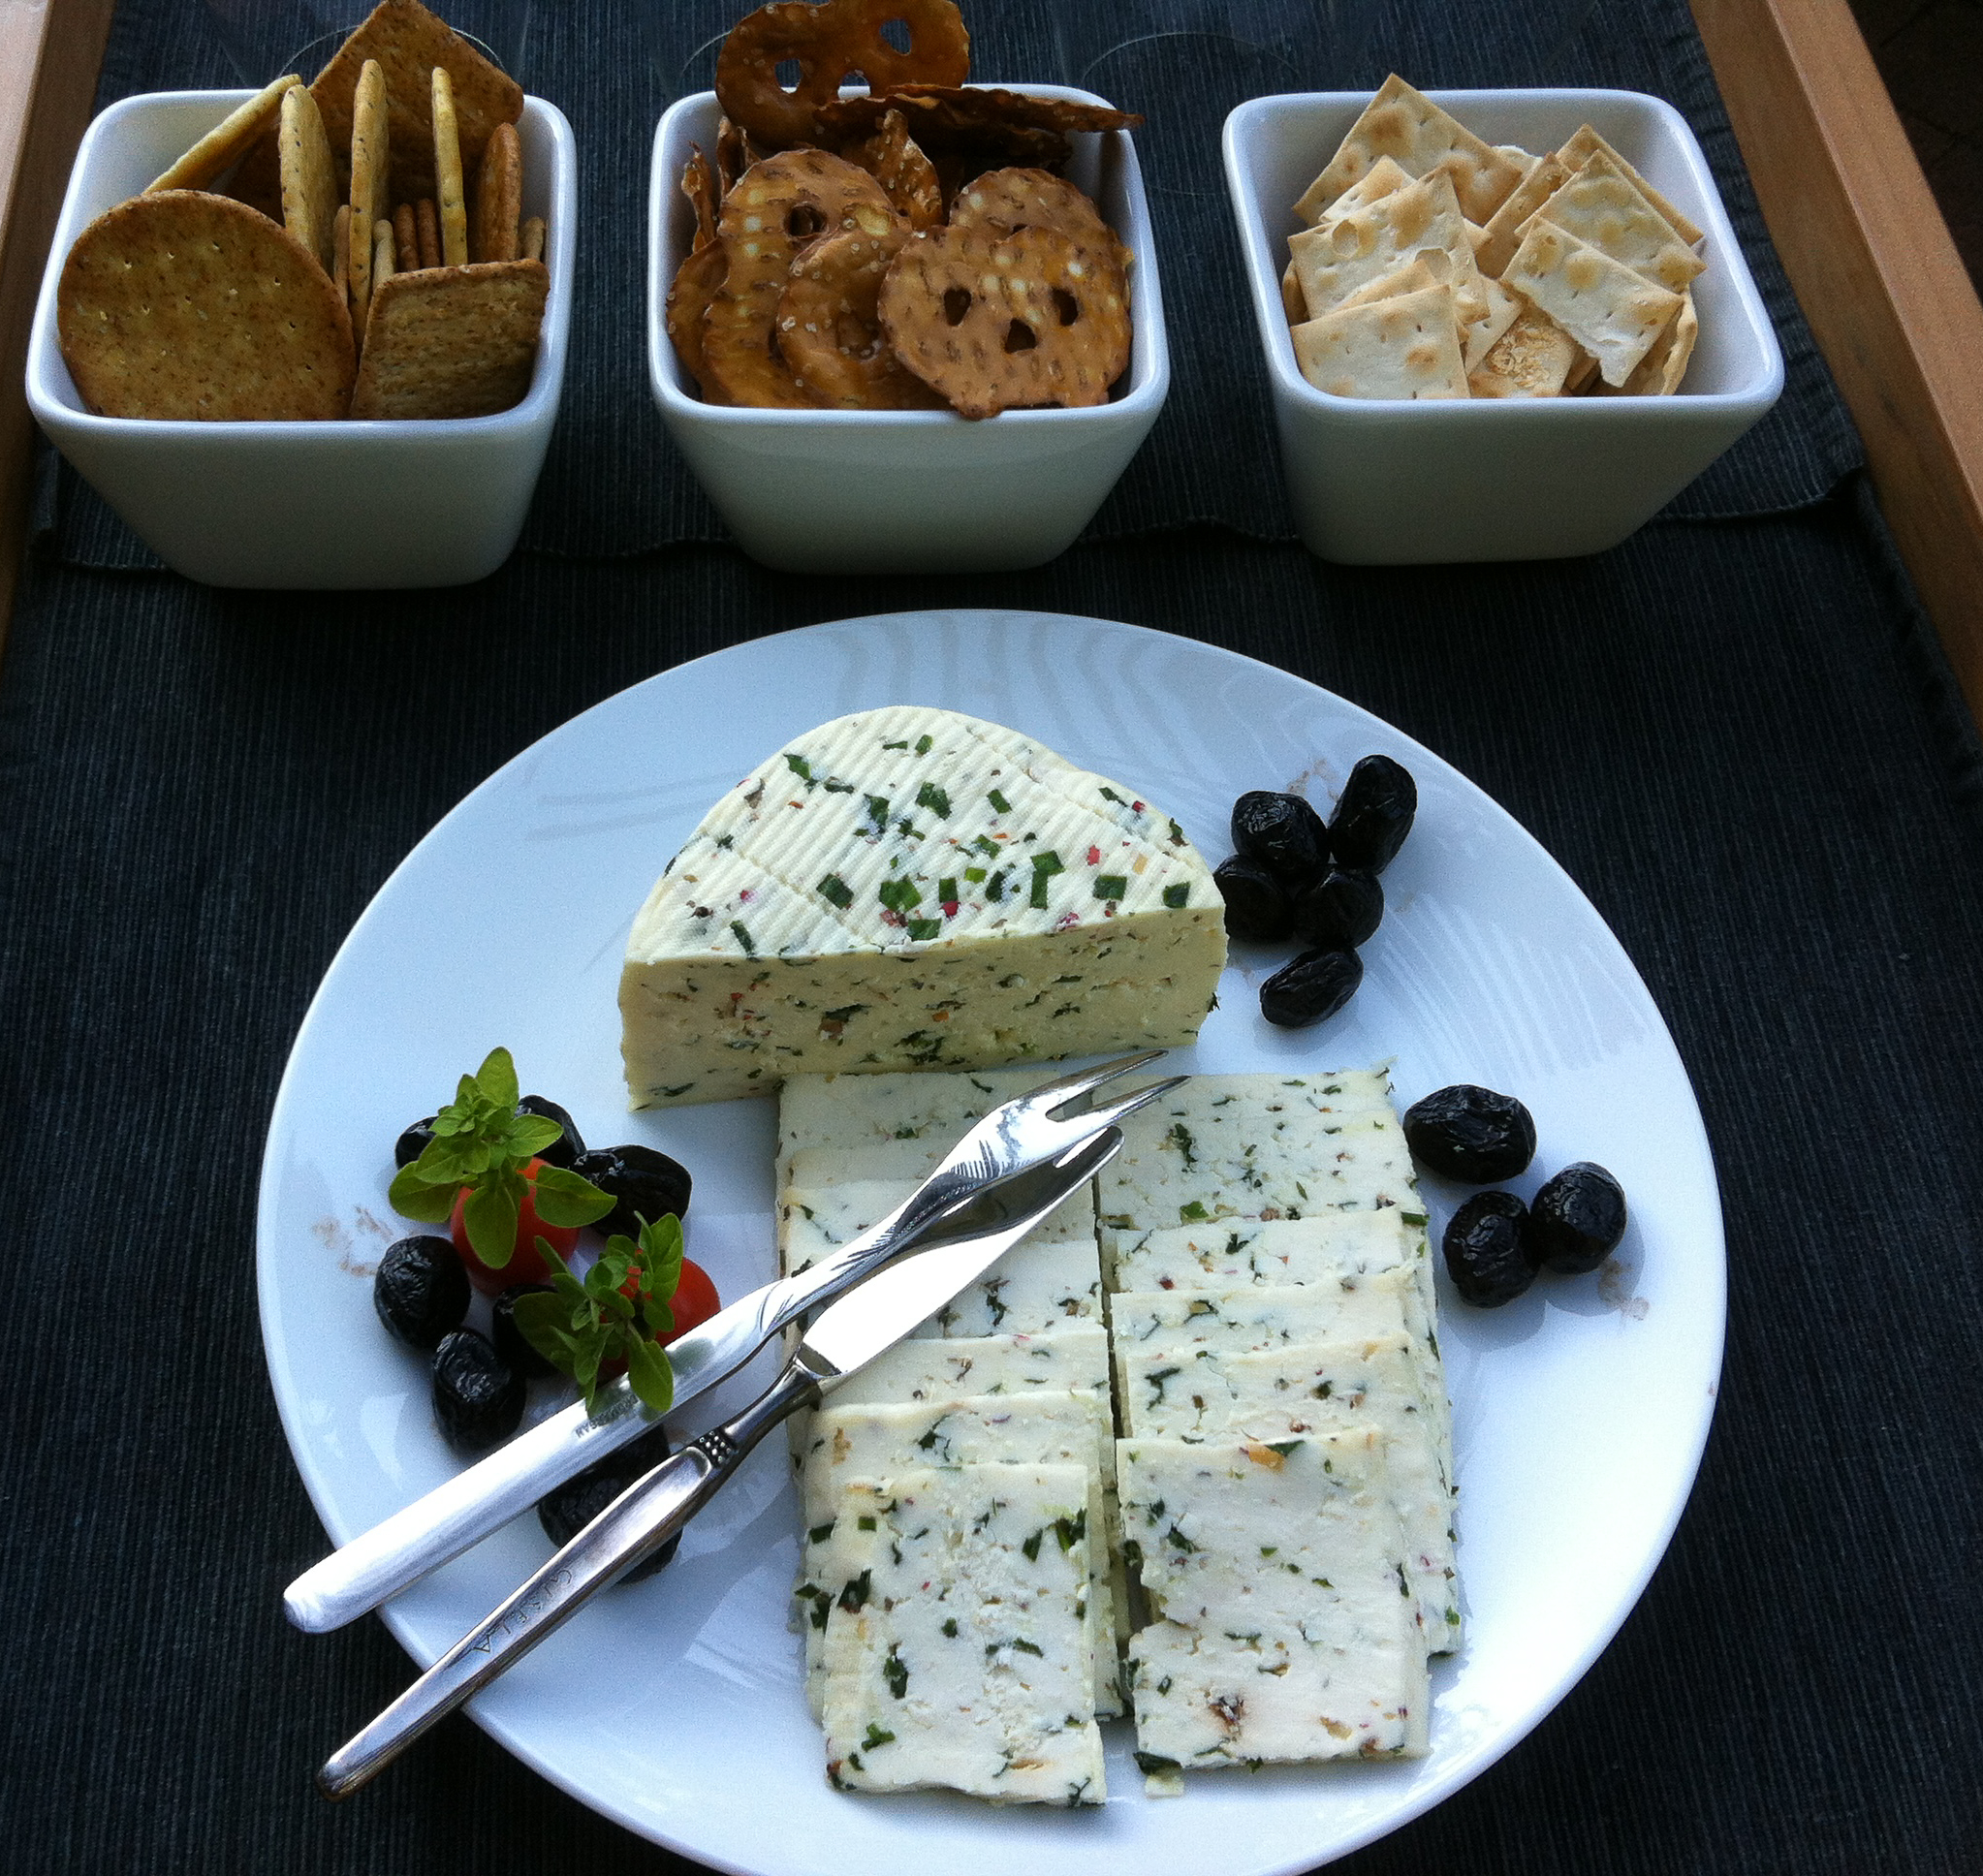
Please let us know if are interested in more details!
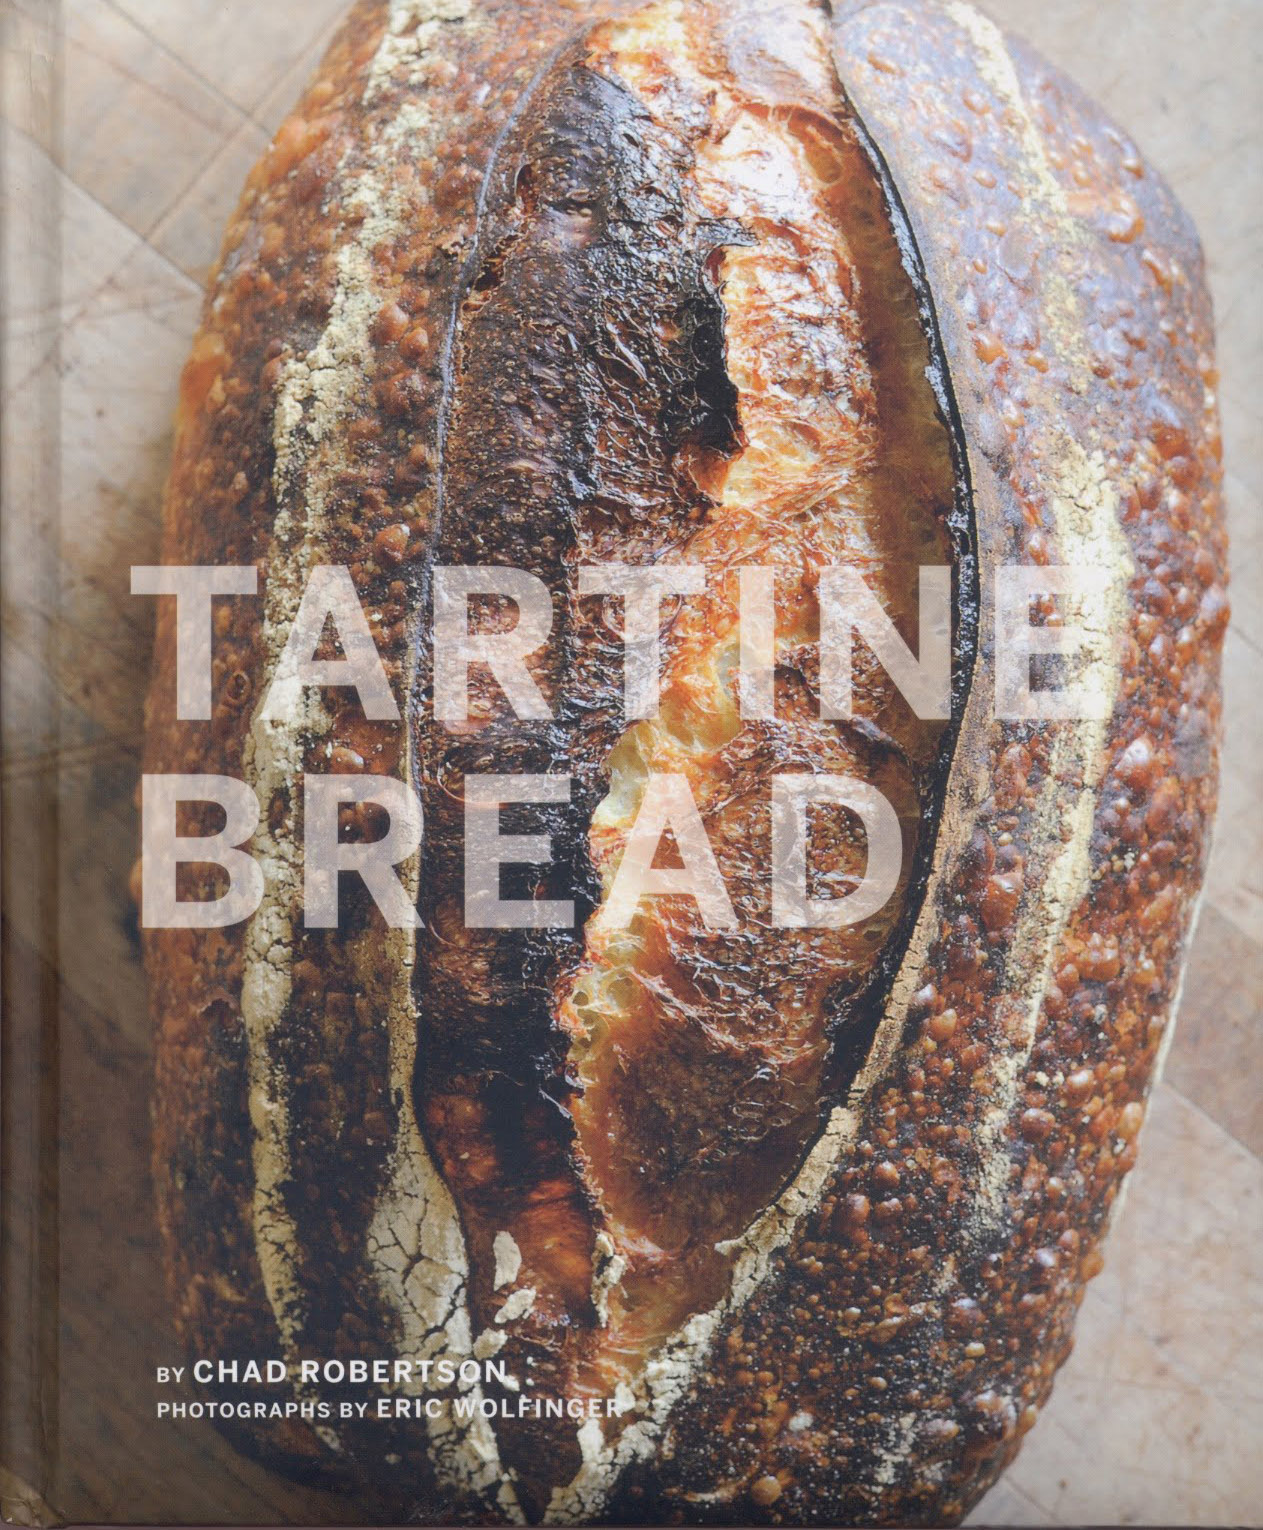 Cover of Chad Robertson's famous Tartine Bread book.
The "bad bread" in America may be the one item Germans most complain about when living in the US.
But since we believe that complaining alone doesn't better the circumstances, we tried to do something about it. And tried, and tried and tried some more... without much success.
Heiko's early sourdough bread was flat, dense, clumpy and had no crust. We were polite about it and ate it. But to be honest, it did not taste like "German baker's bread" (and did not look like it either).
Then, Heiko found this book, and everything changed.
Tartine Bread
by Chad Robertson (Author), Eric Wolfinger (Photographer)
For the home or professional bread-maker, this is THE book! It comes from a man who many consider to be the best bread baker in the United States: Chad Robertson, co-owner of Tartine Bakery in San Francisco, a city that knows its bread. To Chad, bread is the foundation of a meal, the center of daily life, and each loaf tells the story of the baker who shaped it. He developed his unique bread over two decades of apprenticeship with the finest artisan bakers in France and the United States, as well as experimentation in his own ovens.
Best of all: His recipes and the whole process are very elemental.
There is no need for big or expensive equipment. There's no kneading the dough for hours, just carefully folding it once in a while. Since Heiko follows Chad's recipes, we have (almost) retired our professional grade Kitchen Aid.
Don't get me wrong: Bread baking is still a quite time consuming process.
But now, a satisfactory outcome is guaranteed:
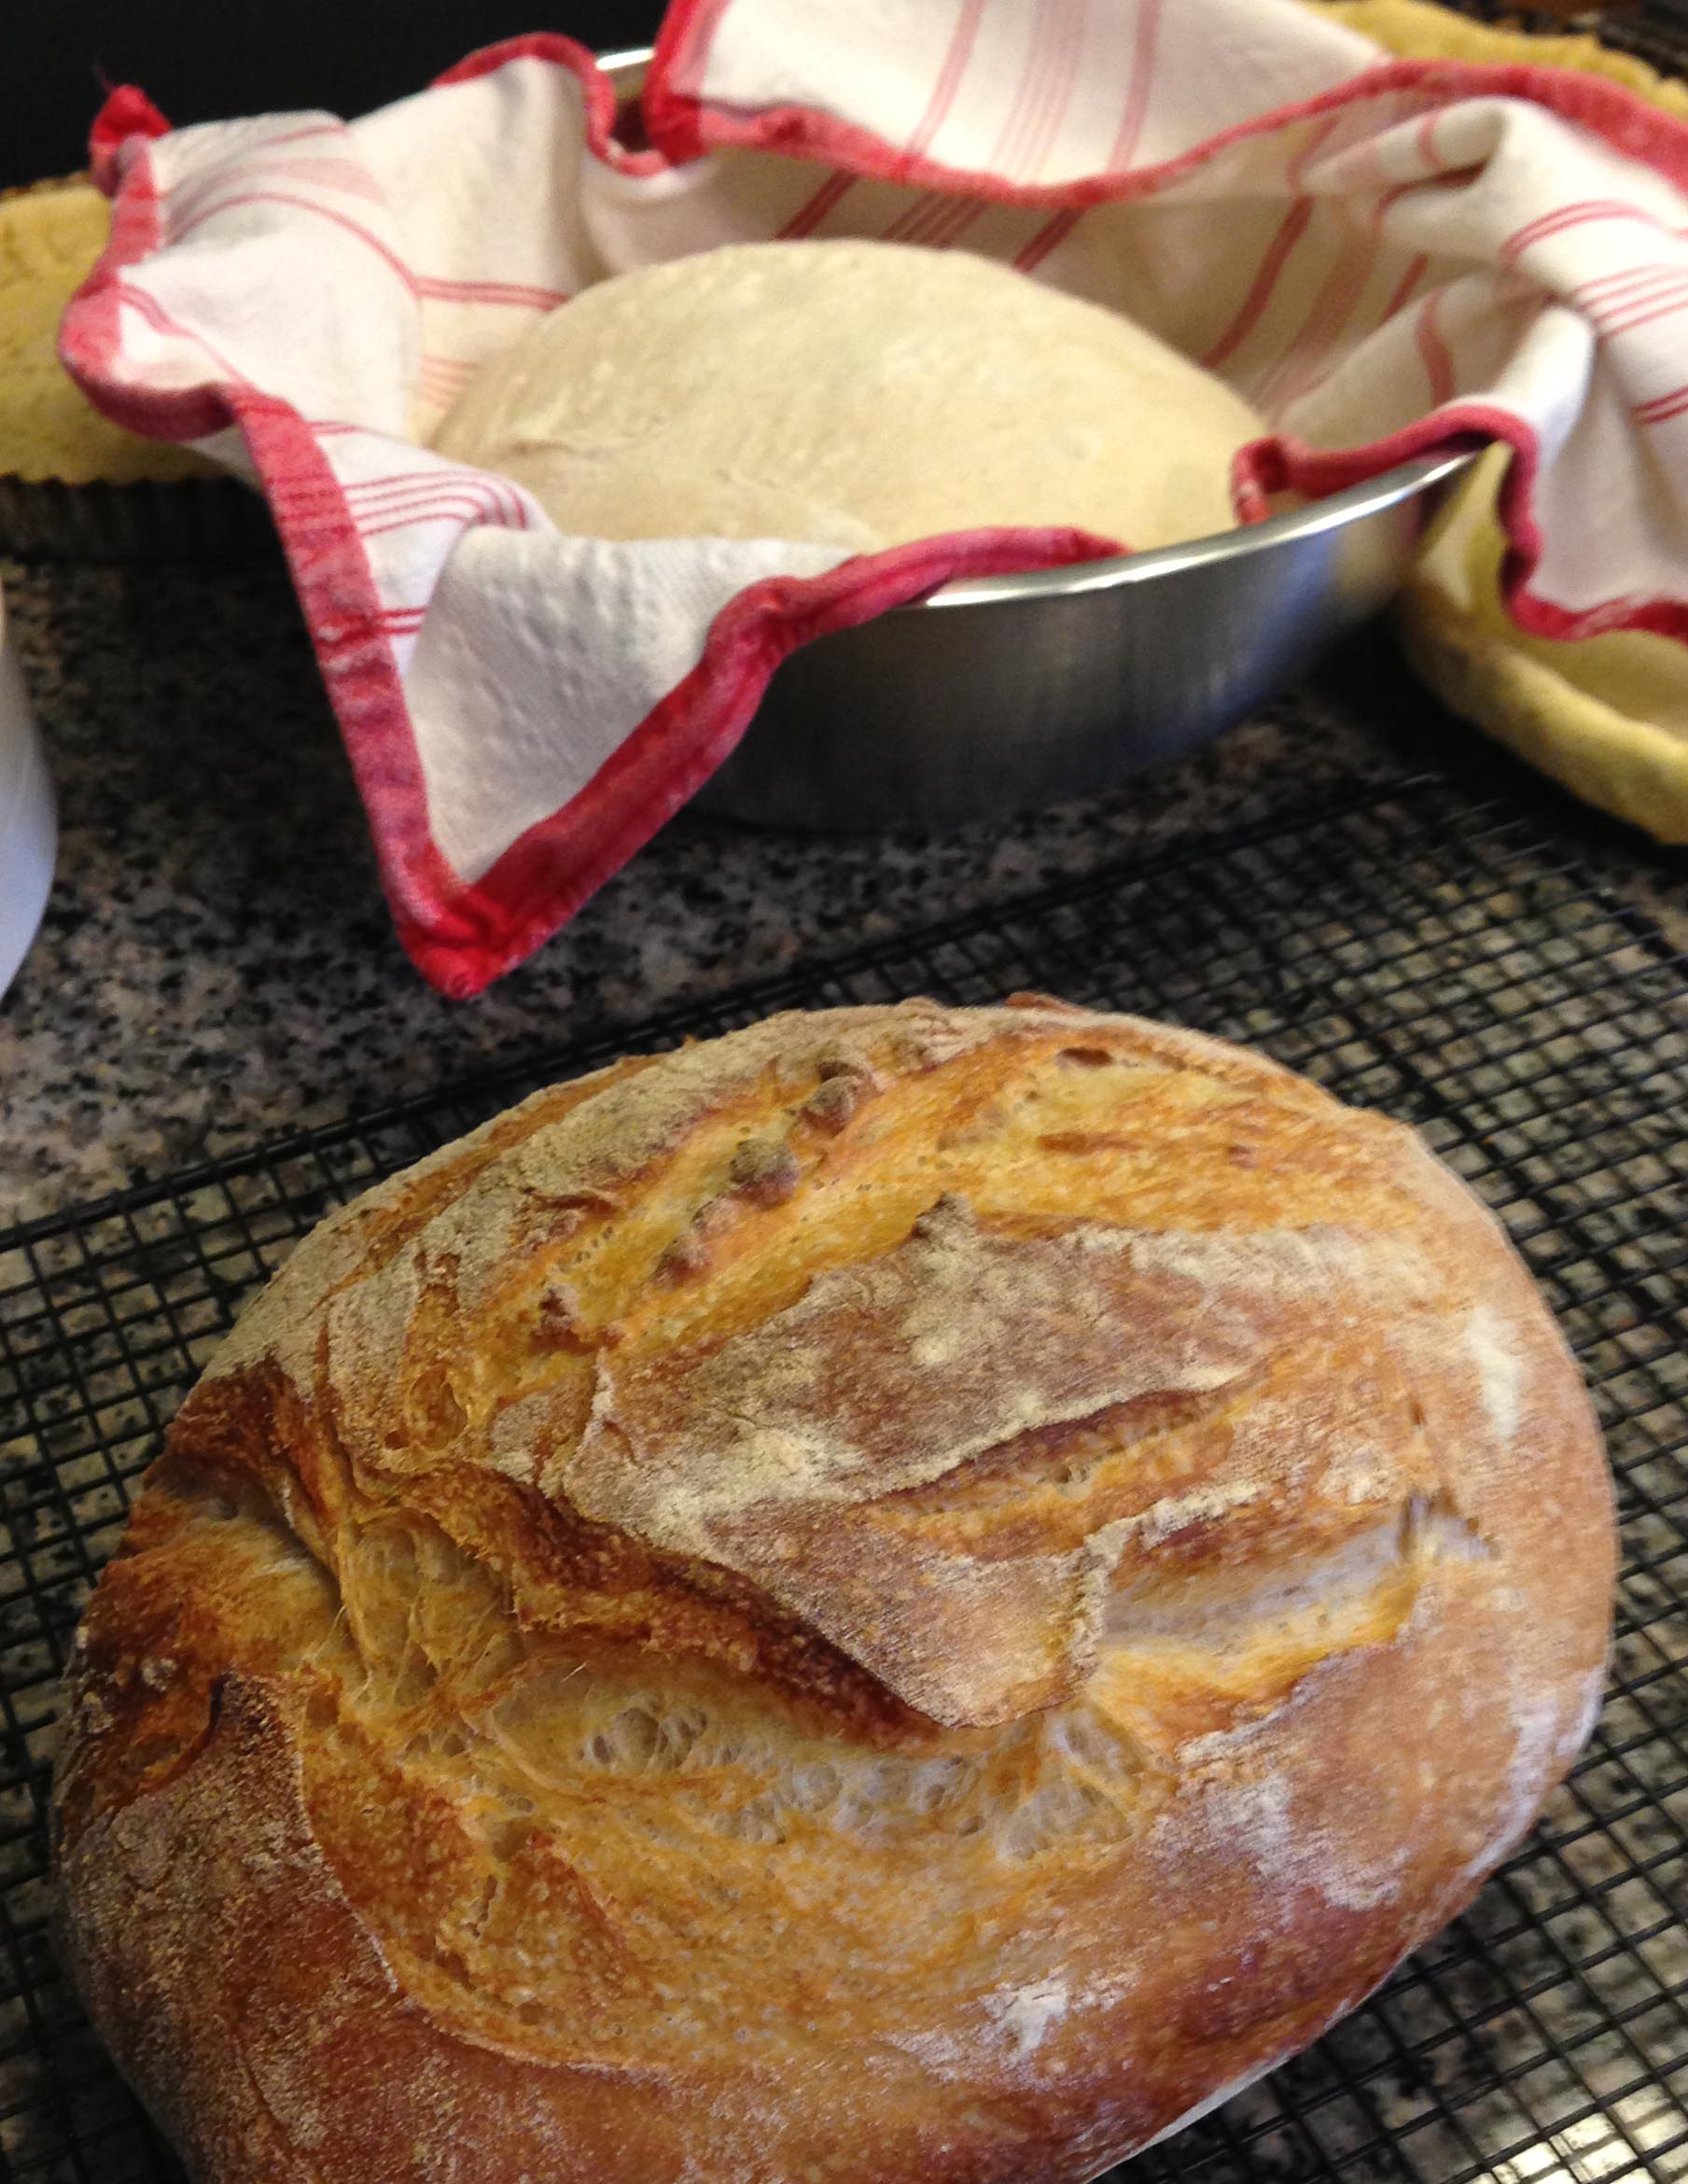 Left: From rising to baking. Right: Deep crust developing in steam filled dutch oven-
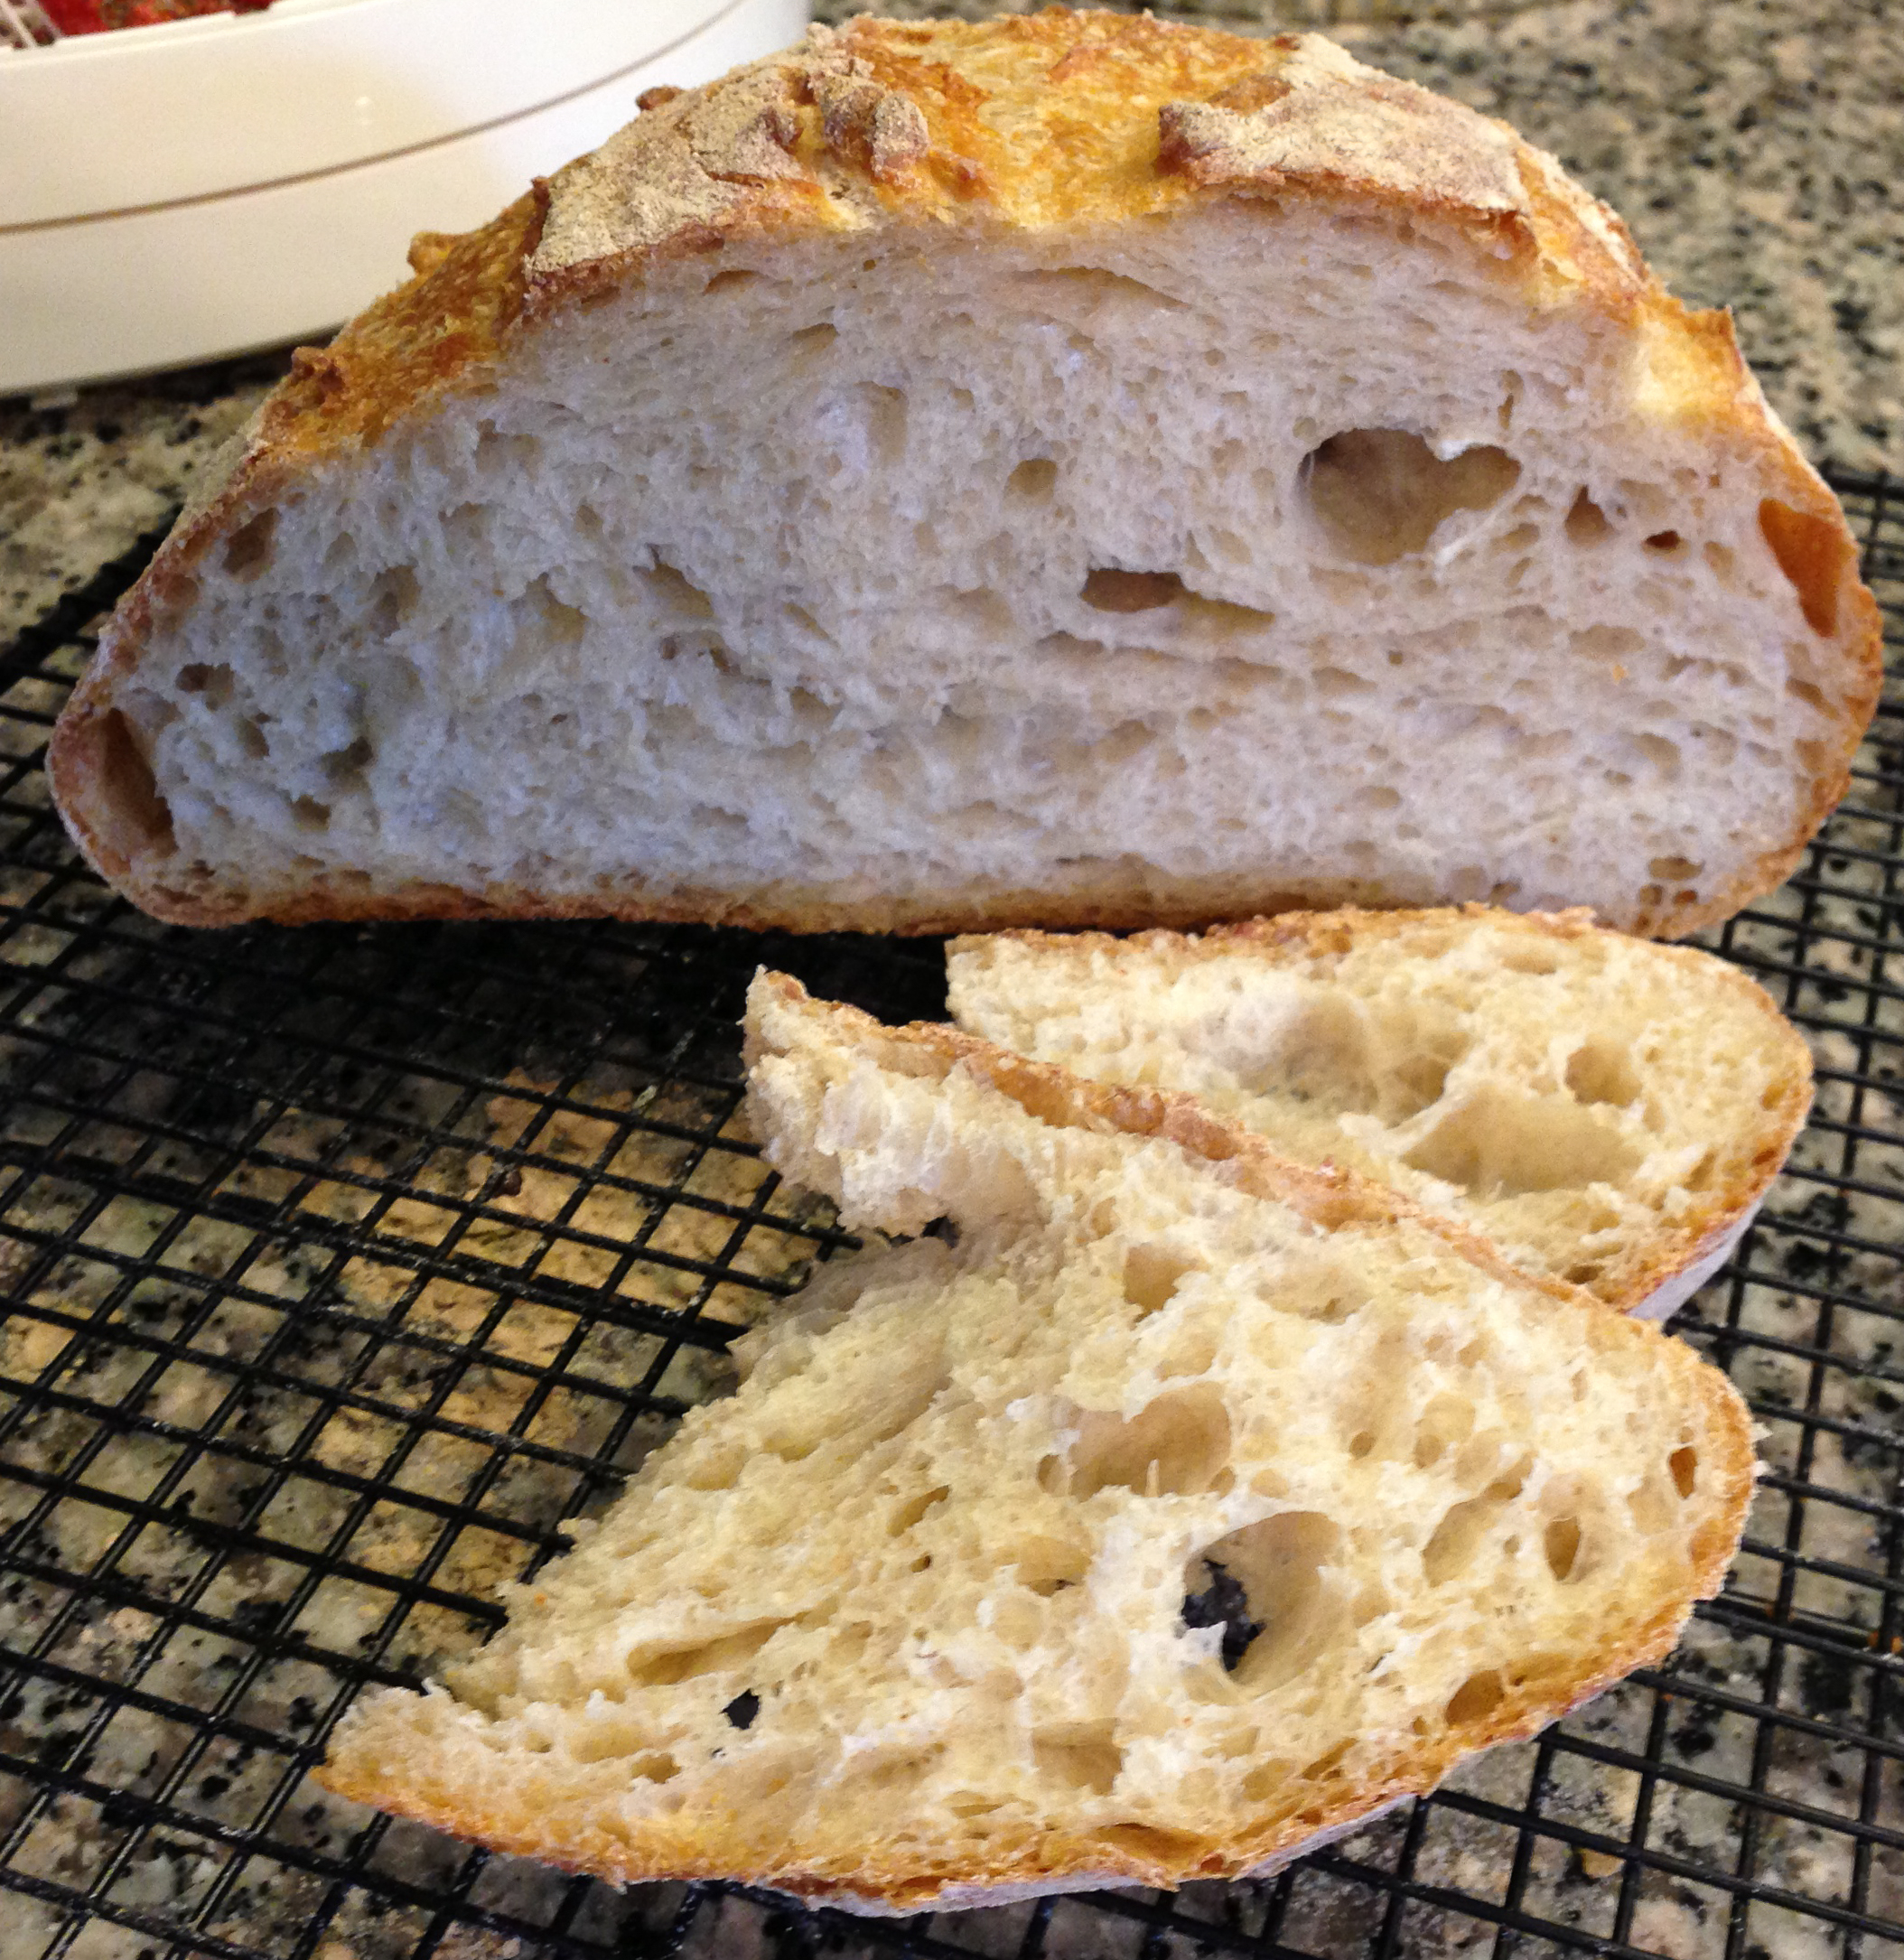
A perfect loaf of bread: Soft and airy in the inside, with a beautiful crunchy crust.
When it's baking day, we can't wait until the first fresh loaf comes out of the oven, and a thick, still warm slice of bread becomes the center of our next meal.
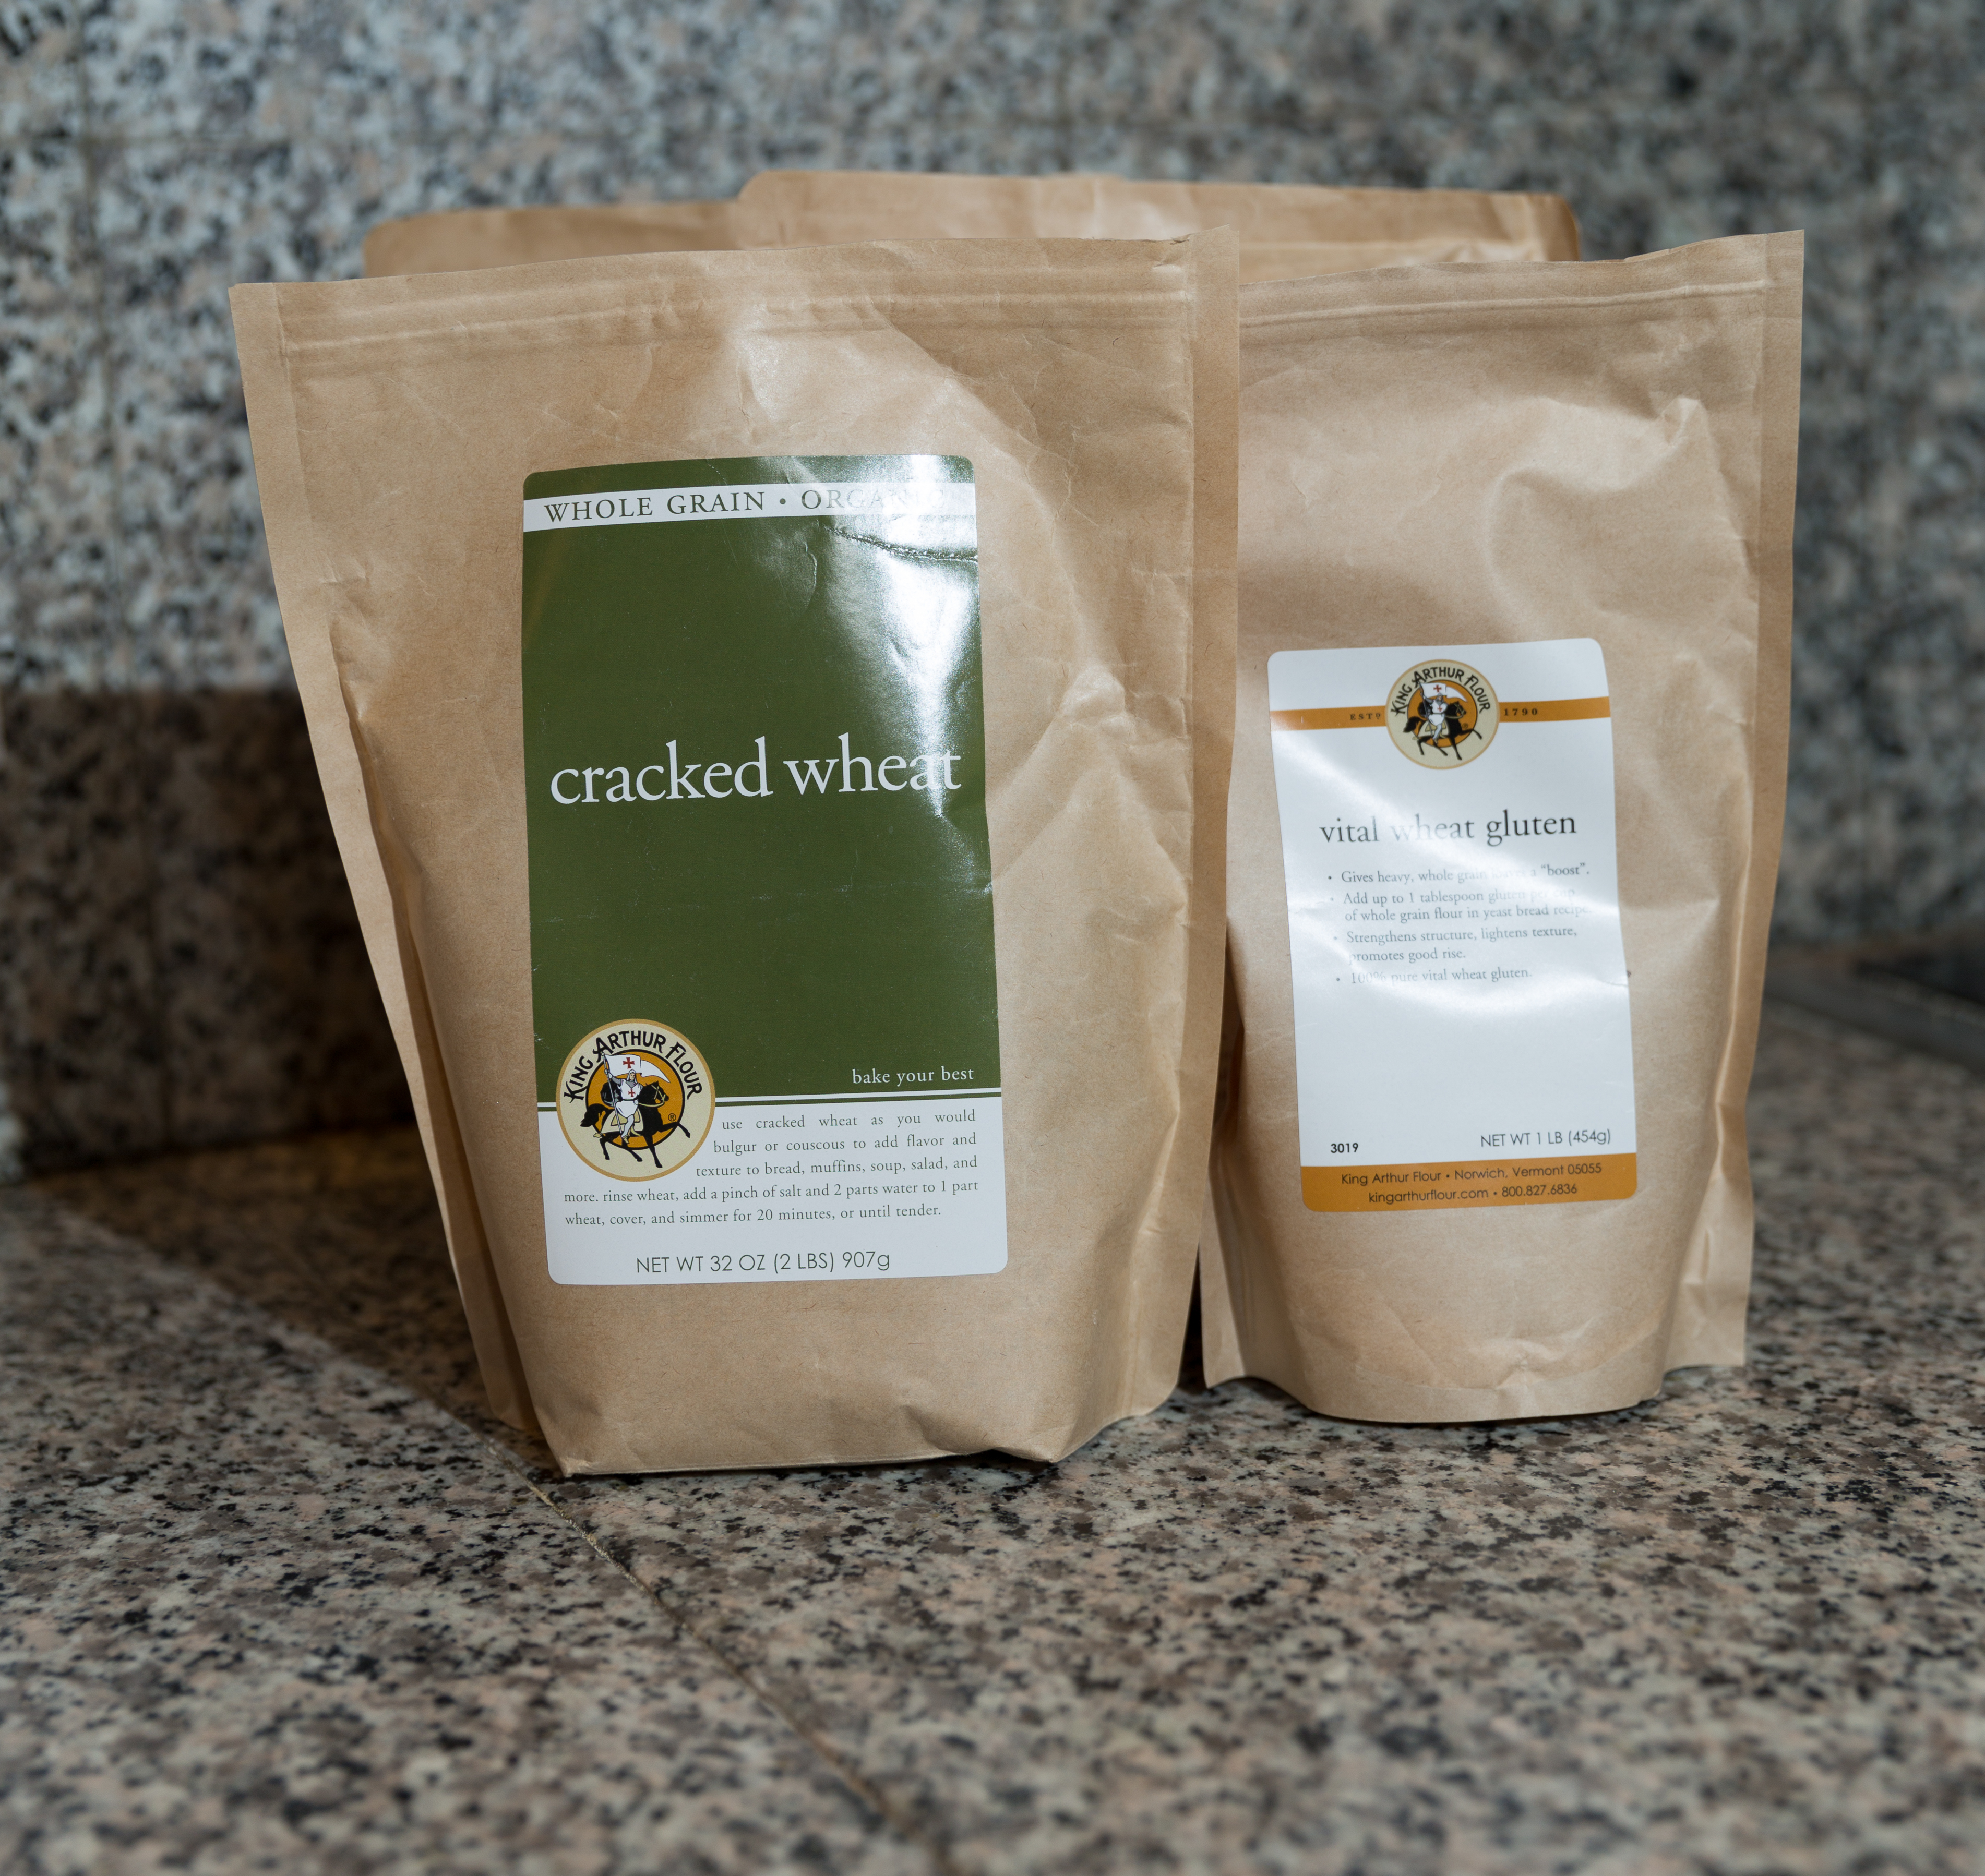 Cracked wheat and vital wheat gluten provide texture to the dough
Since "Tartine Bread" is much more than a "cook book" and one recipe – beautifully illustrated with pictures and side stories – easily spreads over 40+ pages,
Heiko recorded a video to show how simple the process really is:
We use King Arthur's Flour, basic staples such as Unbleached All-Purpose Flour and Rye or Whole Wheat Flour are available at the supermarket. Other products such as Cracked Wheat
or Gluten can be ordered online.
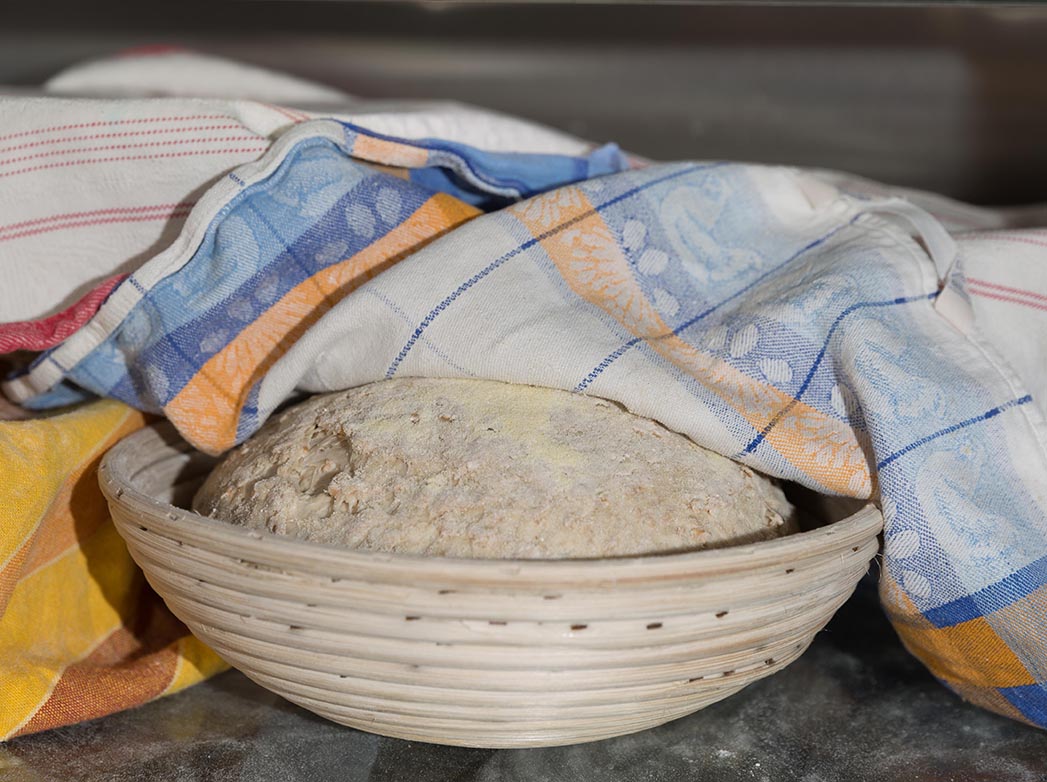 Raising dough in a bread basket under a kitchen cloth cover
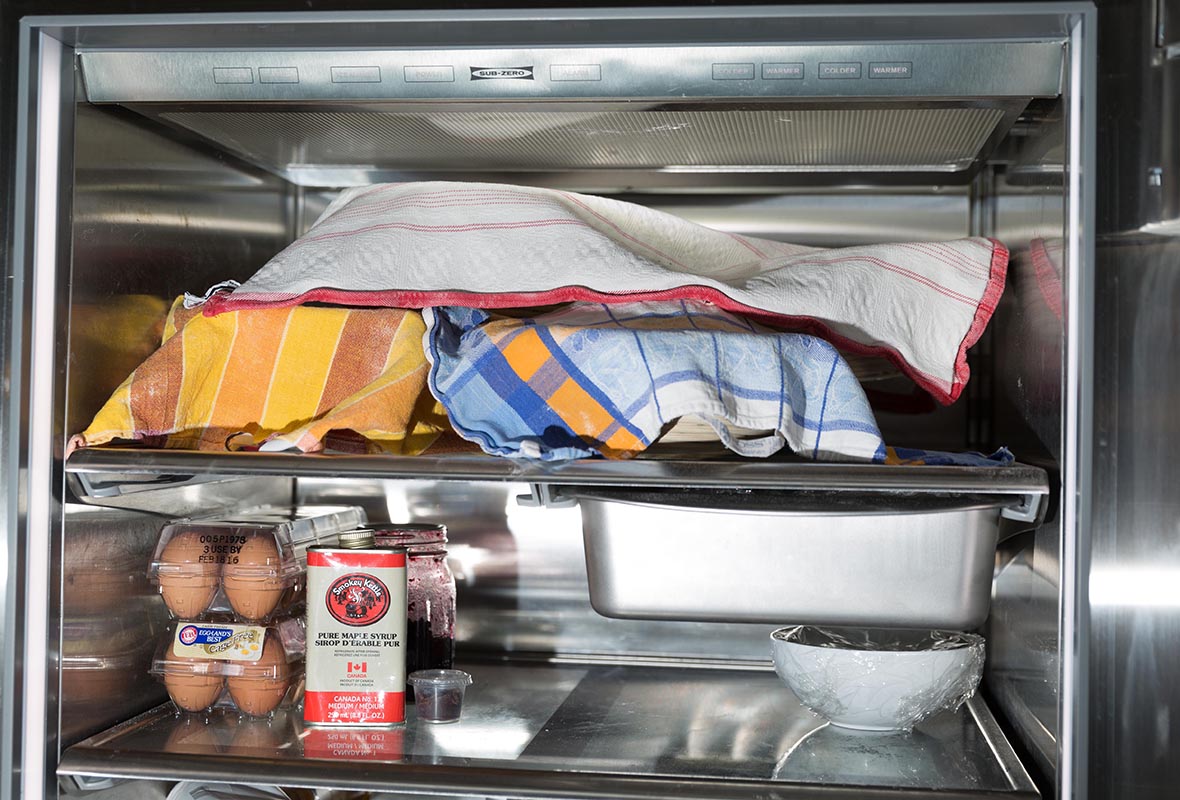 Letting the dough sit overnight in the fridge allows for the development of a mature flavor.
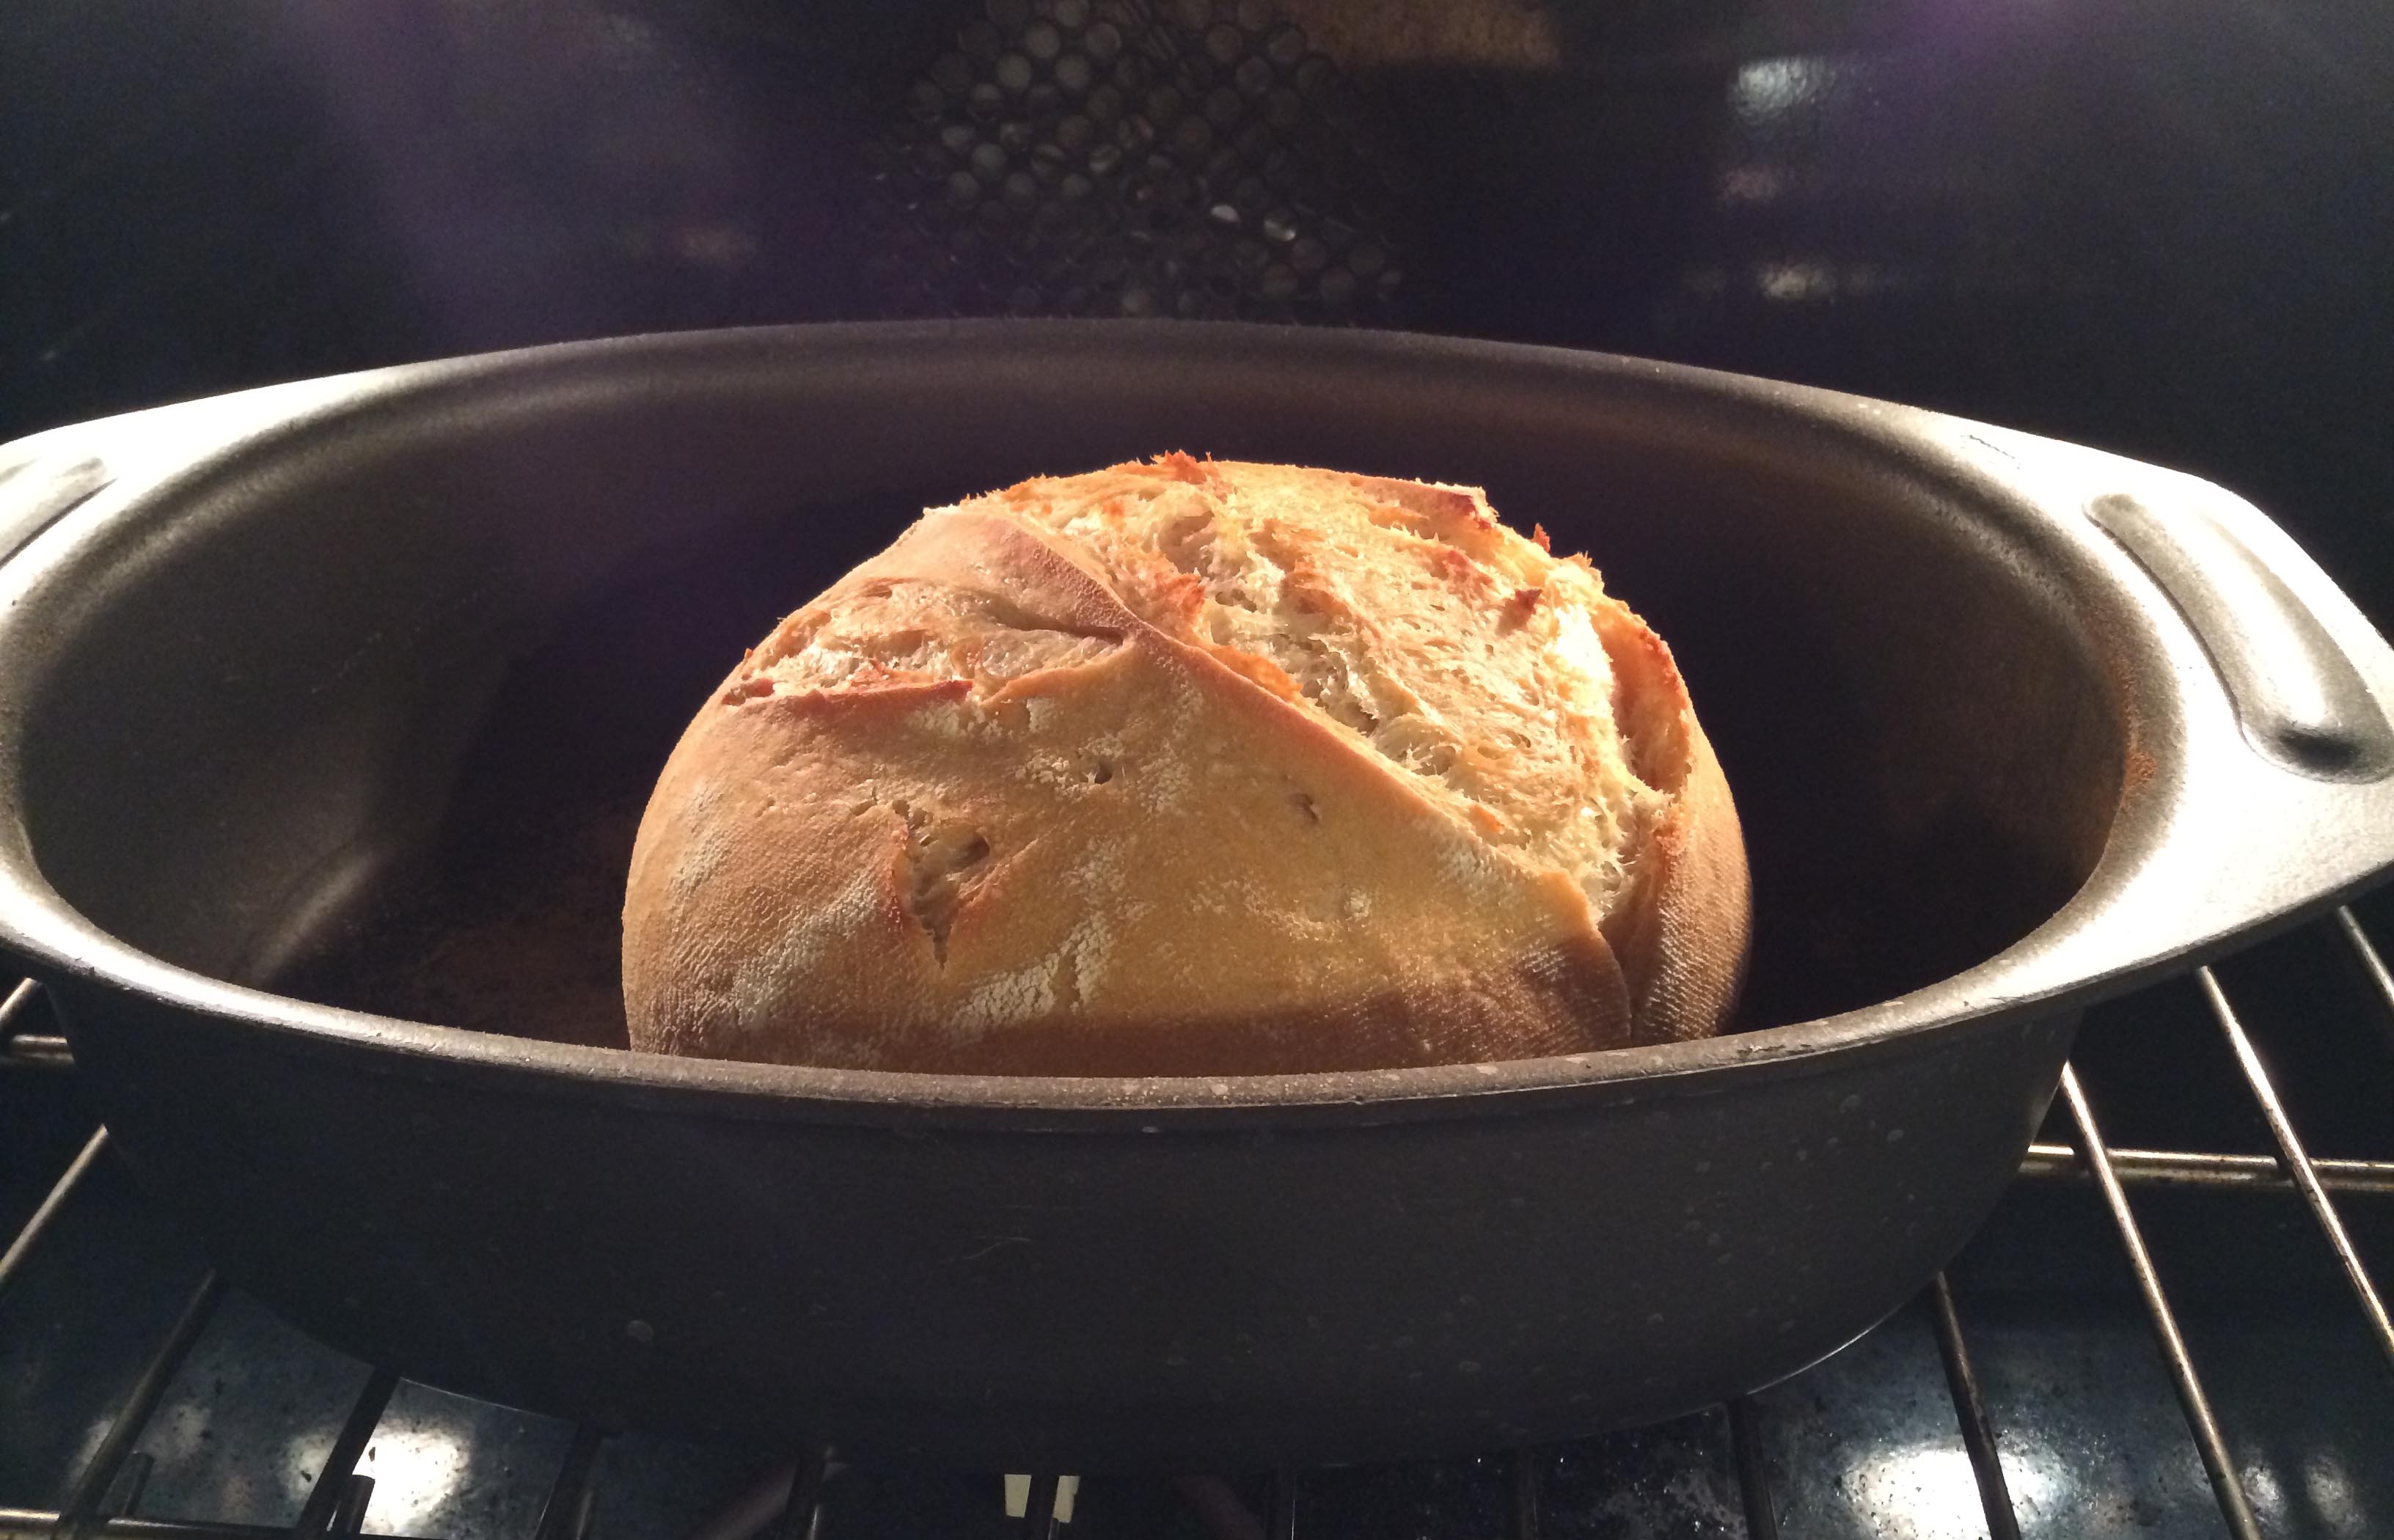 Dutch oven opened for crust development in the second phase of the baking
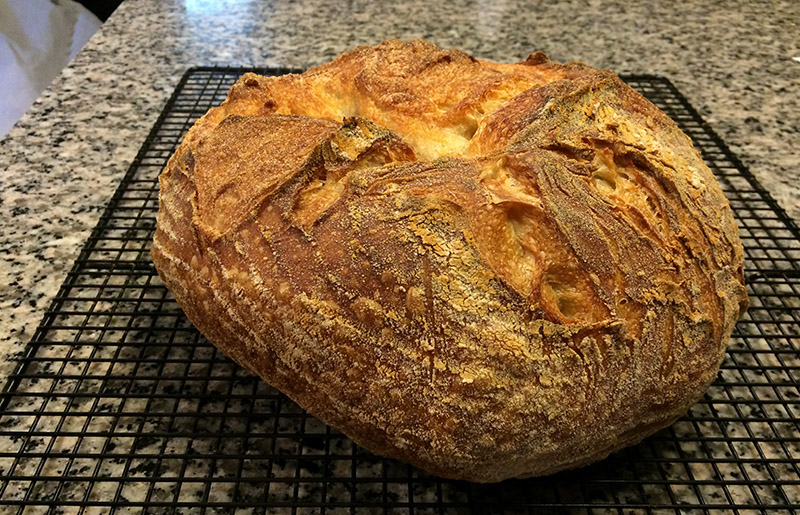 Cooling of the loafs on a rack for air circulation

We don't expect you to turn into bread bakers like us (We basically never buy bread anymore and bake all we need, 16 - 20 loaves at a time, and then freeze them.). But if you are intrigued and have thought about it before, we encourage you to give it a try.
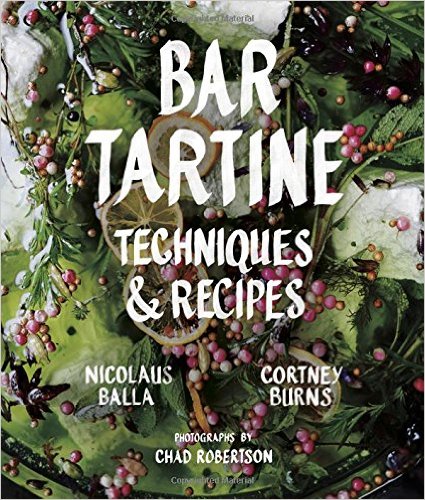
For "Tartine" graduates, we recommend another one of Chad's books (here, he is the photographer) which covers dishes served in his much obsessed about Bar Tartine:
Bar Tartine: Techniques and Recipes
by Nick Balla (Author), Cortney Burns (Author), Chad Robertson (Photographer)
And to all who plan to visit San Francisco, we highly recommend to stop by at his bakery and / or try a dish at his cafe!
Tartine Bakery
600 Guerrero St, San Francisco, CA 94110
Phone: (415) 487-2600
Bar Tartine
561 Valencia St, San Francisco, CA 94110
Phone: (415) 487-1600
To live off the land is not as hard as it sounds.
All you need is a piece of sunny ground in your garden and a little passion.
Start with good seeds
Everyone who's invested in gardening usually has her or his favorite supplier of seeds. Many, many years ago, we found "Seeds of Change", a company (back then located in the Northwest of the US) who grows their own organic seeds through a network of family farms. Since then, "Seeds of Change" has grown (which is a good thing) and now sells seeds mostly in bulk, has added live plants, tools and supplies to their product line and provides local supermarkets with branded organic products such as pasta sauce.
They pride themselves in preserving heirloom and traditional varieties. We have tried and grown to love many of their colorful and tasty tomatoes (check out our September picture), from Blush (pinkish-yellow), Cherokee (purple) and Krim (almost black) to Yellow pear (yellow, as the name says!) and Zebra (green, striped). We have also successfully used their "Cool Weather Selection", in our constant struggle to prolong the short Pittsburgh growing season.
Tip:
Think ahead. Curl up in front of a cozy fire, browse their (and other) seed catalogs and order early. Which is what we mostly do in December, January, February, March… dreaming of the sun, warmer temperatures, spending more time outside. As the "Seeds of Change" has grown, their non-bulk seed packages sell out fast!
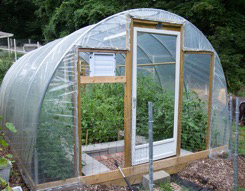
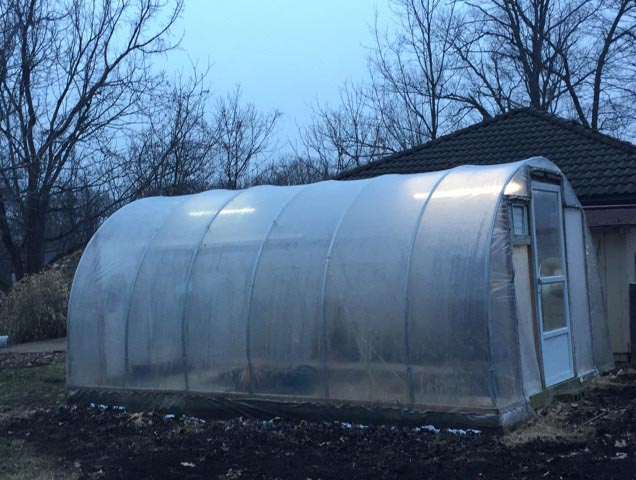
Prolong the season
A greenhouse is helpful in more than one way, especially if you live in Western Pennsylvania.
I have found that people mainly use (small) greenhouses to hang out in to start seeds and re-pot plants or larger ones to actually grow them. We tried to accomplish both. We constructed our greenhouse over one weekend (behind the garage, out of view) on a wooden frame, with aluminium pipes and a clear plastic covering. It is not heated, but has lights, removable sides to improve airflow in the summer and four fans connected to a temperature control system. Heiko installed a flexible dripper system on a timer which is hooked to an above-ground 1,000 gallon water cistern collecting rainwater from our garage.
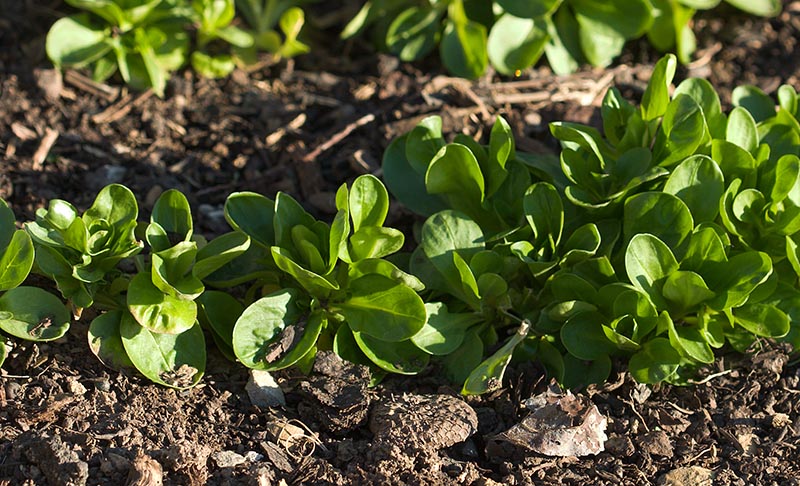
In early spring, I set up a table in one corner, add heating mats on which I place my seed trays. At the same time, I put seeds for hardy greens (like spinach or Feldsalat, Valerianella locusta) and veggies (peas) directly into the ground. In case we have frost, a space heater will prevent the obvious disaster, at the same time, the sunlight and fans produce strong, sturdy plants which are ready to be planted in the garden early May. By the time the early greens and peas are harvested, the tomatoes plants are big enough to take their spot...
The same goes for the fall: Once the tomatoes are slowing down, fall greens take their place.
Over the winter we use the greenhouse to shelter plants that otherwise would not survive the harsh temperatures (mostly due to strong winds) or to give them a head start in the spring. This way we are able to harvest figs!
- Supplier for greenhouse covering
- Genereal / helpful information about greenhouses and pre-fabricated kits
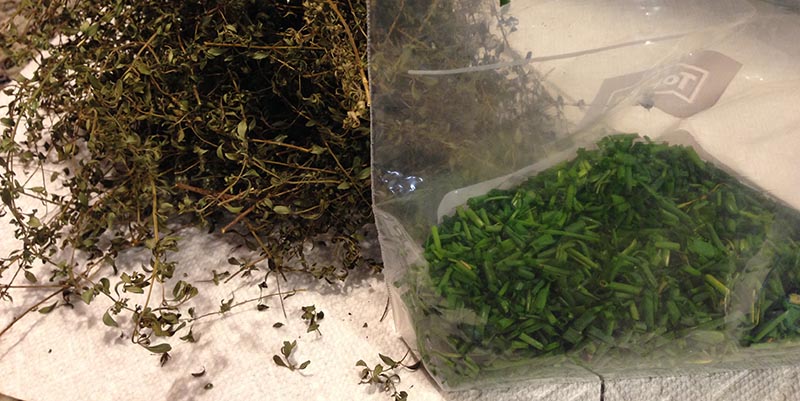 Preserving herbs: Depending on kind and time of year we do both: Drying and freezing. Frozen chives or parsley make a great additon to soups and stews!

Preserve the harvest
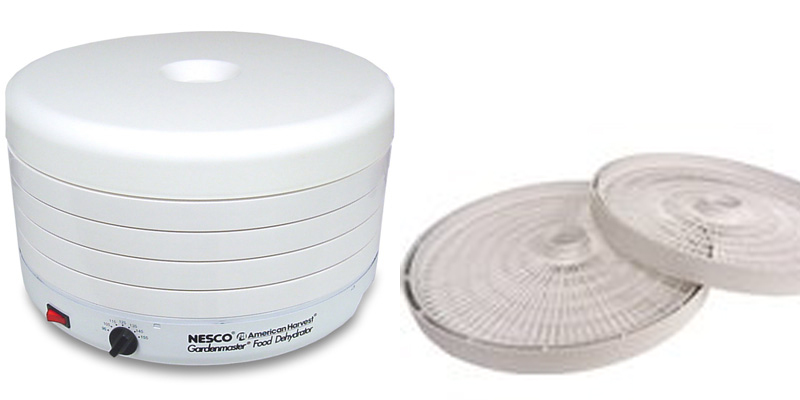
There are many ways to preserve. The easiest is probably drying, e.g. gently drying herbs or slices of fruit and veggies on a dehydrator (which you can also use to dry fresh pasta, see our upcoming October issue.).
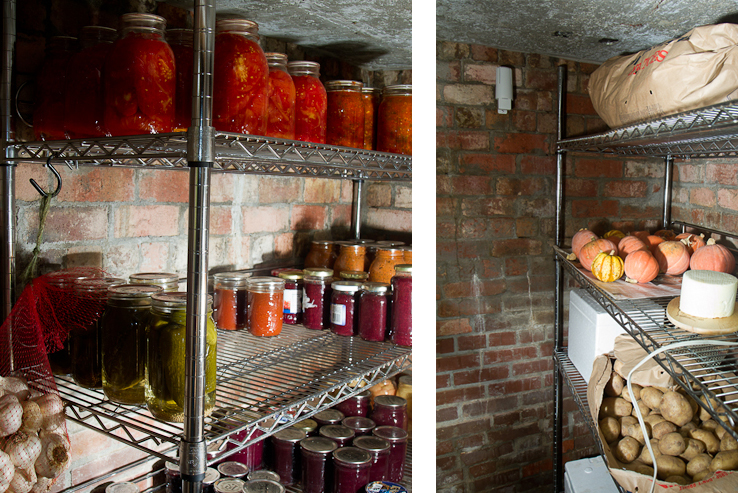
A root cellar, our version hand-dug and shown on the left, allows us to store potatoes, vegetables and fruits as well as canned goods.
But, I have found that in many cases freezing works better for me than canning.
Canned tomatoes are great for stews, soups and pasta sauce, but already spiced-up dried ones are more flavorful and can be used in a wider variety of dishes (such as pizzas, quiches, spreads and even salads). So we invested in professional-grade vacuum sealer
an extra freezer.
Which we needed anyway, because we buy one or two lambs and about 12 whole chickens per year from local organic farms...
If we proocess food, we process a lot.
Tip: Don't get a cheap vacuum sealer if you plan on heavy use. We have made that mistake more than once! The Weston Pro-2300 is the one that doesn't give up after sealing 8 or more packages in a row.
Close
the circle
By now you won't be surprised to learn that we also "do compost". Composting does not have to be smelly or messy.
An almost stylish stainless steel compost bin in the kitchen collects all the scraps our chicken can't or won't eat. Our version includes a set of dual charcoal filters to obsorb any potential odors and can be put in the dish washer.
In the backyard, hidden from view, Heiko built a flexible three-bin-compost out of tree stumps: they can be easily moved and therefore the bin size adjusted to your needs. We have three bins, turning over the contents once a year into the next bin. So what started out as dry leaves (of which we have plenty), garden and kitchen waste in 2014 will be ready for use as top-quality soil in the garden in the late summer 2016. Why late summer? Because each year on Columbus Day, we plant our garlic on the middle compost pile, it grows there like crazy. Harvest is on July 4 the following year, only then can the dirt be turned over...
To live off the land is not as hard as it sounds?
I have to admit, there might be a little more needed than just a sunny spot in your garden.
But we have started out small, with just one raised bed 18 years ago, back then in Philadelphia. After we moved to Pittsburgh and became owners of a much larger property, we first added a (fenced-in for deer protection) vegetable garden and were quite happy with that for a long time. Then I discovered that I not only loved but needed the time outdoors, to relax from my day job at the desk and take a break from the constant demands of our young children.
Over the next 10 years, we gradually expanded the "Spallek Farm" by adding berries and hazelnuts to our landscaping (why plant "plain" bushes if there is a chance for a harvest?), a dwarf orchard, root cellar, greenhouse and an additional garden. Not to forget the chickens, mason bees and rabbits… one step at the time.
And yes, we have tried Vermicomposting and Vermiculture, but were not successful and gave up.
That's one thing I learned quickly as a gardener: Concentrate on what you succeed in, and you will have plenty to harvest.

 Chilled tomato soup (left) and cucumber gazpacho (right): Refreshing all summer long.
Very soon, the harvest will begin and there will be an abundance of... everything.
Especially cucumbers, zucchini and tomatos. We are always on the lookout for new ideas and recipes, if you have any, please share! Meanwhile, here are our quick and easy refreshing summer favorites.
Marinated Zucchini and Yellow Squash Salad
Ingredients:
1/2 cup cider vinegar
4 teaspoons sugar
1/2 teaspoon salt, divided
3 zucchini (about 1 1/2 pounds)
2 yellow squash (about 3/4 pound)
For basil oil:
1 garlic clove, peeled
1/2 cup packed fresh basil leaves
1 tablespoon fresh lemon juice
1 tablespoon extra-virgin olive oil
3 ounces part-skim mozzarella cheese, cut into 1/4-inch cubes
Combine vinegar, sugar and 1/4 teaspoon salt until sugar dissolves. Trim ends of zucchini and squash; cut into thin ribbons with harp-shaped peeled. Add to vinegar mixture. Cover and chill 2 hours or overnight.
Prepare basil oil (or, if short on time, use store-bought flavored olive oil):
Bring a small pan of water to a boil; add garlic. Remove with a slotted spoon after 1 minute. Rinse under cold water; set aside. Add basil to boiling water; immediately remove and rinse under cold water. Reserve 1 tablespoon of cooking liquid. Transfer garlic and basil to a food processor, and add lemon juice, olive oil, reserved water, and the remaining 1/4 teaspoon salt. Process until smooth.
Drain squash. Top with cubed mozzarella, and drizzle with basil oil. Add fresh basil for decoration.
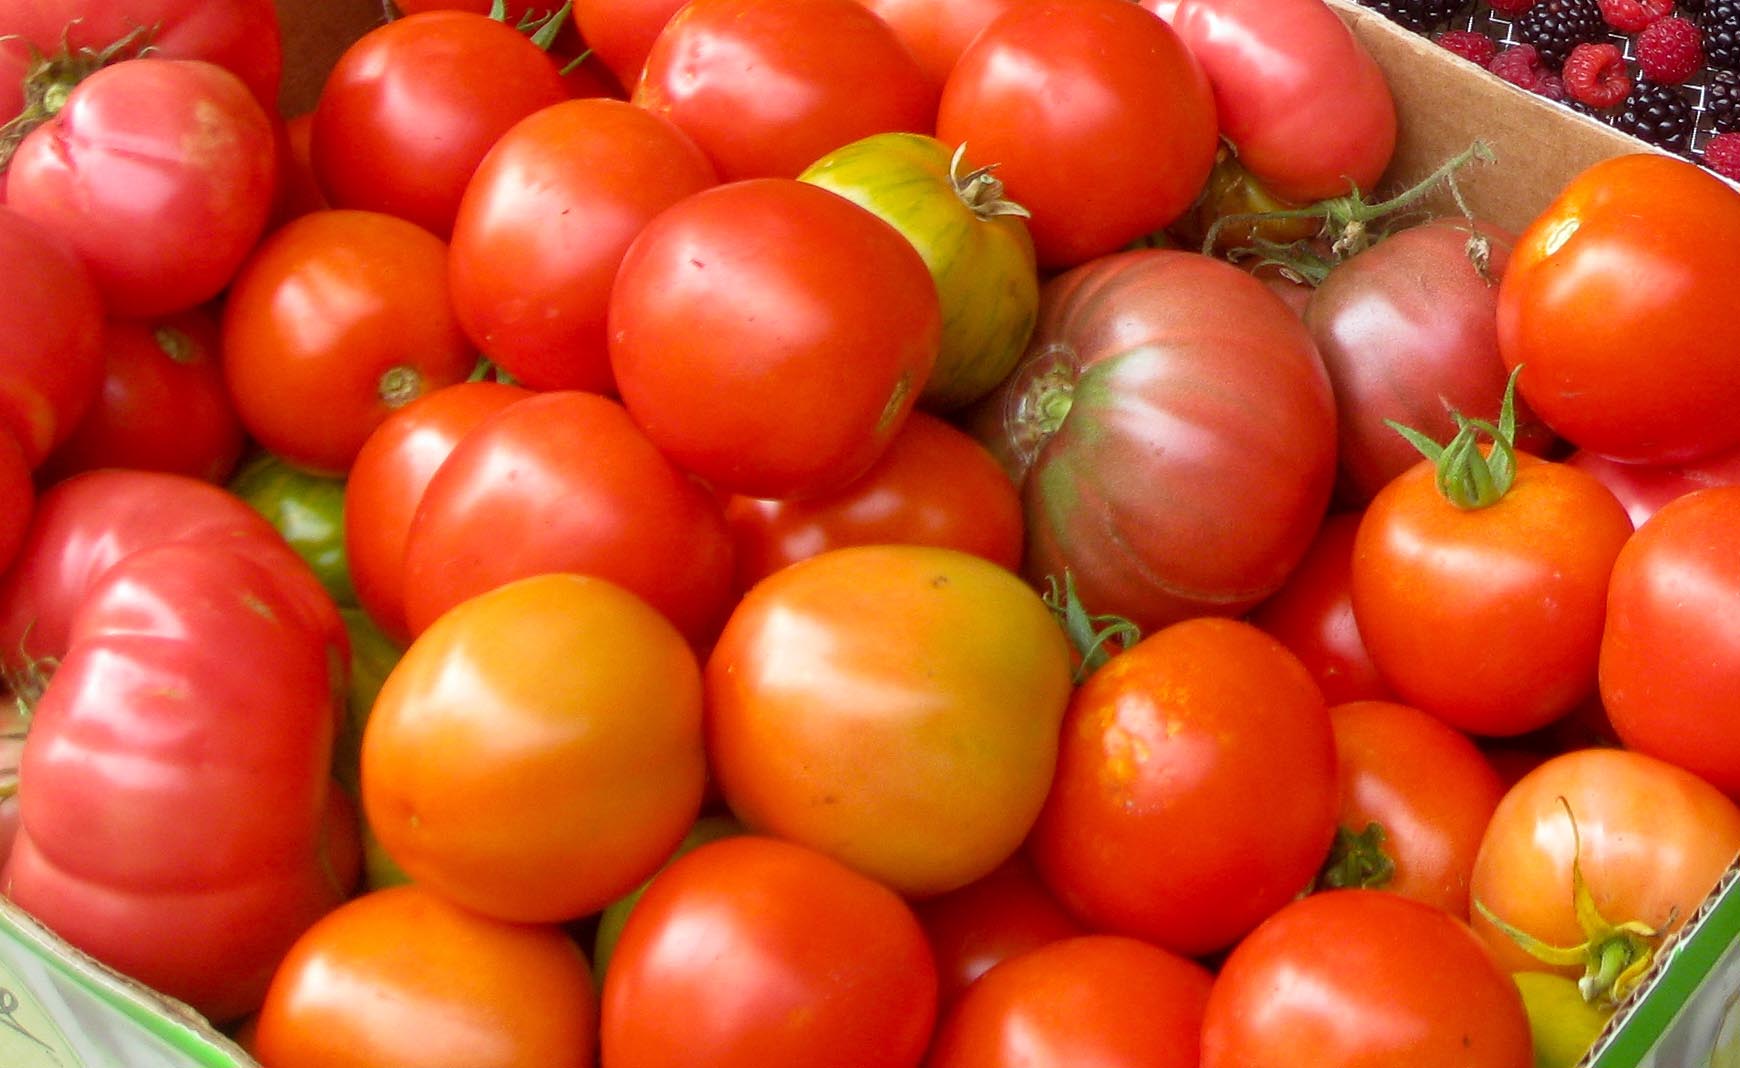
Cold tomato soup
Ingredients
500 g tomatos
salt and pepper
2 tbsp red wine (or more)
2 tbsp olive oil
3 small garlic gloves, minced
1 bunch of basil, chopped
If you use whole tomatos, skin them before chopping them up as fine as you can: Drop them into a pot of boiling water, watch for their skins to start to wrinkle and split, about 45 to 60 seconds, then scoop them out with a slotted spoon and transfer them to a bowl with ice water and let them cool down. (You may understand now why we make this tomato soup as a by-product when preserving/drying our tomatos for the winter season: We skip the skinning by using the otherwise wasted inner flesh of the tomatos.).
Add all other ingredients, stir and chill.
Experiment by adding feta, olives or parmesan cheese!
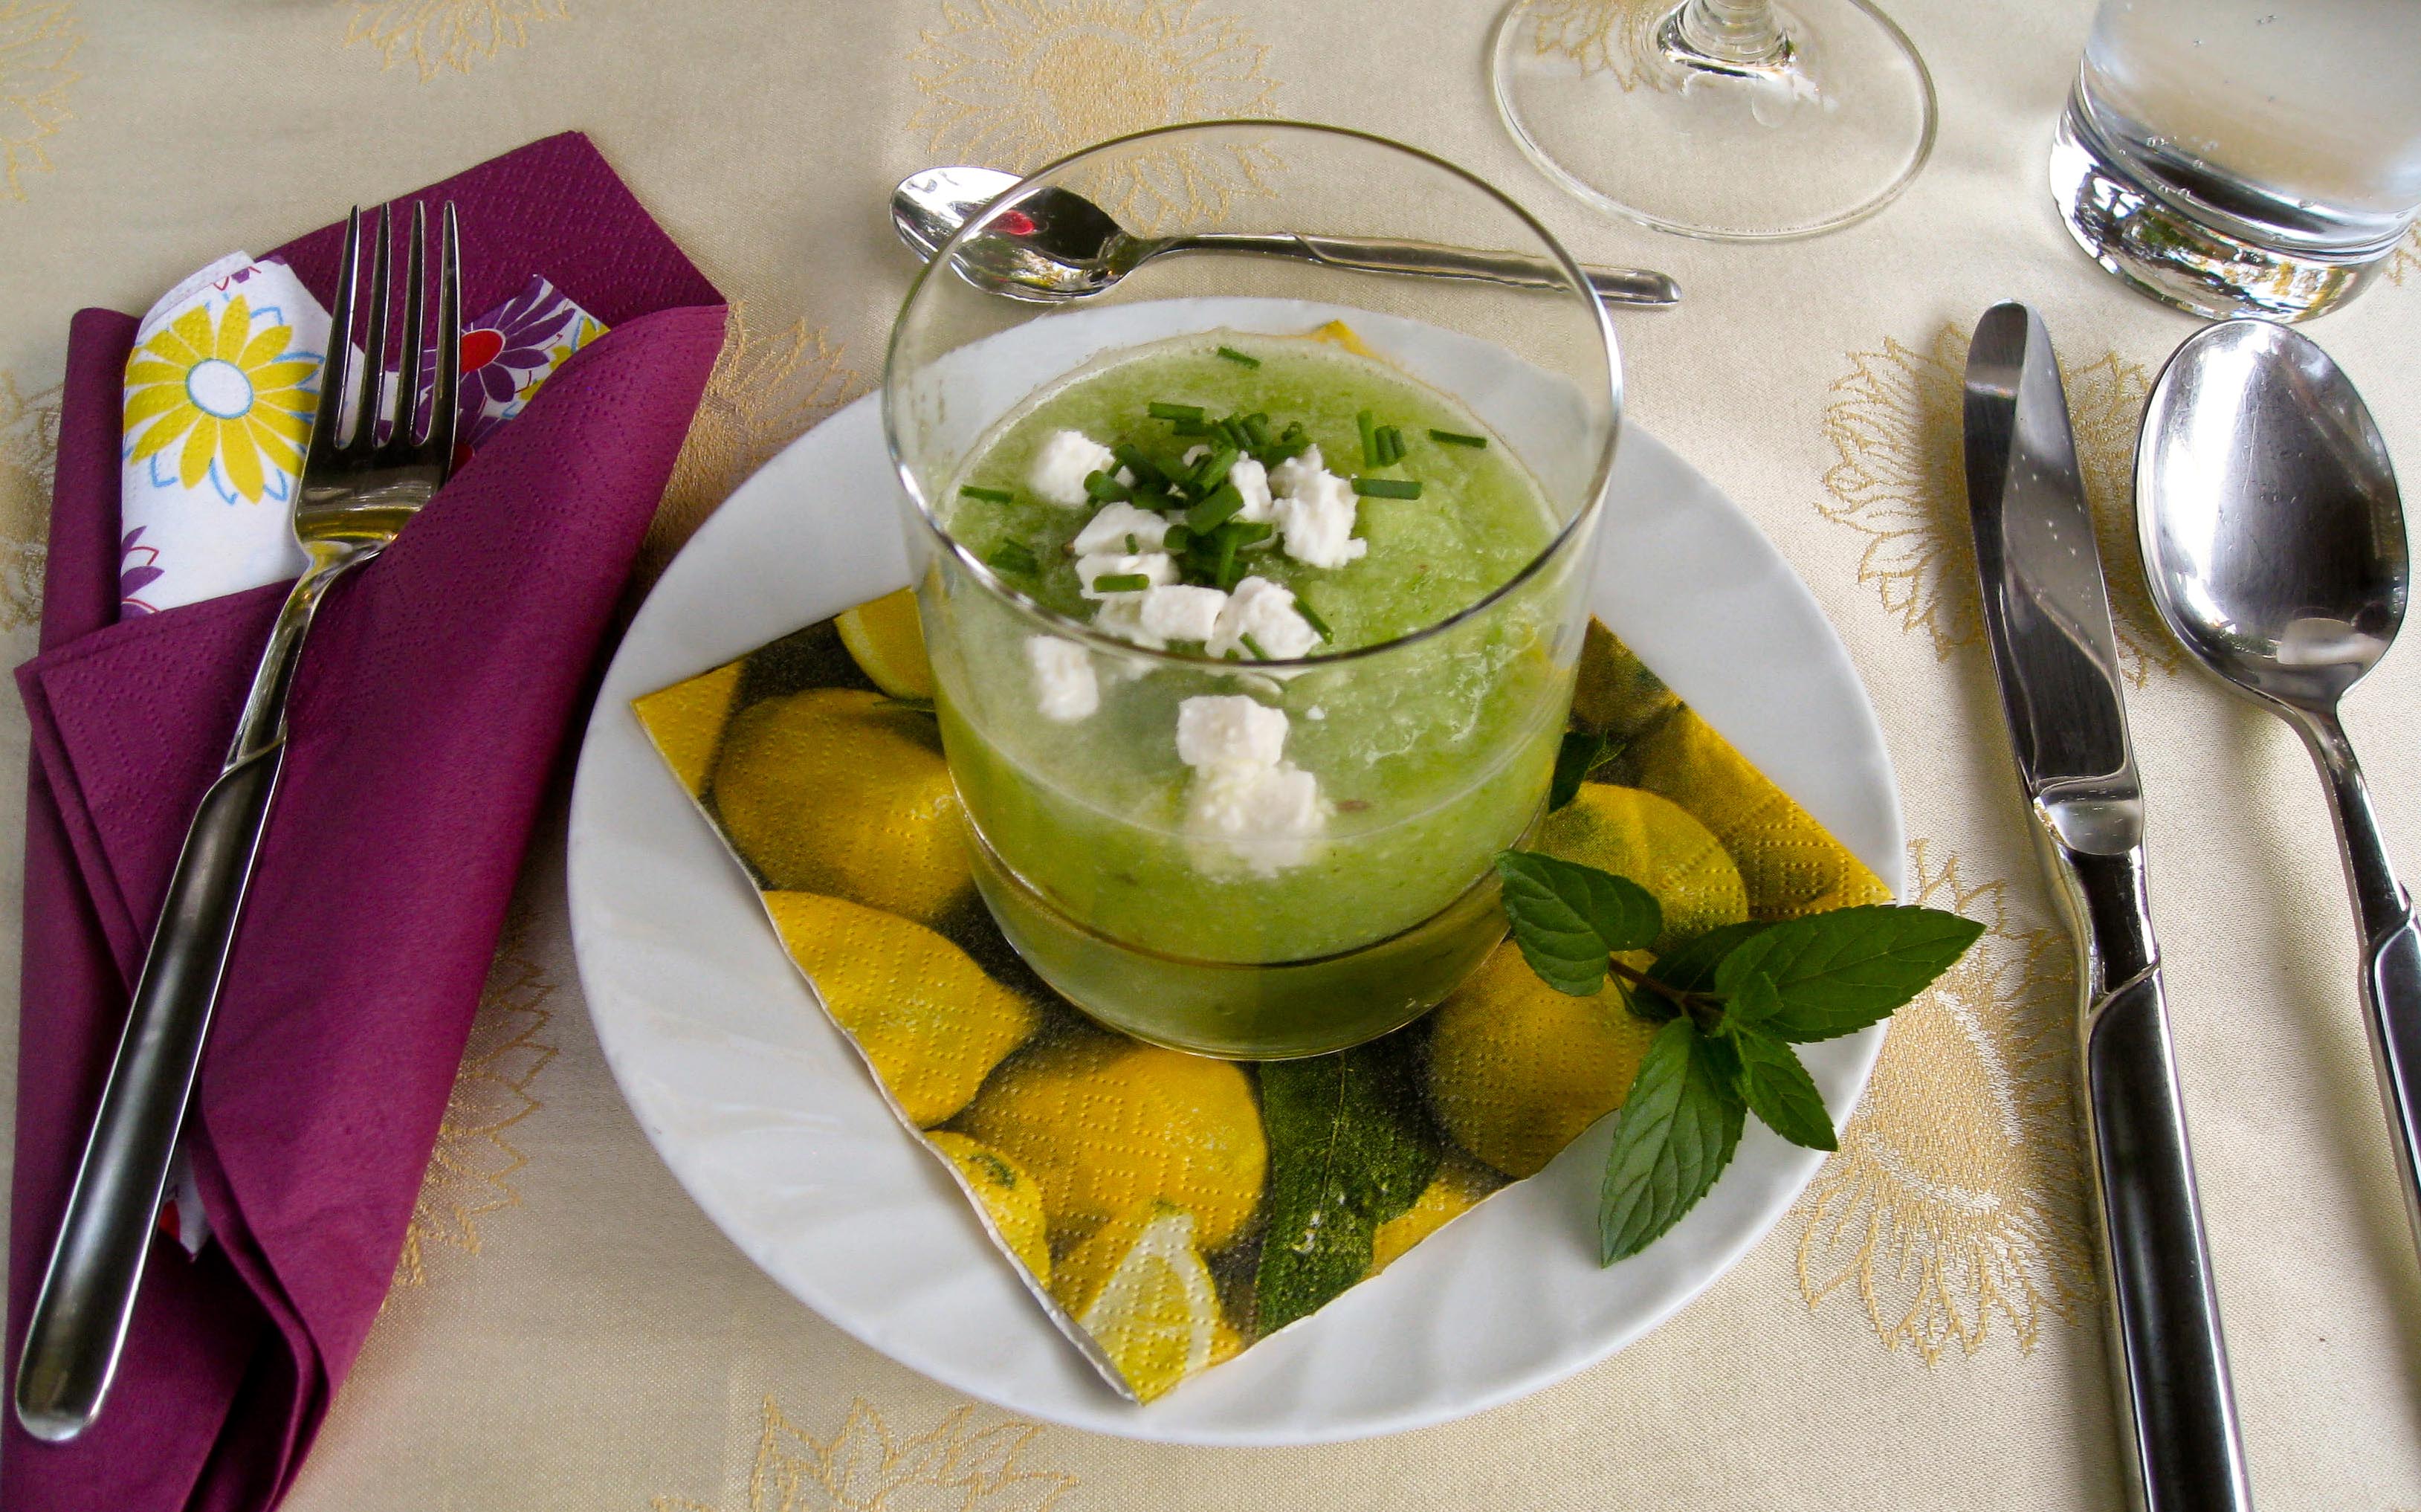
Cucumber Gazpacho
Ingredients
2 cucumbers
1 garlic clove
2 spring onions
Mineral water, non-carbonated
1 tbsp Dijon mustard
3-4 tbsp lemon juice
salt, pepper
1 tbsp sugar
1/2 tbsp cumin
100 g Feta, crumbled
Peel cucumbers, cut in half and scrape out seeds with a spoon. Cut cucumber in small cubes.
Peel and chop garlic and spring onion. Combine cucumber, garlic and onion in tall bowl and puree. Add mineral water until you have reached the desired consistency, then add mustard, lemon juice, salt, pepper, sugar and cumin and chill.
To serve, add crumble feta and fresh herbs such as dill or basil.
With all the ingredients at hand, this special toast is a quick and delicious treat.
Ingredients / Preparation:
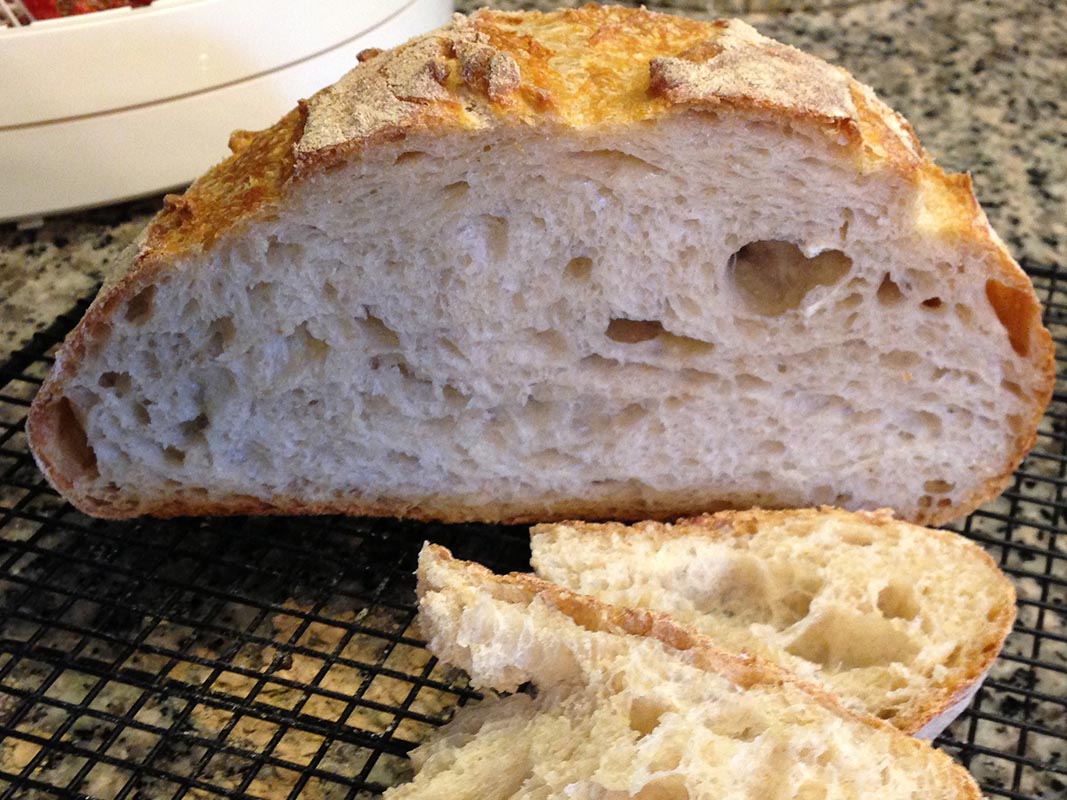
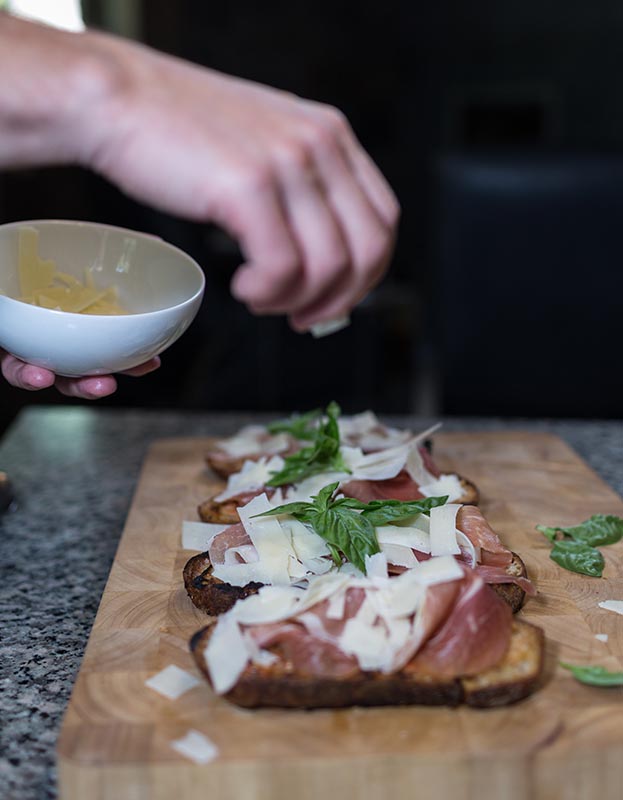
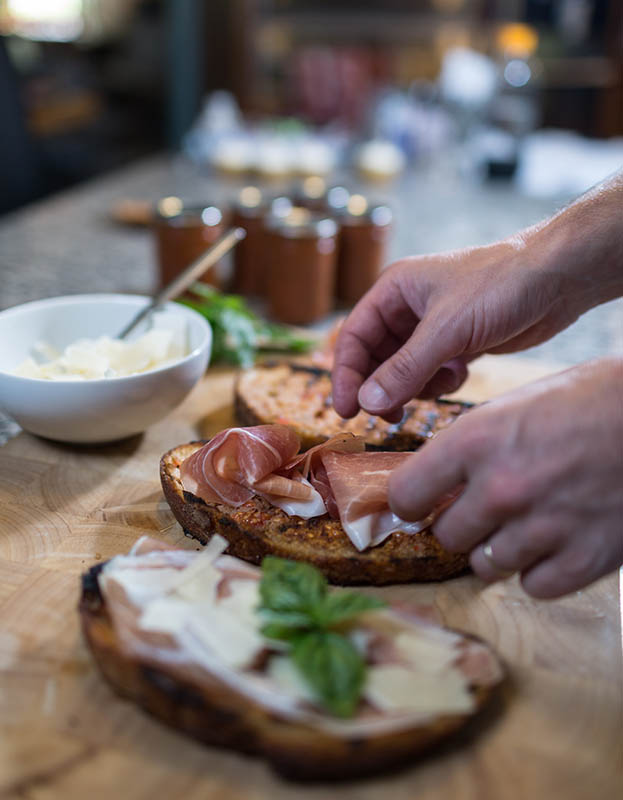
Use only the best for this tasty delight: your best olive oil, ripest heirloom tomato, dry-cured serrano ham, aged Manchego and - of course - tartine bread.
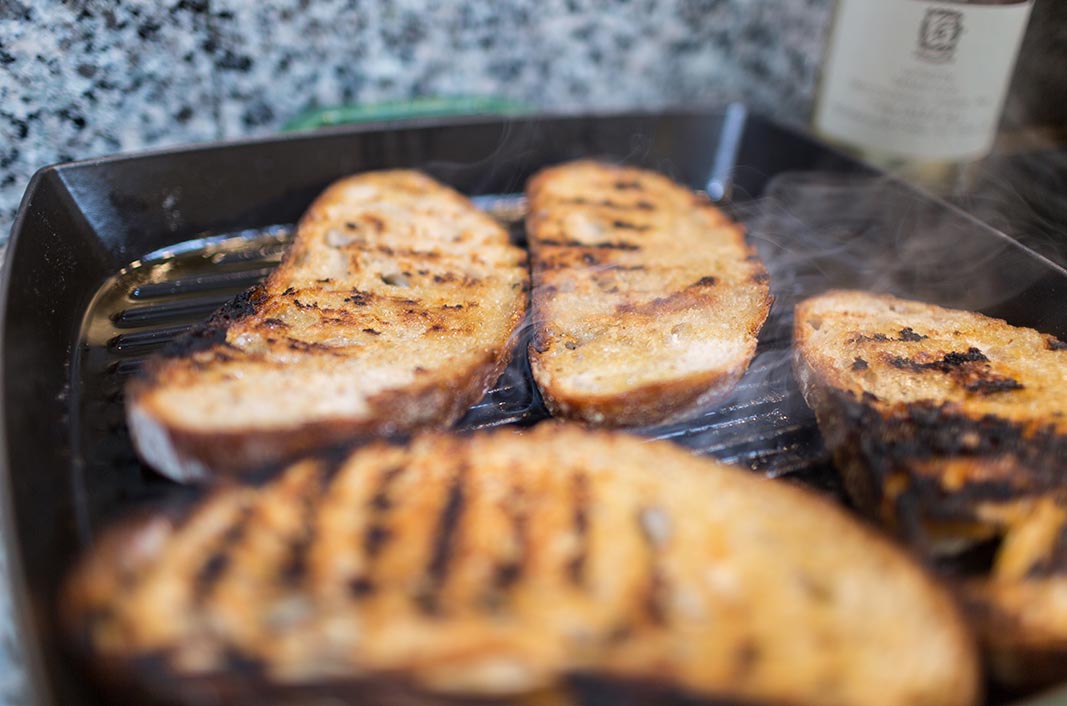
Per person, cut a slice of fresh or day-old Basic Country Bread (see our April blog). Heat a generous amount of olive oil in skillet, fry bread until golden brown and crisp (about 3 minutes on each side). Cut tomato in half and rub the cut side on one side of the roasted bread slice, until pulp is shredded and juices fill the holes of the bread with tomato puree. Top with ham and thinly sliced hard aged cheese such as manchego. Garnish with fresh basil.
During the winter, when heirloom tomatoes are not in season, this toast can be prepared with Bar Tartine's spicy tomato paste (recipe on page XXX of the book). At the peak of the tomato harvest, we make and freeze and/or can this paste for that reason alone.

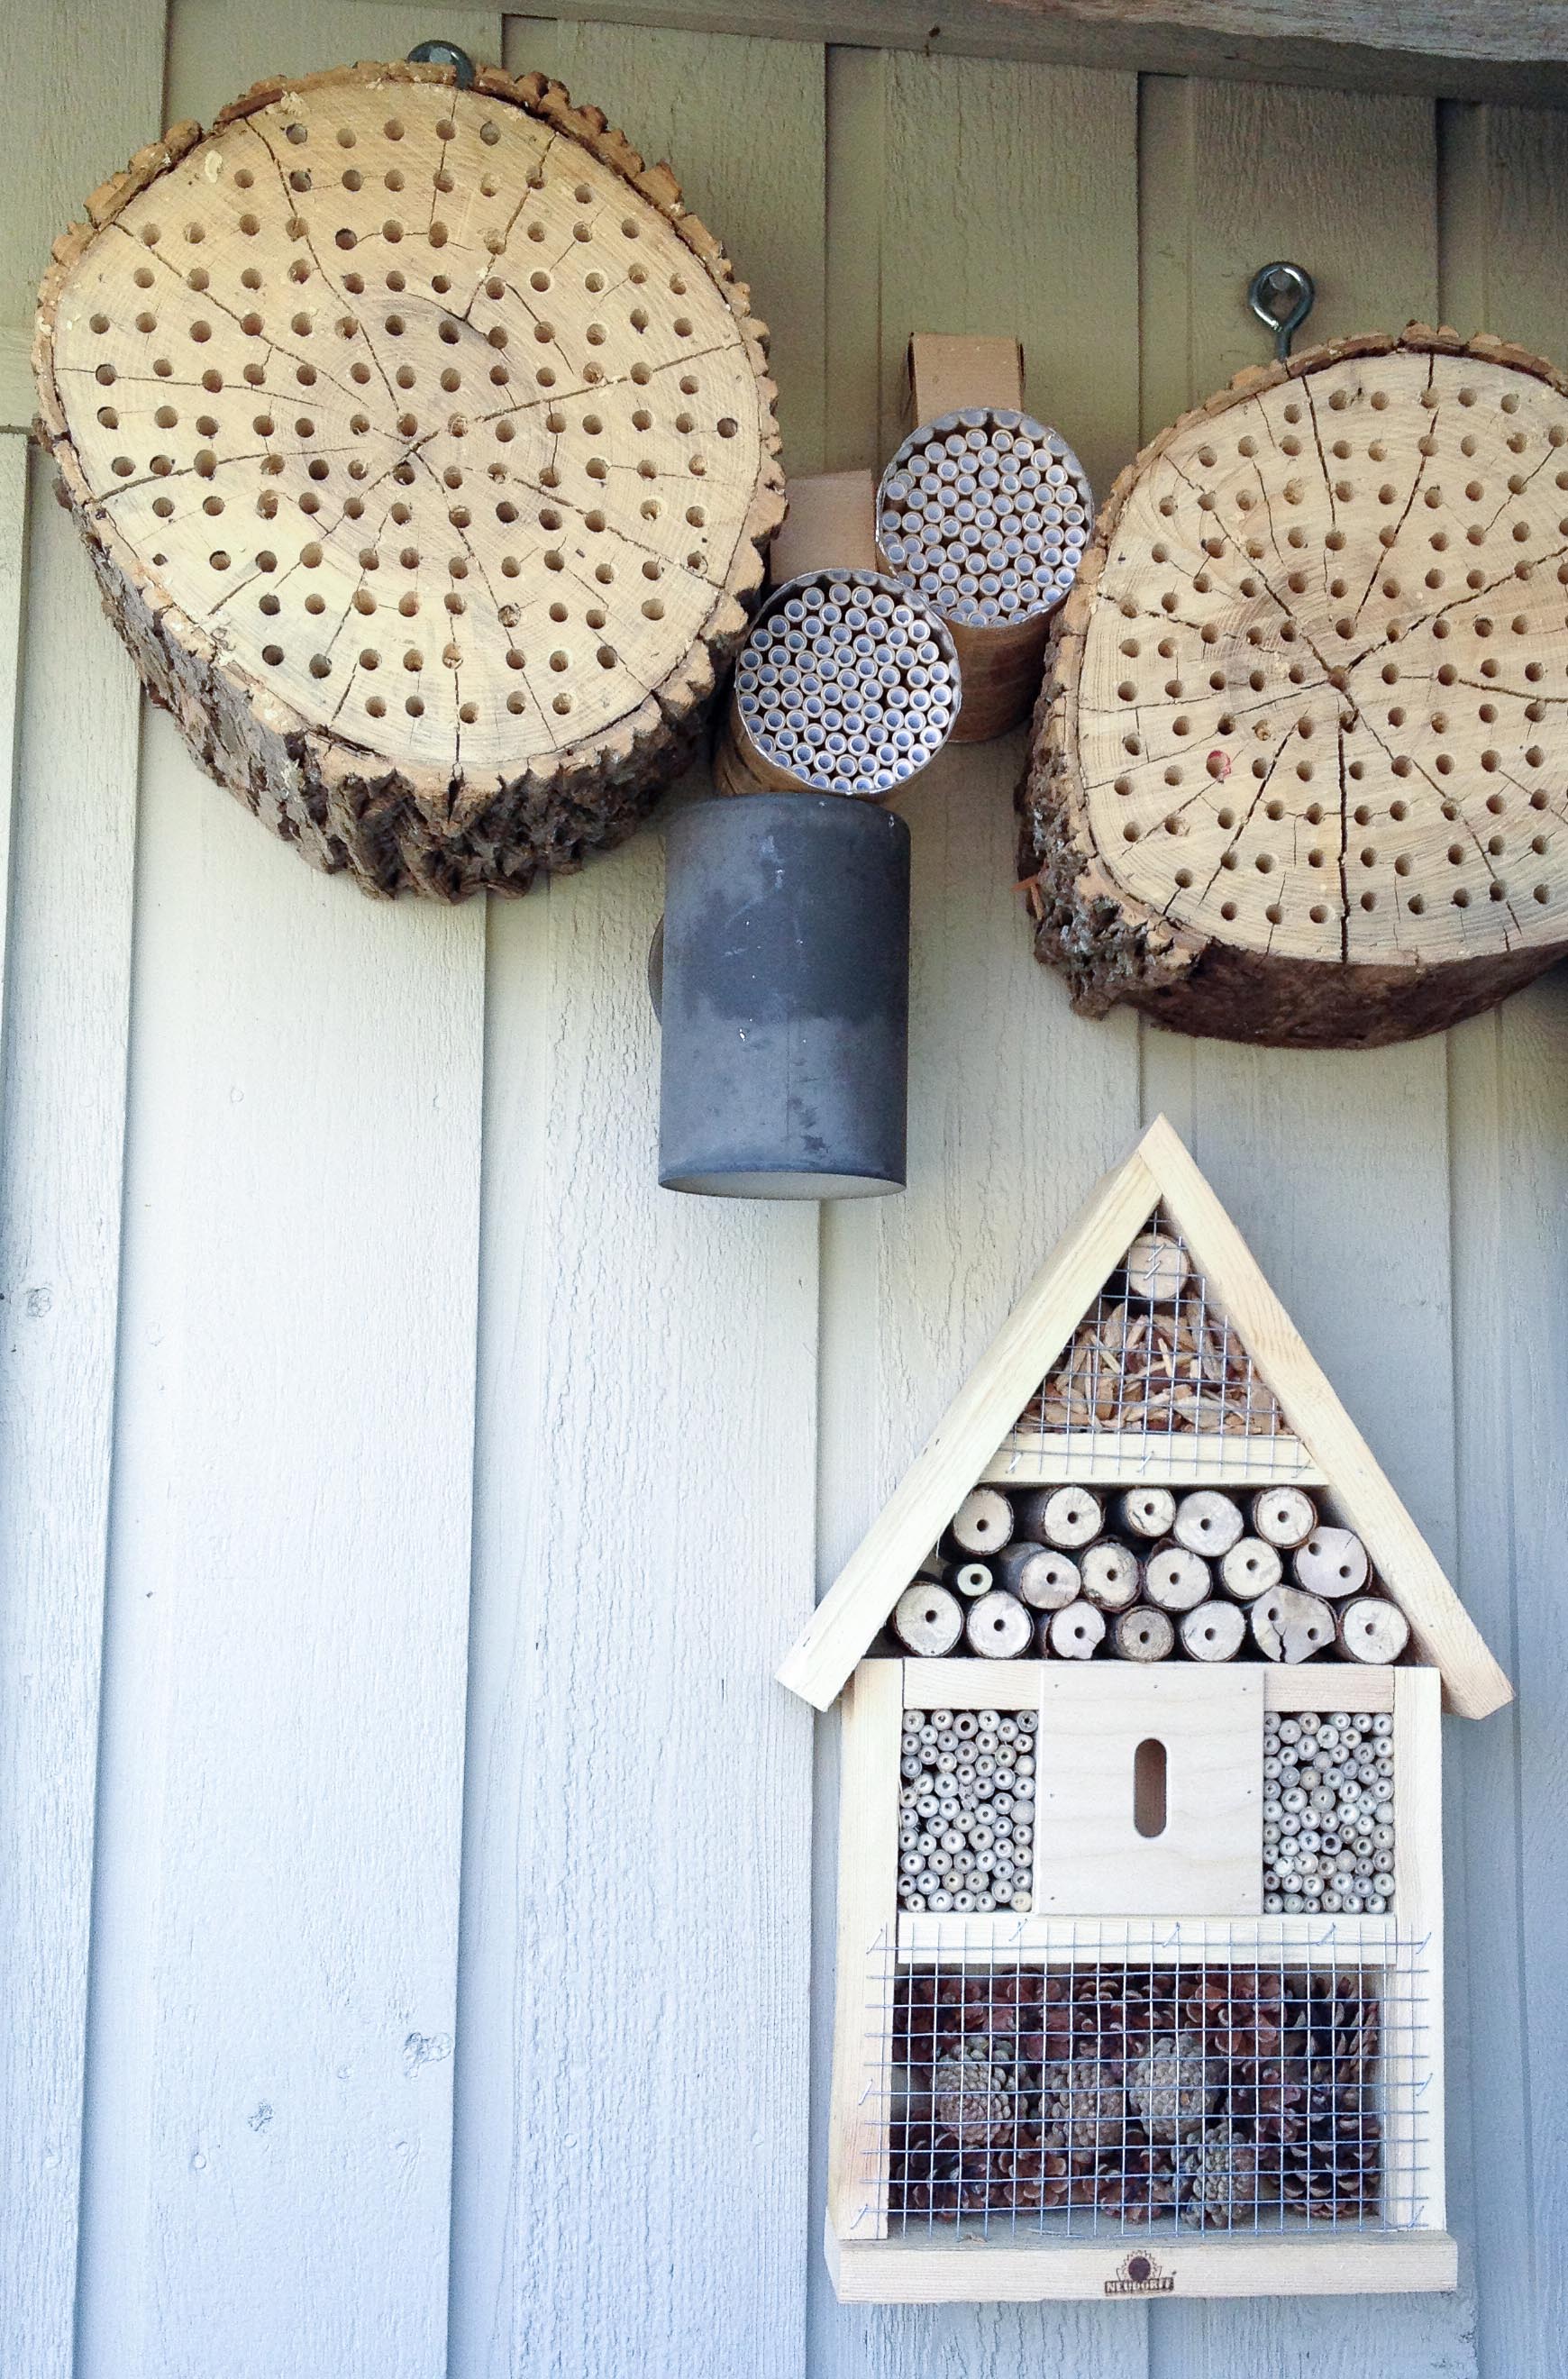
In recent years, concerns have mounted over the environmental impacts of pollinator decline, resulting in rising conservation efforts by average families to protect, enhance, and foster agricultural pollination through beekeeping.
Keeping native non-stinging mason bees - even in urban spaces - is a surprisingly easy way to help the environment.
It's also inexpensive (they can be ordered for a few bucks), safe (they do not sting) and hassle free (they do not produce honey).
The best news is that they will do wonders for your fruit crops and gardens.
After we planted our dwarf-tree orchard, we experienced only frustration. We had the usual (short) warm weather spell in March, the fruit trees would start to bloom... but no insects were around yet, and the April and May frosts surely to come.
The situation improved drastically, after we introduced mason bees to our farm.
Unlike garden-variety honeybees, mason bees (also known as orchard bees) are non-social creatures that nest in holes rather than in a hive with a queen. They work alone, but like to nest in groups. The male bees don't have stingers, and - since they have no queen to protect and all of the females are fertile - they're not aggressive.
How to - It's really easy!
We started out by ordering a mason bee nesting tubes and bees online. Later, we drilled holes in oak trunks to provide a variety of nesting options.
Placing the nesting units on the south-facing side of the building is key — the bees need to warm up to 80 degrees for their wings to function. Mason bees' black bodies can soak up rays even when it's only 58-64 degrees outside, making exposure to direct sunlight very important. The activity usually begins mid to late March, the females lay the most eggs in the beginning of the season.
The nests also need to be protected from rain and wind. If you cannot place them under a roof or overhang, keep them mounted with the cavities tilting slightly down to prevent rainwater from entering and creating harmful mold.
Fun facts
If a mason bee accidentally goes into another bee's hole, the intruder will quickly back out and find the correct nest. Their individual pheromones help them identify their own hole.
When the female is adding her final mud plug, she'll go around and around the hole's opening as she works to close the egg chamber.
Using a flashlight at night or in the early morning, you can see the bees at rest in the front of their holes, with their eyes looking out at you.
Salad variations
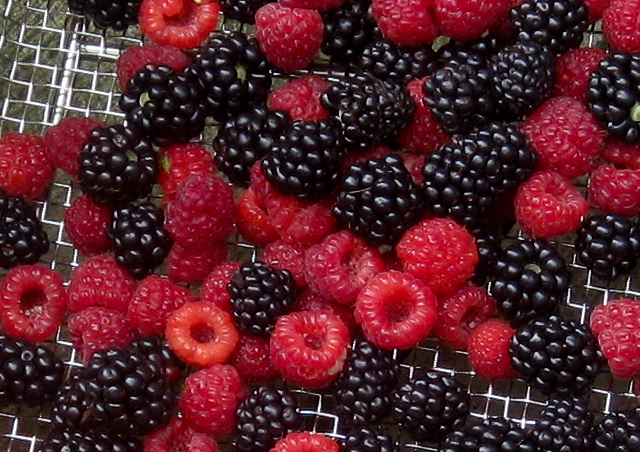
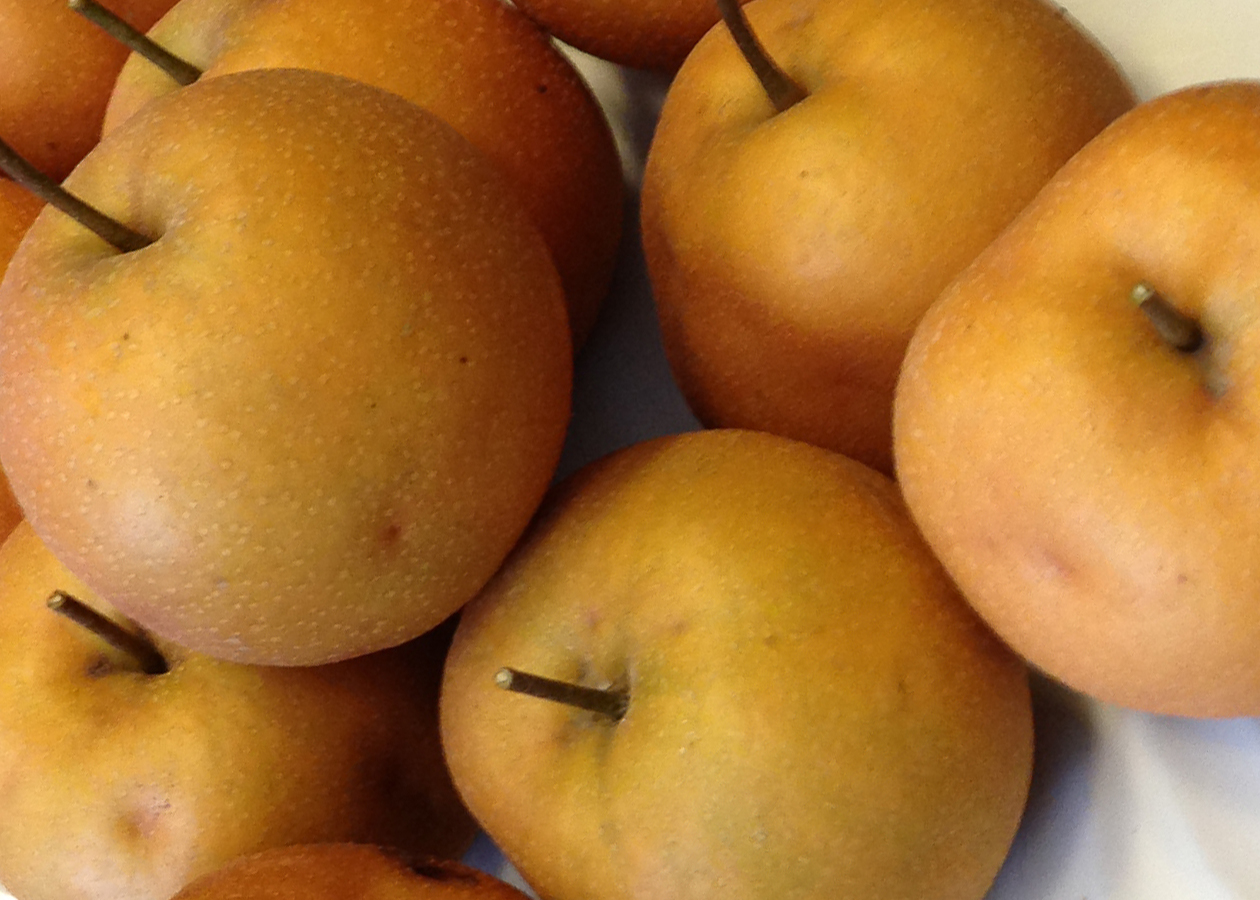
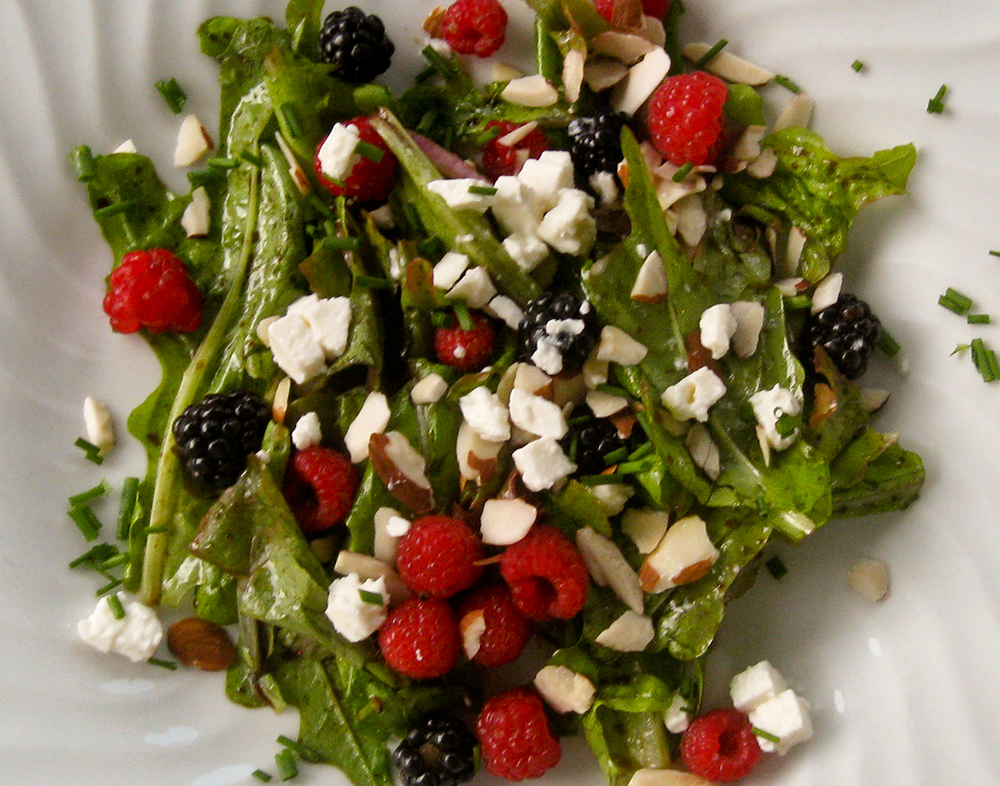
Be creative - and try fresh berries or fruit in combination with different cheeses, nuts or dried meats in salads. Arugla with pecans, Asian pear and blue cheese became a family favorite!
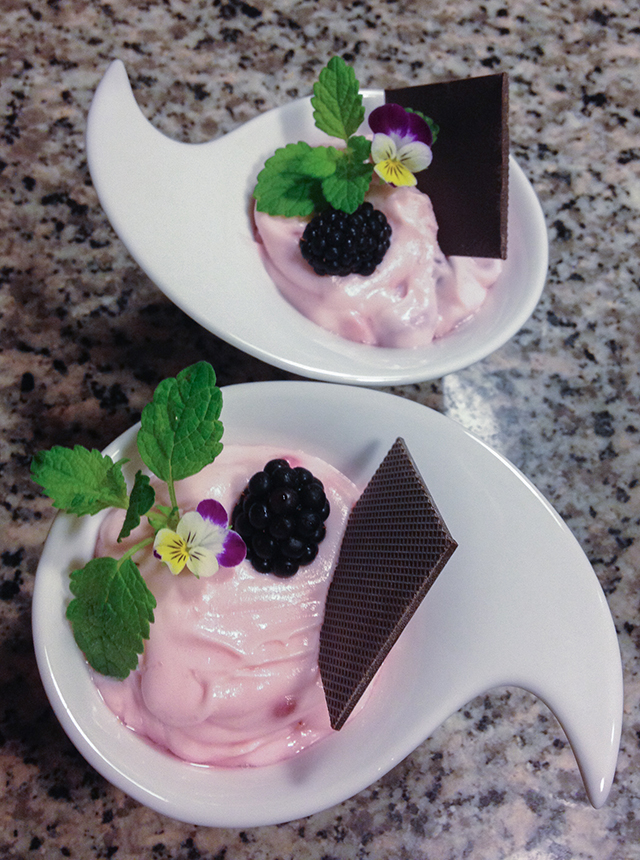
Blackberry Ripple Mousse
Note: During the summer months, we have made the culis (step 2) en masse and frozen portions of it. They come in very handy for desserts (such as the Ripple Mousse or ice cream) during the long winter months.
Step 1: Creme Patisserie (Can be prepared up to 3 days before)
6 egg yolks
1/2 cup plus 2 tbsp (125g) superfine sugar
1/4 cup (40g) all-purpose flour
2 cups (500ml) milk
1 vanilla bean, split lengthwise
a little confectioners' sugar or butter
Combine the egg yolks and one-third of the sugar in a bowl and whisk to a light ribbon consistency. Add the flour and whisk it in thoroughly. In a pan, heat the milk with the rest of the sugar and the vanilla bean. As soon as it comes to a boil, pour it onto the egg yolk mixture, stirring as you go. Mix well, then return the mixture to the pan. Bring to a boil over medium heat, stirring constantly with the whisk. Allow the mixture to bubble, still stirring, for 2 minutes, then tip it into a bowl. To prevent a skin forming, dust the surface with a veil of confectioners' sugar or dot all over with little flakes of butter. Once cold, the pastry cream can be kept in the refrigerator for up to 3 days. Remove the vanilla bean before using.
Step 2: Coulis (Can be made ahead of time, even frozen)
3/4 (350g) blackberries, plus extra to serve / for decoration
100 g sugar
juice of 1 lemon
Heat blackberries in a pan with 1/2 cup (100g) sugar, stirring with a wooden spoon from time to time. When the mixture comes to a simmer, cook gently for another ten minutes. Transfer to a blender or food processor and whiz to a puree, then strain through a strainer into a bowl. Let coulis cool, stirring occasionally to prevent a skin forming. When cold, stir in the lemon juice.
Step 3: Assemble Ripple Mousse
1/3 cup (100ml) heavy cream
9 oz (250 g) creme patessiere, cooled
2 egg whites
30 g superfine sugar
Blackberry coulis
Whip the cream to a ribbon consistency, then fold into the cooled creme patissiere. Whisk the egg whites in a clean bowl to a thick foam, then add the remaining sugar and whisk to soft piaks. Gently fold in the pastry cream mixture, without overworking. Very delicately mix in the cold blackberry coulis to create a ripple effect. Divide the mousse between 6 glass dishes and refrigerate for two to three gours before serving. Serve the mousse on its own, or with extra berries, decorate with fresh mint and / or thin chocolate leaves.


By now, the garden beds are overflowing with ripe veggies and we have our hands full with the daily harvest.
Over the years we have learned many tricks how to process and preserve efficiently to waste any fruits of our summer labor, but rather enjoy it over the long months ahead of us. Here are some of our secrets.
Tomatillo Salsa: A fresh take on the classic
1 pound fresh tomatillos, husked and quartered
1 fresh serrano chile, seeded and chopped
1/2 large white onion, chopped
2 garlic cloves, chopped
1/2 cup chopped cilantro
1 tablespoon fresh lime juice
salt, pepper to taste
Coarsely purée tomatillos, chile, onion, garlic, and salt in a blender. Add a little water if needed. Transfer to a bowl, stir in cilantro, lime juice, and salt and pepper to taste. Done!
Spiced Dried Tomatos: A quick alternative to canning!
Cut tomatos in quarters, scoop out seeds. Season generously with salt, pepper, thyme, rosemary - or add whatever flavor you like. Place on dehydrator trays, dehydrate overnight. If you do not have a dehydrator, try the lowest temperature setting in the oven (leave the oven door a crack open). We vacuum seal and freeze portions for later use in stews, as a base for pasta sauces, addition to pizzas or quiches.
Note: Do not waste the seeds, use them together with a few super-ripe cut-up tomatos in our cold tomato soup (See "Summer Refreshments", June 2016).
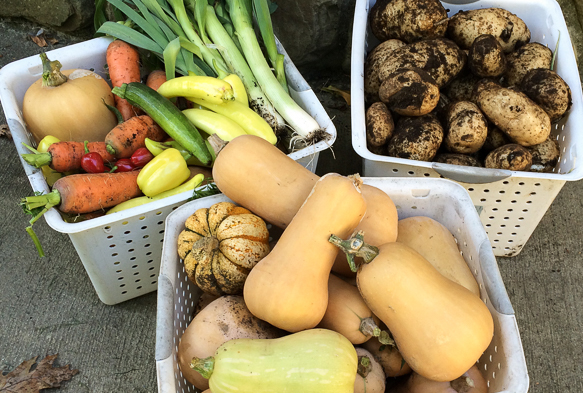
Roasted Tri-colored Potatoes:
A favorite to serve at late summer BBQs
We fell in love with blue Peruvian potatoes and have been growing them, together with small red and white potatoes, for the past few years. However you serve them, roasted, in a salad or mashed, they add a splash of color to your dish.
Wash and scrub red, white and blue potatoes (about the same amount of each) thouroughly, cut in wedges. In a large bowl, toss potatoes with salt, pepper, thyme, rosemary and olive oil. Spread wedges on baking sheet. Bake at 475 degree Fahrenheit for about 45 min (check: If pieces are larger, you may have to add 5 - 10 minutes).
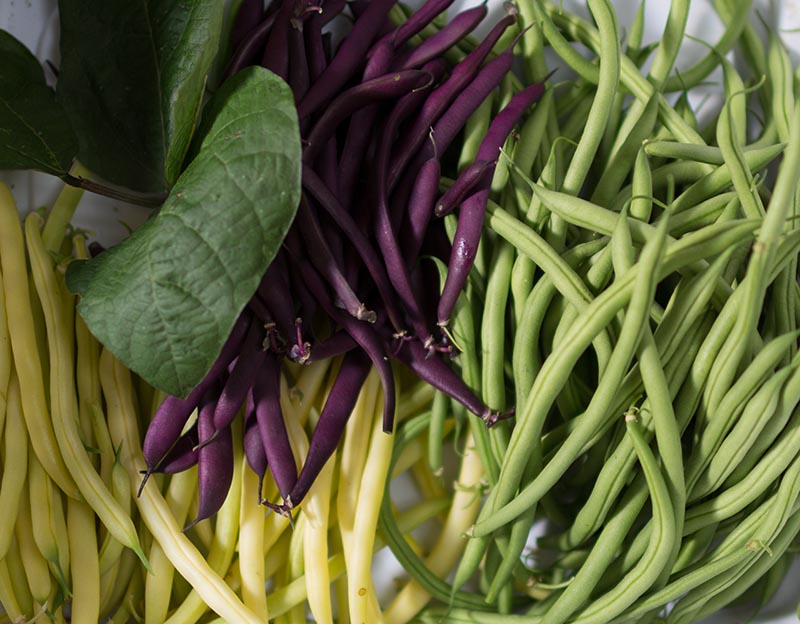
If you do not like potatoes but the color combination, serve a variety of green, yellow and purple beans instead. clean the beans. Heat olive oil in
a large pan, roast the beans, stirring frequently. Do not overcook.
If you can't find purple beans, cut a red onion or two into wedges and roast those before you add the beans. It's a tasty combination!

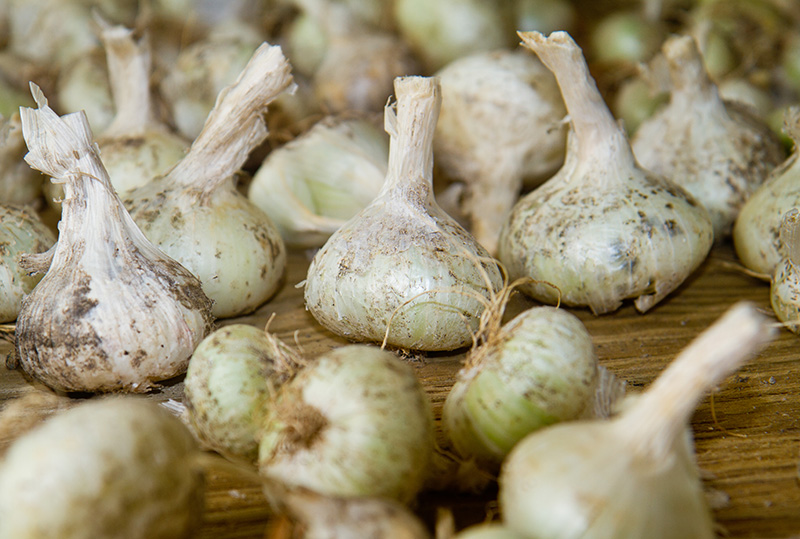
Oven roasted garlic:
A tasty addition to winter dishes
Garlic is one of the easiest - and most used - food to grow. You plant the cloves around or on Columbus Day (early October) and harvest fresh, big bulbs on Independence Day the next year. In between, there's not much to do. We let the garlic grow on our compost, and add a layer of mulch on top. That's it. Once harvested, we braid (or simply bundle) the greens and hang them in bunches in a dry, well ventilated space. After about 6 weeks, we cut off the green parts and select the best bulbs (not necessarily the biggest!) to keep as seed stock for the fall.
If you have buckets of garlic like we do, you may want to process and preserve some of it to for quick use in hearty winter dishes. Peel the garlic (wear protective gloves to protect your skin from the rather harsh juices - Heiko learned it the hard way!), separate the cloves, toss them with spices (salt, pepper, hot pepper flakes) and slowly roast them on a baking sheet. Depending on the cooking time, the cloves can be al dente or much softer. From there, we go the "Spallek way" again: We vacuum seal and freeze small portions, to be added to antipasti, quiches, stews or roasts in the cold months to come.

Quiches: Endless variations
You may ask, what's the deal with all that freezing? As a busy mom, wife and CEO I do not have the time to cook a complete meal from scratch during the week. I grab any chance to prepare and preserve en masse upfront, when the fruits are in season. There's no point in letting produce go to waste only to import and buy it a few months later, especially if the quality and taste doesn't suffer from the preservation. Of course, we do have a large freezer (two actually), and a root cellar, so storage space is not a
concern.
I found that Quiches are great dish to be prepared, baked and frozen without forfeiting texture or taste.
Prep the dough, bake the crust
(Amount for 2 quiches XXX diameter)
3 cups all purpose flour
15 T soft butter, diced
2 medium egg
2 t salt
2 T superfine sugar
First, put the flour in a mound on a surface (preferably marble) and make a well in the middle. Put the butter, egg, salt, and sugar into the well. Using you fingertips, mix all the ingredients in the well together, then gradually draw in the flour, little by little. Then mix until all the ingredients are almost amalgamated and the dough has a slightly sandy texture. Add about 3 tbsp (40 ml) cold water and incorporate, using your fingertips. Knead the dough 2 or 3 times with the heel of your hand to make it completely smooth. Roll it into a ball, wrap in plastic wrap, and let rest in the refrigerator for 1 to 2 hours. When you achieve the required thickness, lightly roll the dough round the rolling pin, and carefully unroll it over a flan ring or tart pan. Use you thumb and index finger to push the dough into the bottom and side of the mold. Cut off the excess dough by rolling the rolling pin across the rim of the mold, then pinch up the edges with your thumb and index finger to crimp them 1/4 inch (5 mm) above the rim. Refrigerate the tart shell for at least 20 minutes before baking. Prick the bottom of the pastry shell in 3 or 6 places with a fork. Line it with waxed paper and fill with baking beans. Bake at 400-425 F (200-220 C) for about 15 minutes. Remove the baking beans and paper and return the pastry shell to the oven for a final 5 to 10 minutes, depending on the type of pastry and its thickness.
Let cool, use time to prepare the filling of your choice.
Note:
A good friend of mine saves time by skipping this labor-intense step and uses a healthier alternative to dough: She overlaps thin slices of raw sweet potatoes/yams on the bottom and sides of the pie dish, the pours in the filling.
Of course, there's the classic Quiche Lorraine, but don't be afraid to try and combine whatever the garden produces.
Here are some examples of our creations:
Swiss Chard Quiche:
A savory mixture of steamed greens, roasted garlic, smoked bacon, rosemary, sage and feta cheese.
Ham, Leek and Three Cheese Quiche:
Smoked ham, caramelized leeks, and a mixture of whatever cheeses you have in the fridge (mozarella, feta, gouda, goat, gruyere, fontina...). Season with salt, pepper and a little nutmeg.
Winter Squash:
Pair butternut squash with bacon bits and feta, add lots of fresh herbs for color and flavor.
 Pizza peel
We LOVE pizza.
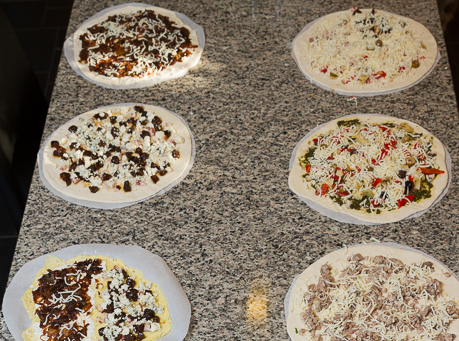
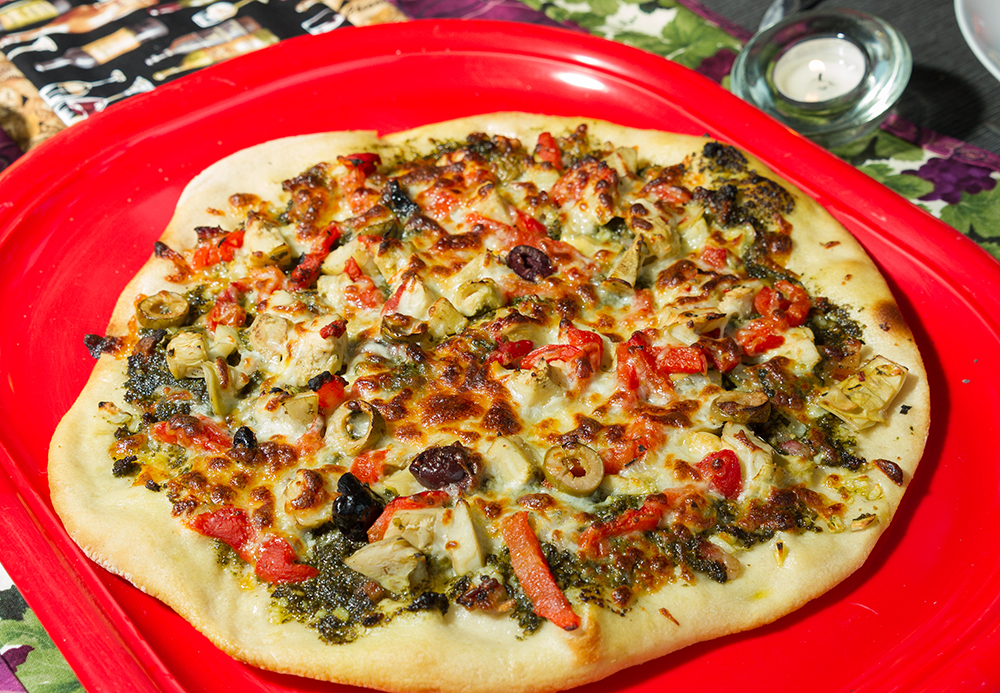
Thin-crust pizza. Crunchy, with untraditional toppings, full of flavor.
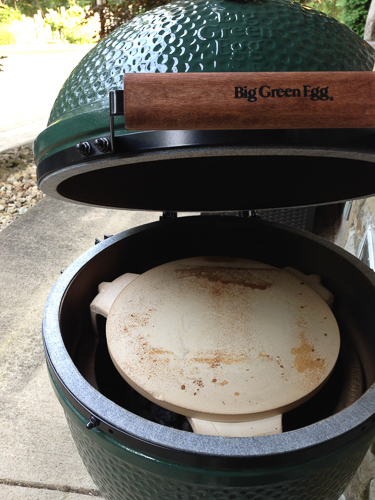
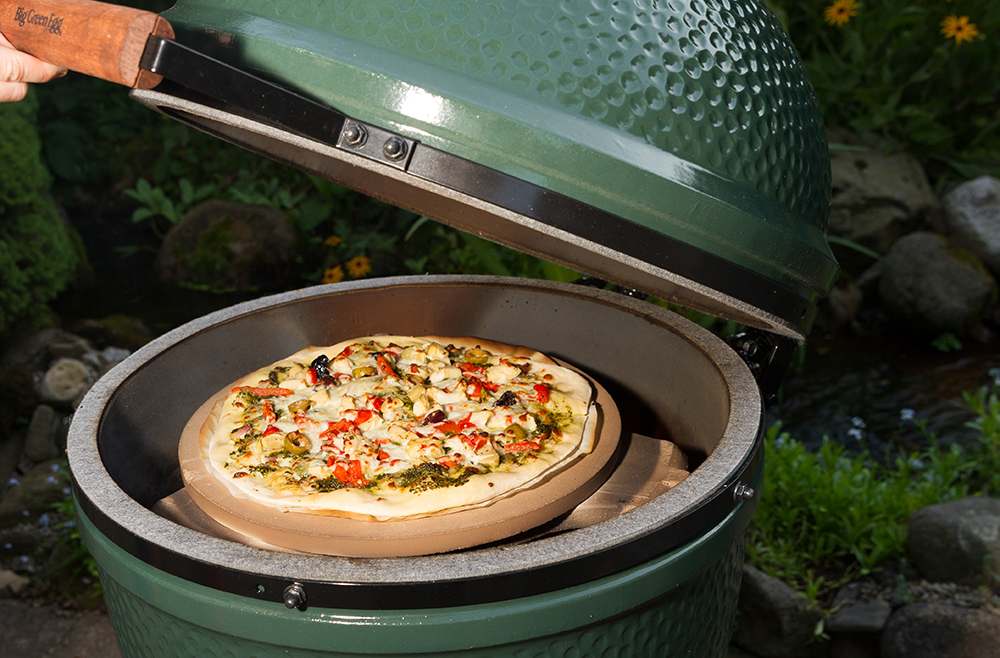
With home-made dough, cooked at the highest temperature on the Green Egg.
The dough: Best if prepared a day in advance.
Inspired by Sam Sifton, New York Times, 2014 (Watch video here).
Ingredients (makes approx. 6 medium-sized thin crust pizzas):
400 g all purpose flour
1 Tablespoon of yeast
Chlorine free water
Mix flour and yeast, add water while the KitchenAid (mixer) is running, until dough is sticky.
Let KitchenAaid mix dough for 30 min on slow speed.
Let dough raise in bowl at room temperature until its volume has doubled.
Put bowl in fridge overnight (or at least for a minimum of 3 hours).
Take out of fridge 2 hours prior to rolling out pizza dough.
(If this sounds too much, be assured: We have also used alternatives to Heiko's pizza dough, and encourage you to try them if you are just curious about the toppings - Pita or Lebanese bread work great!)
Pre-cut 13 in wide parchment paper circles.
Roll pizza dough as thin as possible, place onto the parchment paper. Let raise for another 30 min, then add your toppings.
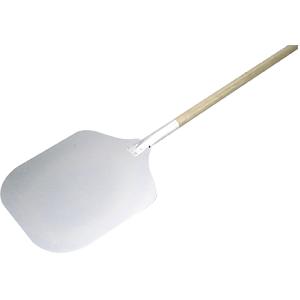
Use aluminium pizza peel of sufficient size (at least the size of the pizza) to move pizza into oven, on grill or into the Green Egg. Whatever you'll use: HIGH temperature is a must (700-800 F). Let pizza bake for apporx. 6 min (at 750 F - The temperature will drop when you open / close the oven or lid, and with that the cooking time will increase).
 Green Egg with pizza stone
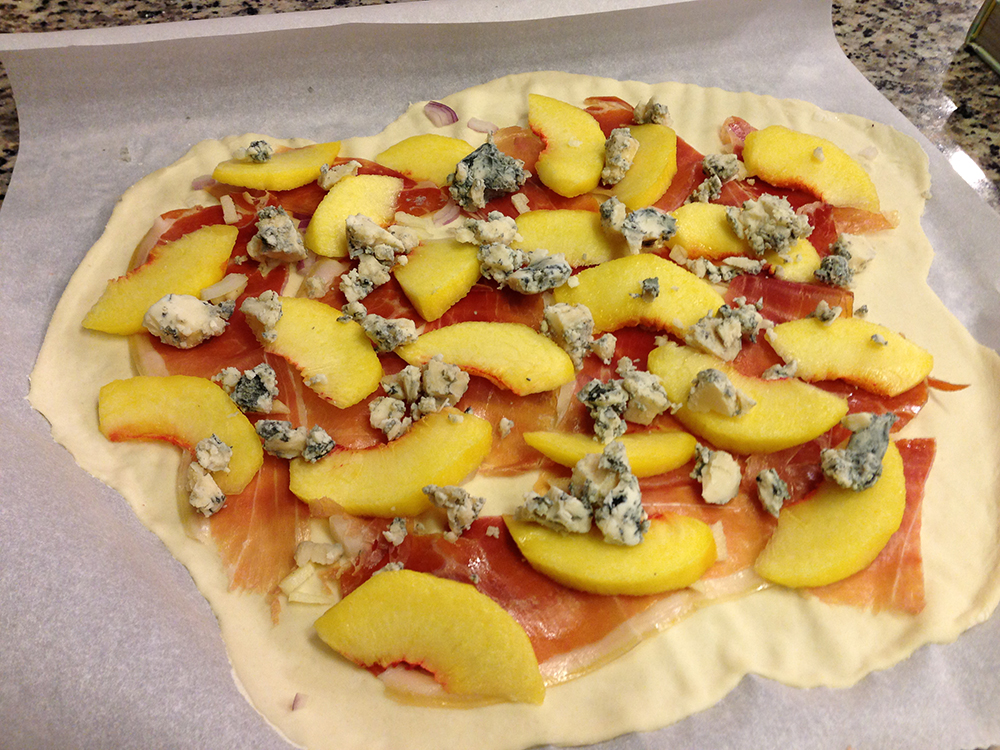
FIG, BLUE CHEESE AND PROSCIUTTO FLATBREAD
2 cups of dried figs
1/2 cup port wine
1/4 cup balsamic vinegar
1/4 cup olive oil
1 garlic clove, minced
2 ounces prosciutto
6 ounces blue cheese (e.g. Gorgonzola), crumbled
Remove the stems from the figs, then cut
figs into small pieces. Place figs and wine in a saucepan, simmer over low heat
until figs are plump and most of the liquid is gone. In a small bowl whisk
together oil, vinegar and garlic. Cut the prosciutto horizontally into half-inch strips.
Brush the dough with vinaigrette and top with figs, prosciutto and blue cheese.
Tasty variations:
a) Use fresh peach slices instead of figs.
b) Dress some arugula with a little balsamic vinegar and oil , then mound atop pizza after baking.
GRILLED CHORIZO, GOAT CHEESE, AND WATERCRESS PITA PIZZA
14 ounces chorizo sausages, casings removed
4 cups watercress topa
8 ounces soft fresh goat cheese, crumbled
3 mini sweet peppers, cut into thin rings
Sauté chorizo in skillet over medium-high heat
until cooked through, breaking up with spoon, about 8 minutes. Transfer chorizo to sieve
set over bowl and drain. Mix 2 1/2 cups watercress and goat cheese in medium bowl. Top pizza with
cheese mixture, chorizo, and several sweet pepper rings. Bake pizzas, then top with more watercress and serve.
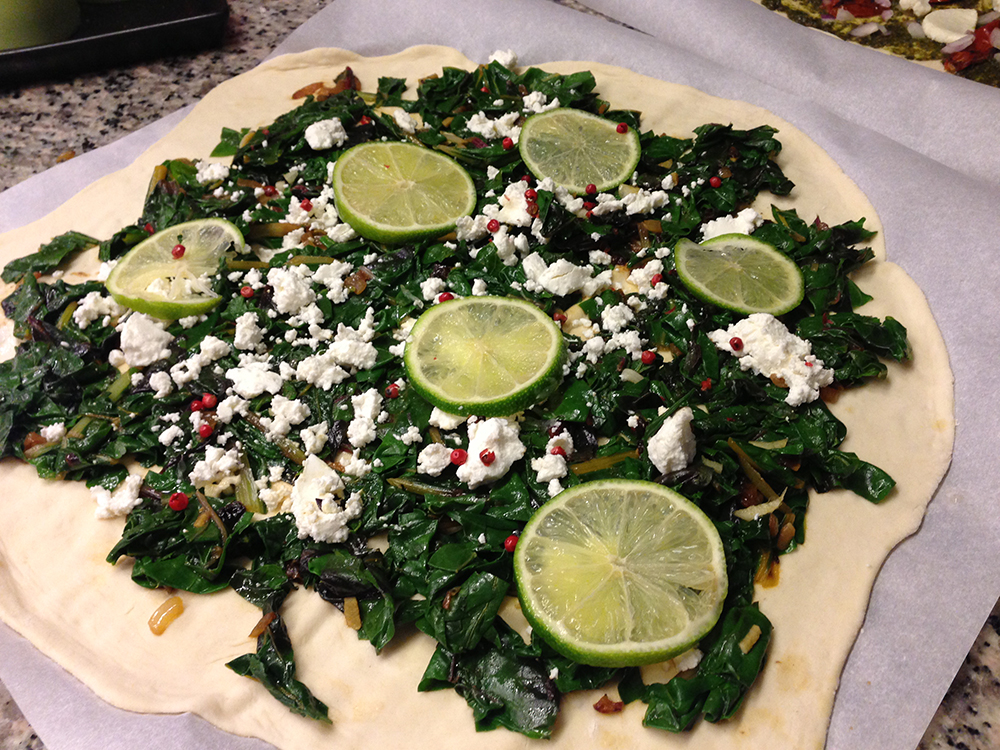
MEYER LEMON, SPINACH AND GOAT CHEESE PIZZA
Olive oil
2 shallots, thinly sliced
4 cups packed baby spinach (or Swiss chard)
Kosher salt and freshly ground pepper, to taste
1 small garlic clove, minced
1 Meyer lemon, very thinly sliced
2/3 cup crumbled goat cheese
Crumbled dried whole chili peppers or red pepper flakes as needed, salt, pepper.
In a nonstick fry pan over medium heat, warm olive oil. Add the shallots and cook, stirring occasionally, until tender. Add the spinach, season with salt and pepper and cook until just wilted, 1 to 2 minutes. Transfer to a bowl and let cool.
In a small bowl, combine 1 Tbs. olive oil with the garlic. In another bowl, toss the lemon slices with 1 tsp. olive oil. Lightly brush the dough with half of the garlic oil. Top with
half each of the spinach mixture, lemon slices, cheese and chili peppers.
If it comes to smoking, Heiko is an expert.
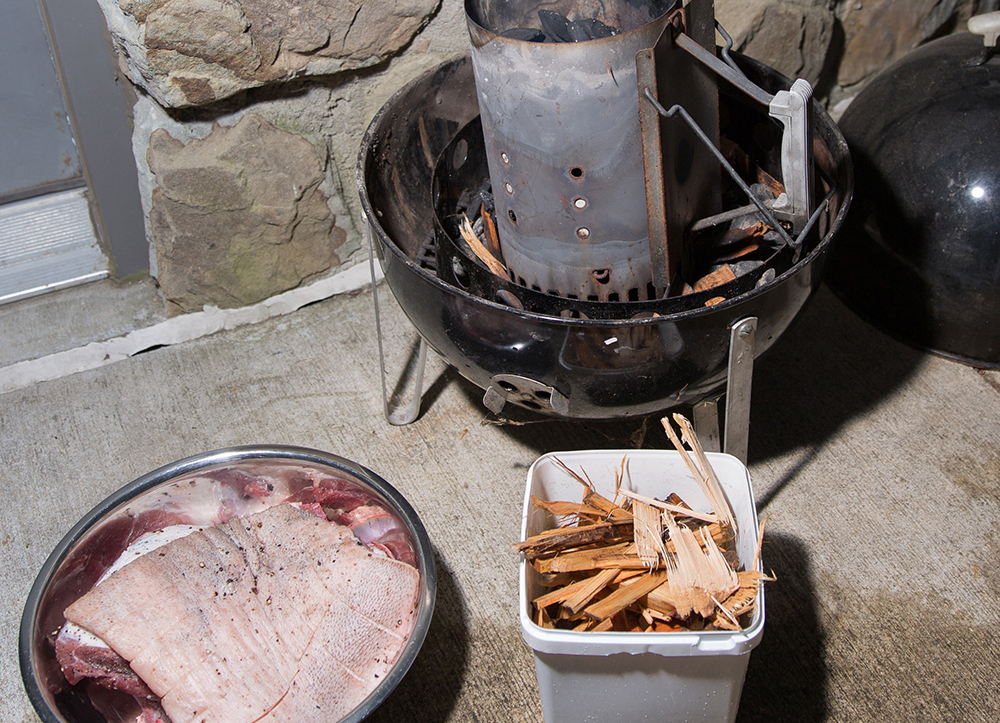
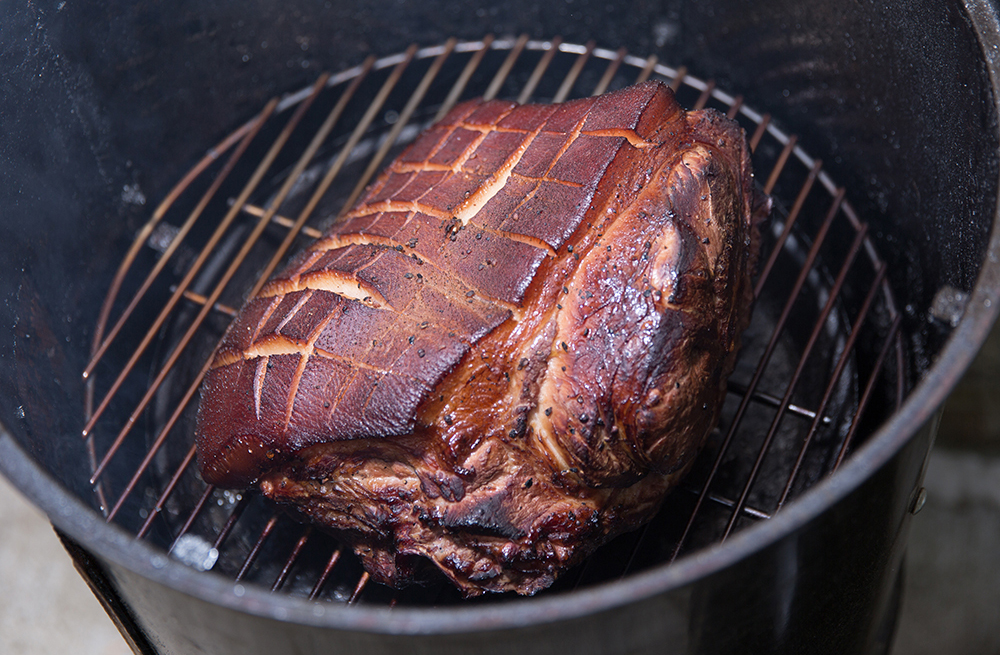
For hot smoking, he's used a Weber Smokey Mountain Cooker (bsee Boston Butt) and a Big Green Egg (below).
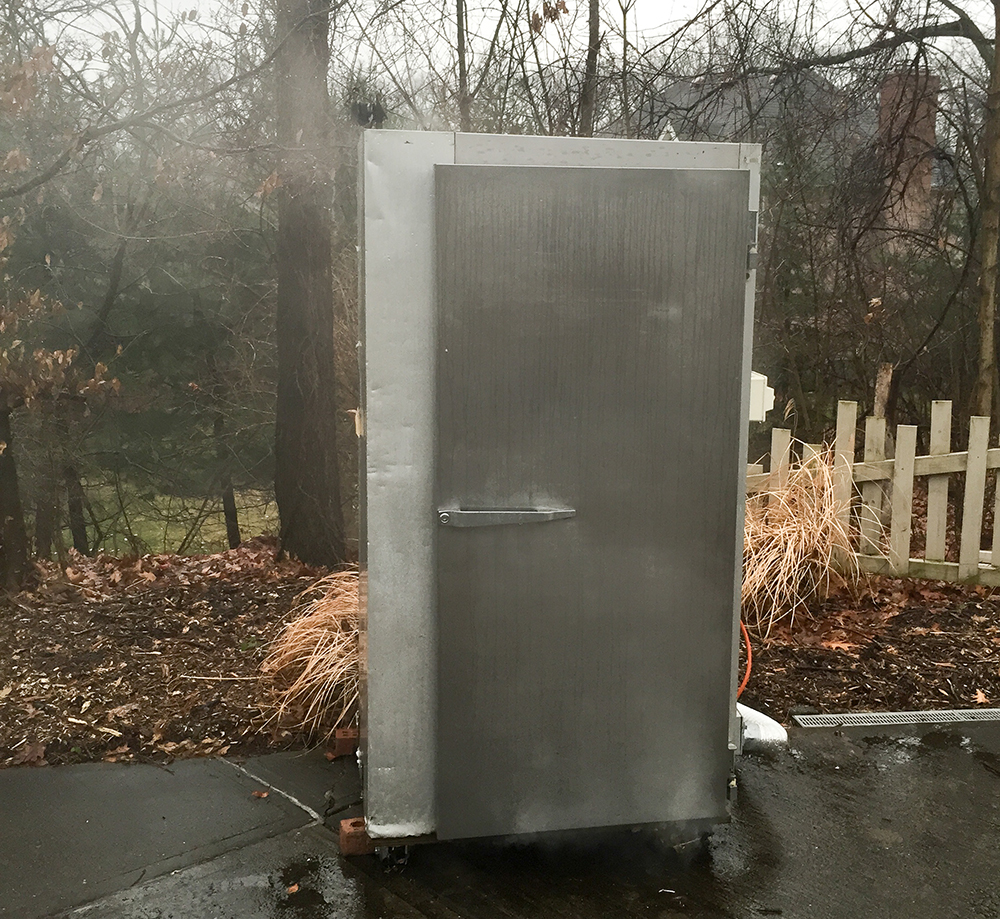
For cold smoking, he bought an old commercial fridge at a metal junk yard (left) and transformed it into a smoker (details on the transformation can be found here).
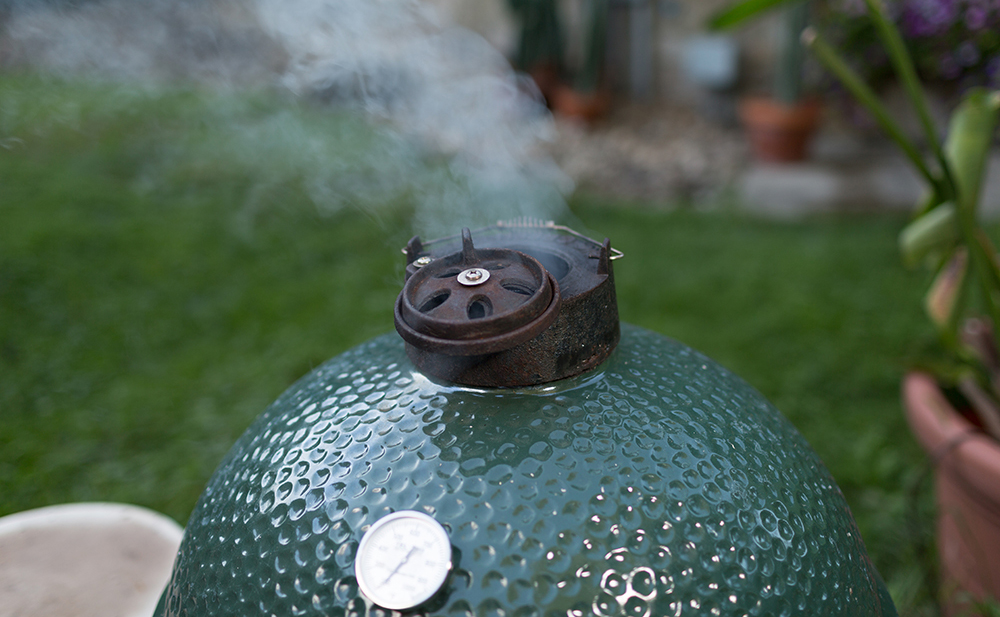
Smoking hot
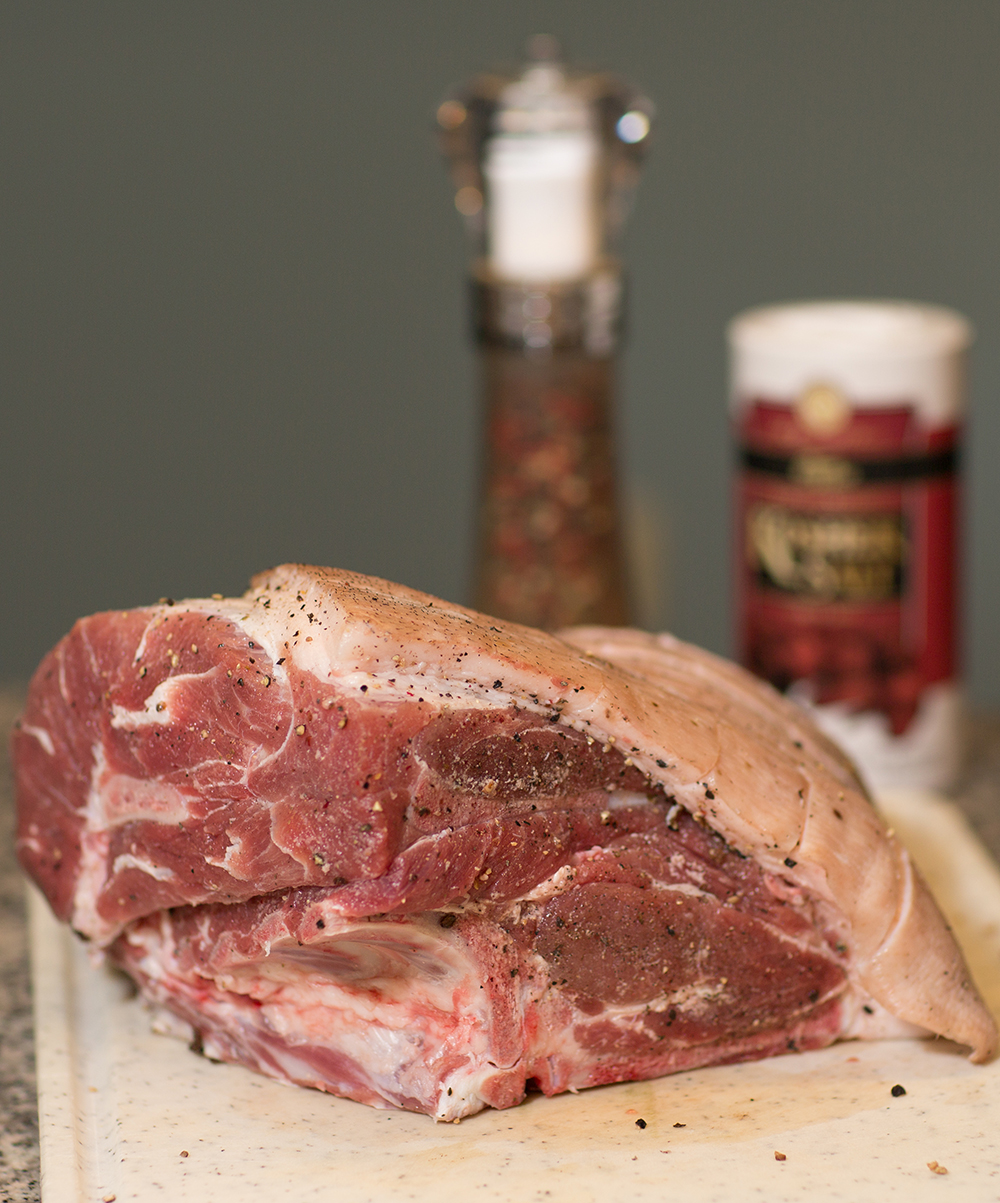
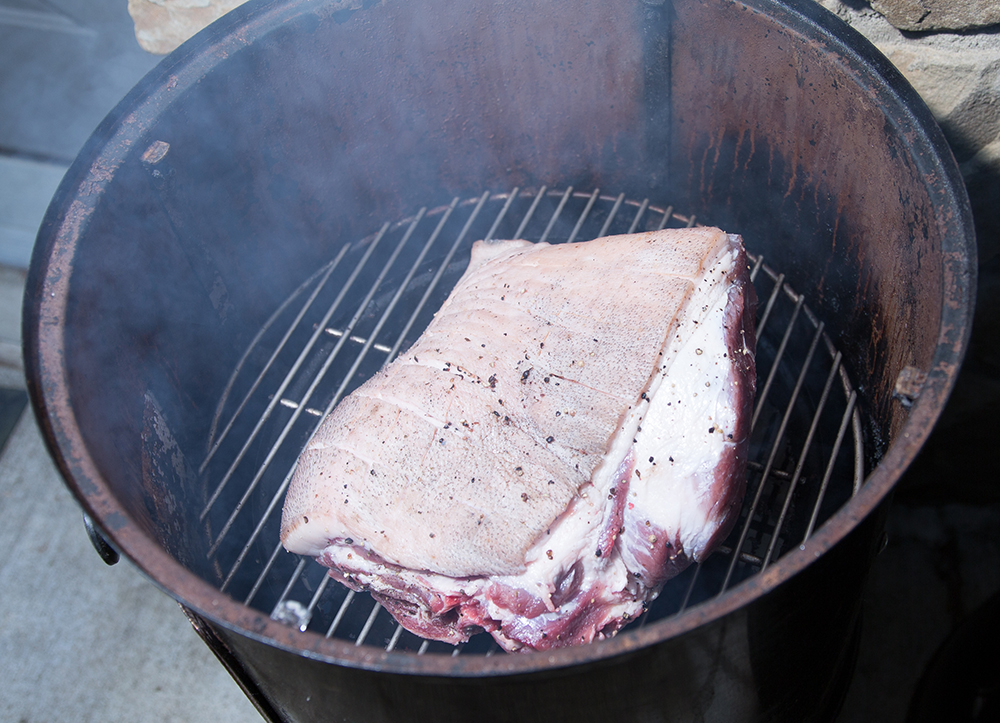
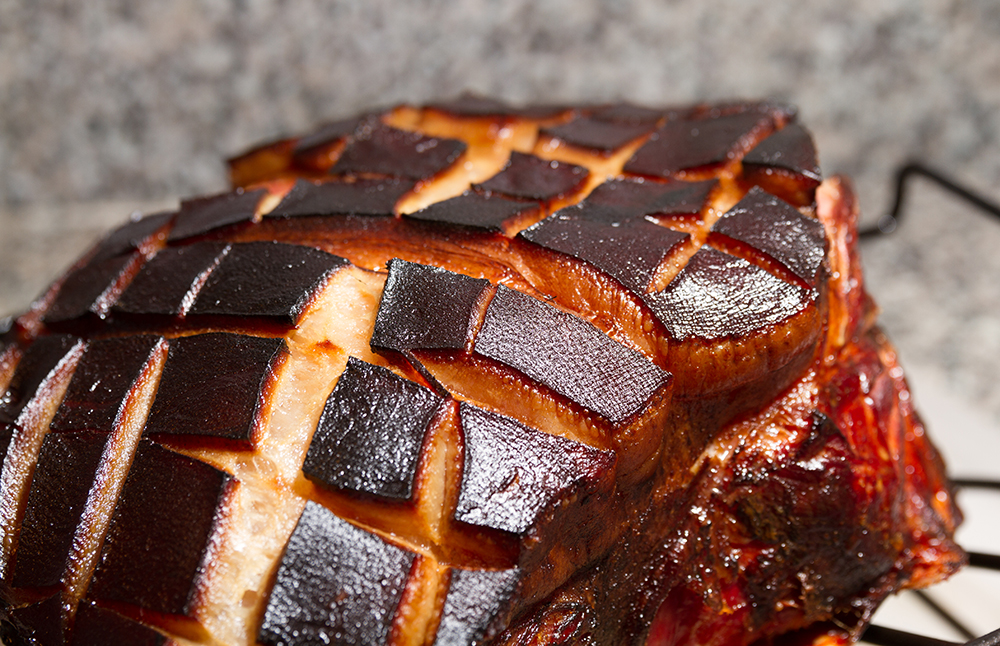
Heiko has smoked whole chickens, ducks, ribs and the featured "Boston Butt".
Boston Butt
Based on the recipe from Cooked by Michael Pollan
Cooking a pork shoulder like this is a 10 - 12 hour long adventure, requiring frequent attention to the temperature and drip pan. The key to succes is to keep the temperature low - for a long time. Which is easier said than done.
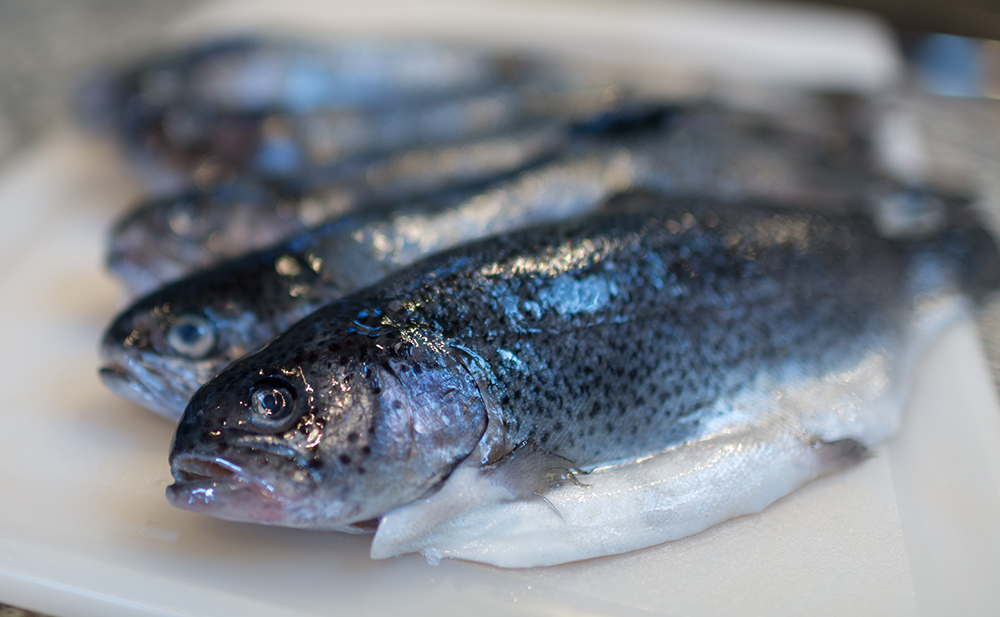
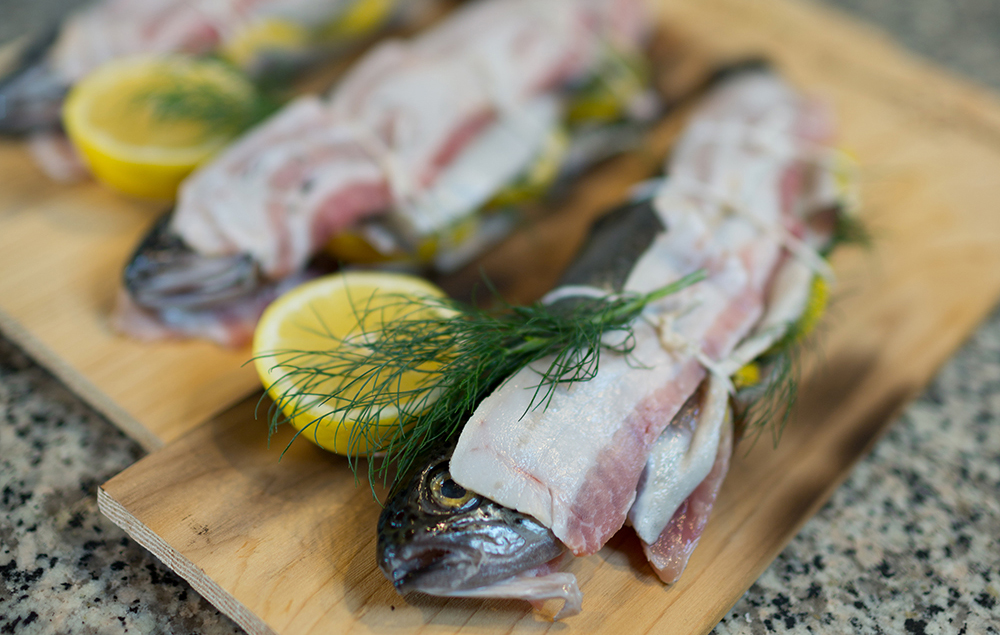
Smoked Planked Trout
The recipe we used is from the Signature Recipe Collection for the Big Green Egg.
The trick to keeping the meat moist is to stuff butter slices (along with lemon) into the cavity of each trout as well as tieing pancetta (we used our smoked bacon instead) around it. For extra flavirung, add some lemon halfs and smoke them next to the fish, then use for squeezing.
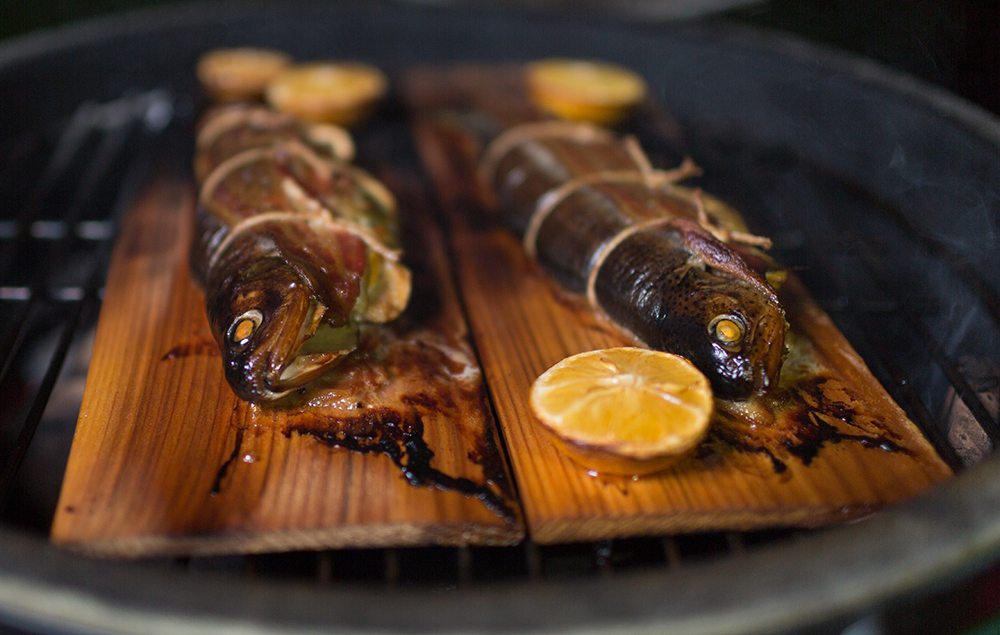
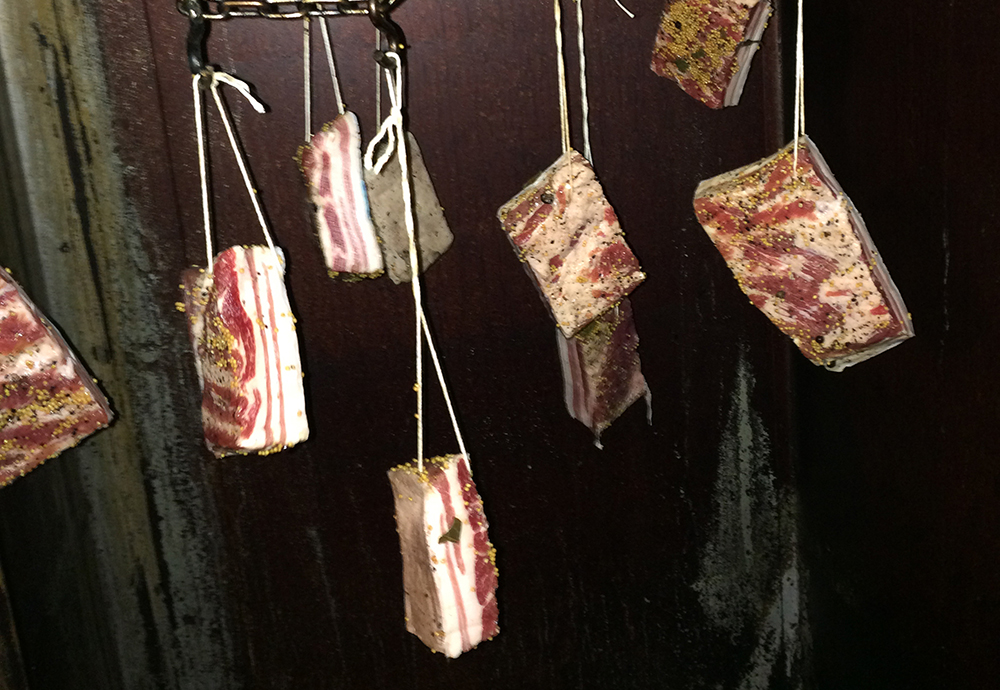
Smoking cold
This technique is used to add flavor to the otherwise already cooked or cured food.
We have experimented with lots of different foods - from hard cheese, beef tongue, bacon, liver wurst and bratwurst to deer ham and steelhead trout (see December for recipe and pictures).

Liver Wurst and Bratwurst
Since the wurst is staying in the smoker for a few days, it needs to be cold.
Therefore, "wurst making" is a winter activity and quite a challenge: All the tools, bowls, grinder parts etc. that come in contact with the meat need to be cold as well.
We usually bundle up and prepare the food (on clean surfaces!) in the garage, where it is barely warmer than outside. With all these preconditions and necessary preparation it is understandable that if we make wurst, we make a lot!
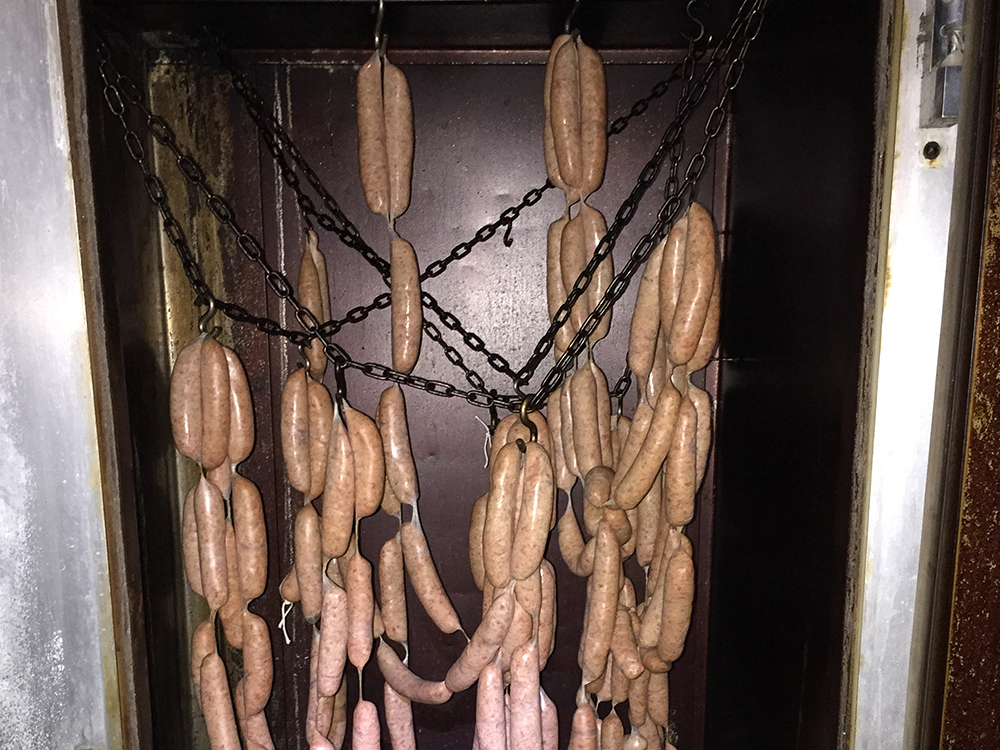
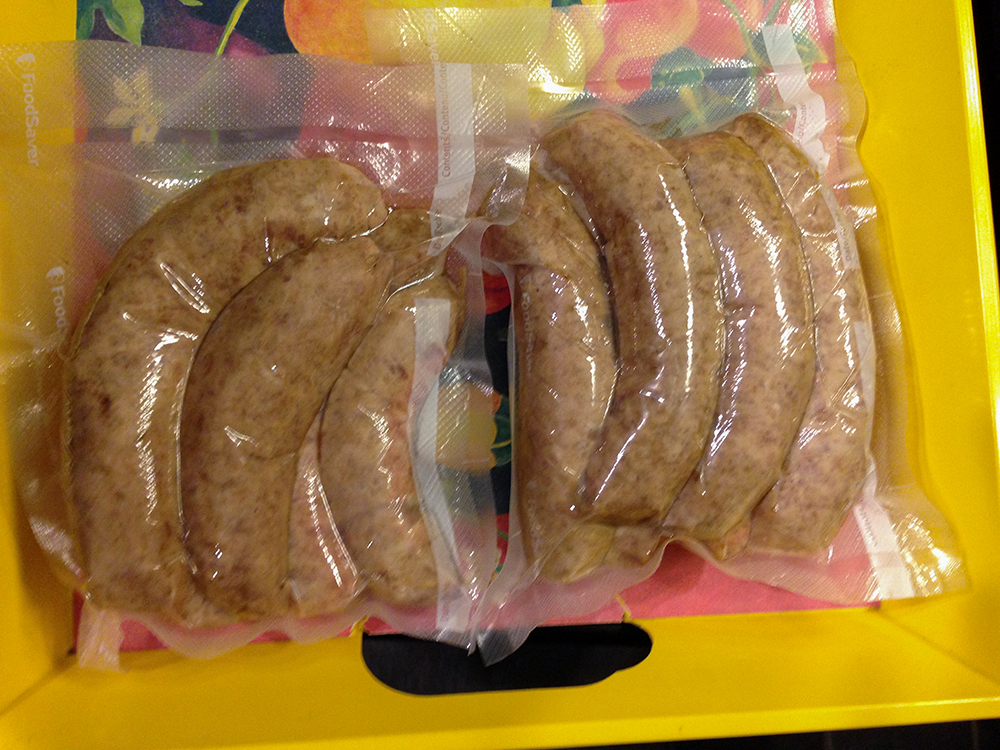
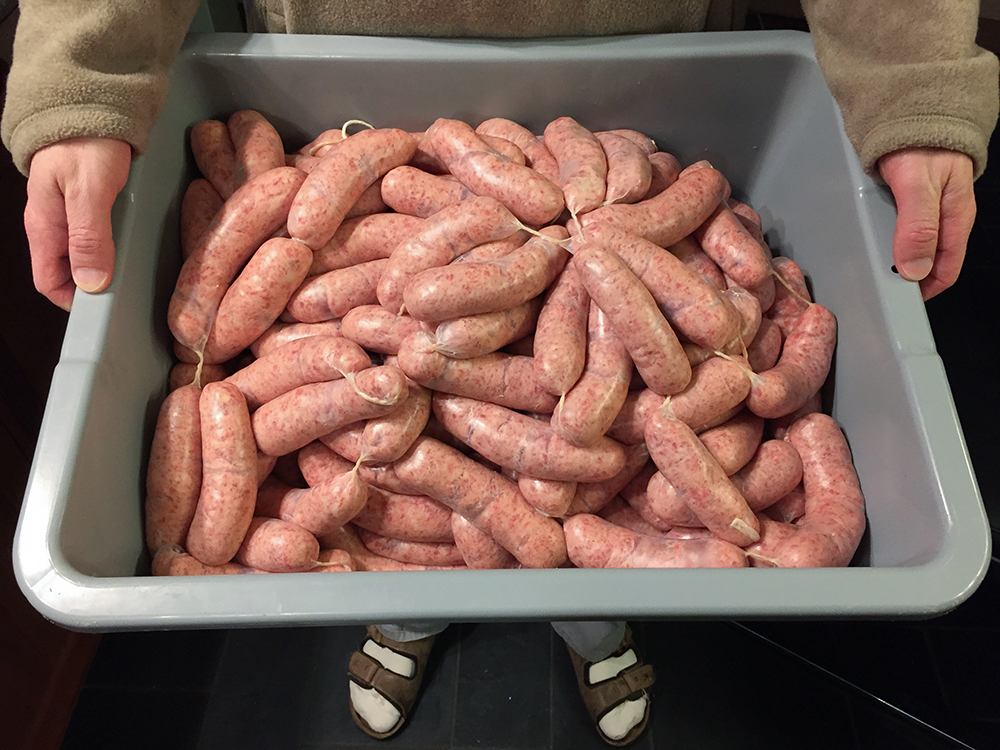
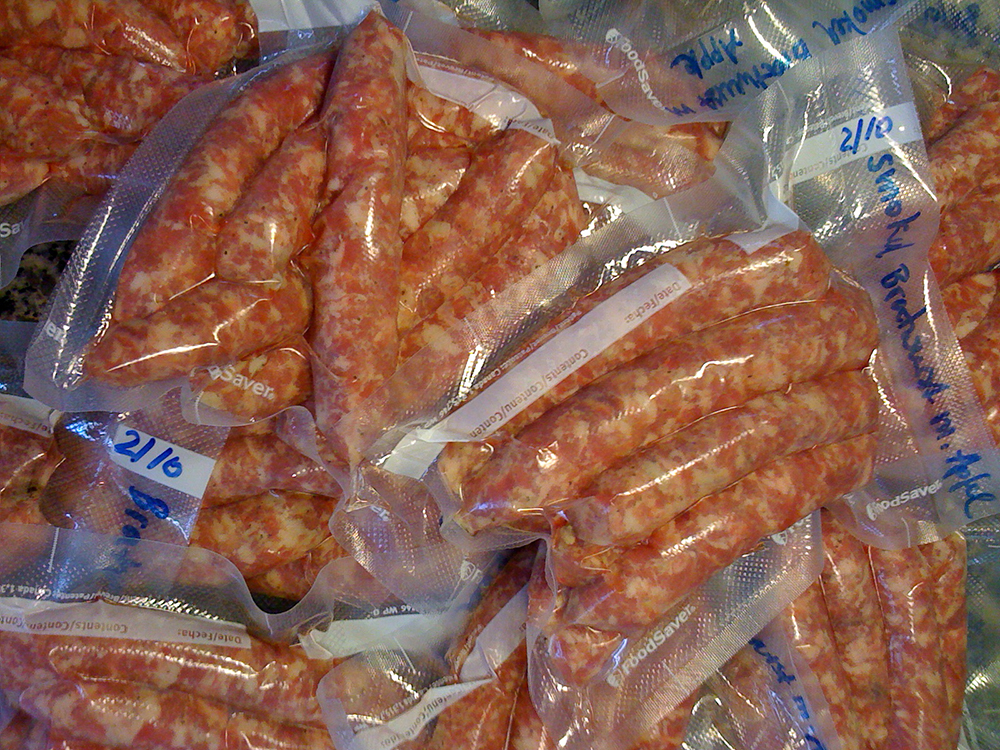

We have been very lucky to have fishermen friends who were happy to share their catch with us.
We returned the favor by sharing the processed goods, such as caviar (or, less fancy: cured roe) and smoked fillets.
The Pennsylvania streams in the Lake Erie Watershed are renowned for their steelhead fishing.
The steelhead in the creeks are a strain derived from the steelhead of the Pacific Northwest. These fish are "lake run" rainbow trout. They are a species of rainbow trout which lives in Lake Erie during the summer, and in the creeks during the winter. Steelhead in the creeks generally run from 3 to 8 pounds. Fingerlings, which are about one year old and approximately six inches inches in length are stocked in the creeks in the late winter and spring for "imprinting." Steelhead generally return to spawn at three years old.

How to cure Steelhead Trout roe
Method adapted from Olivia Wu
Imagine our surprise when we cut open our first female steelhead trout and found roe. We immediately googled recipe ideas online and, to our surpise, "making caviar" was very easy!
1.) In a stainless steel bowl, combine 3 quarts of warm water (100F) and 1 cup of kosher salt for 30 minutes.
2.) Lift out the skein (the sack which contains the roe), reserving the brin. Under the hot water, remove the membrane. The hot water running over it will shrink and retract from the eggs, allowing the individual eggs to fall into the colander. When all the eggs have been separated, return them gently to the salt water.
3.) Pick through the eggs, separating any small bundles and pulling away remaining skein until the eggs are clean. Pour the eggs into a colander and drain the eggs well. They may look a little opaque, but within 15 minutes, will become translucent.
4.) Place the eggs in glass jars and refrigerate. The caviar should last two weeks - but definitely tastes best when fresh.
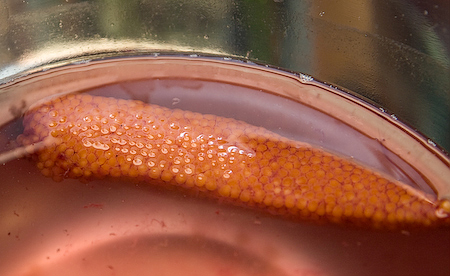
1) Prep the brine.
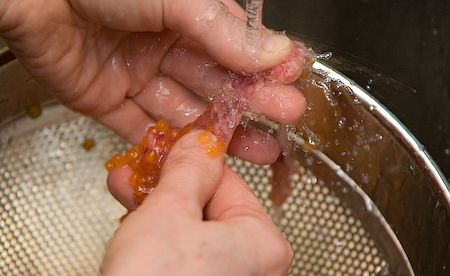
2) Remove the eggs from skein.
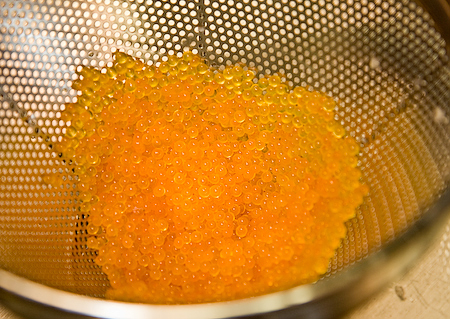
3) Remove remaining membranes.
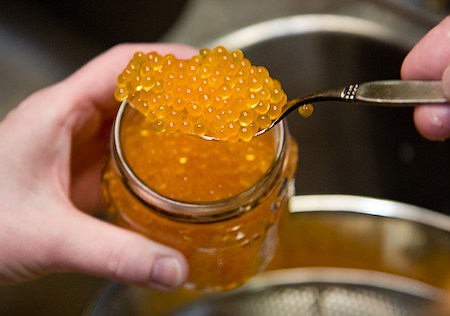
4) Enjoy!

Recipe Ideas
Caviar tastes a little fishy, mostly salty, and adds a great deal of color to any dish.
Here are a few ideas of what to do with it:
Sprinkle on top of a hard boiled egg or egg sandwich.
Add flavor to your omelette or scrambled eggs.
Decorate smoked salmon or trout appetizers.
Add an elegant touch to deviled eggs.
Use as topping on blinis or mini potato pancakes.
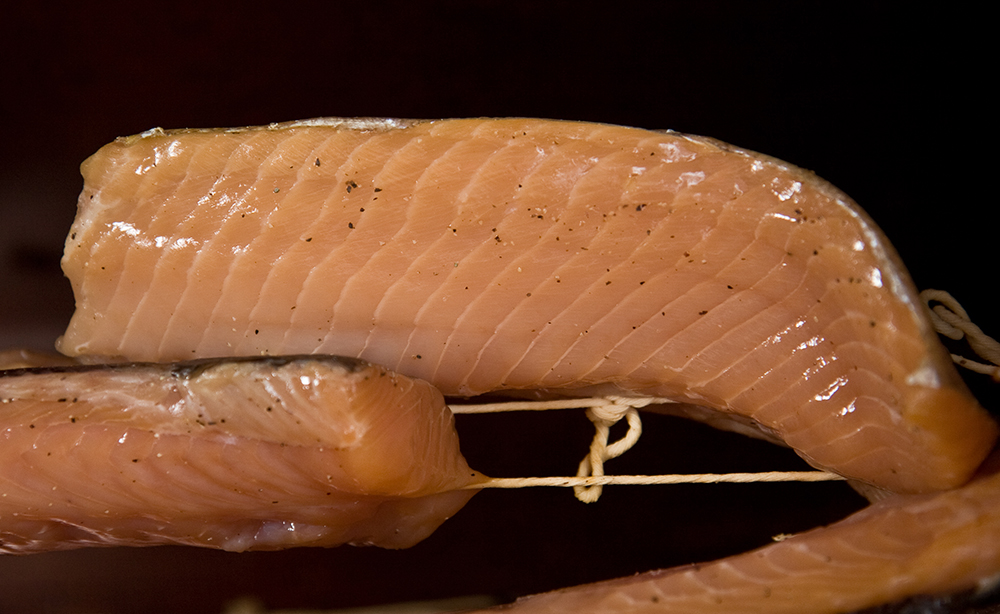
How to cold-smoke Steelhead Trout fillets
1. Preparation of brine
Fill food grade bucket with filtered water (6 quart water)
Put bucket with water in a fridge, cool down to 35 F.
2. Add curing agents
It is very important to exactly measure the amount of curing agents!
Add in this order:
a) 3671 Sodium Erythobrate (0.8 oz) and stir thoroughly.
b) 783 Brown Sugar Cure .75% Nitrite (22 oz).
c) 2801 Haifa Sodium Tripolyphosphate (6 oz).
d) Add further:
20 Bay Leaves
4 tsp pepper
30 juniper berries
1 TL Garlic powder
Stir thoroughly!
3. Curing process
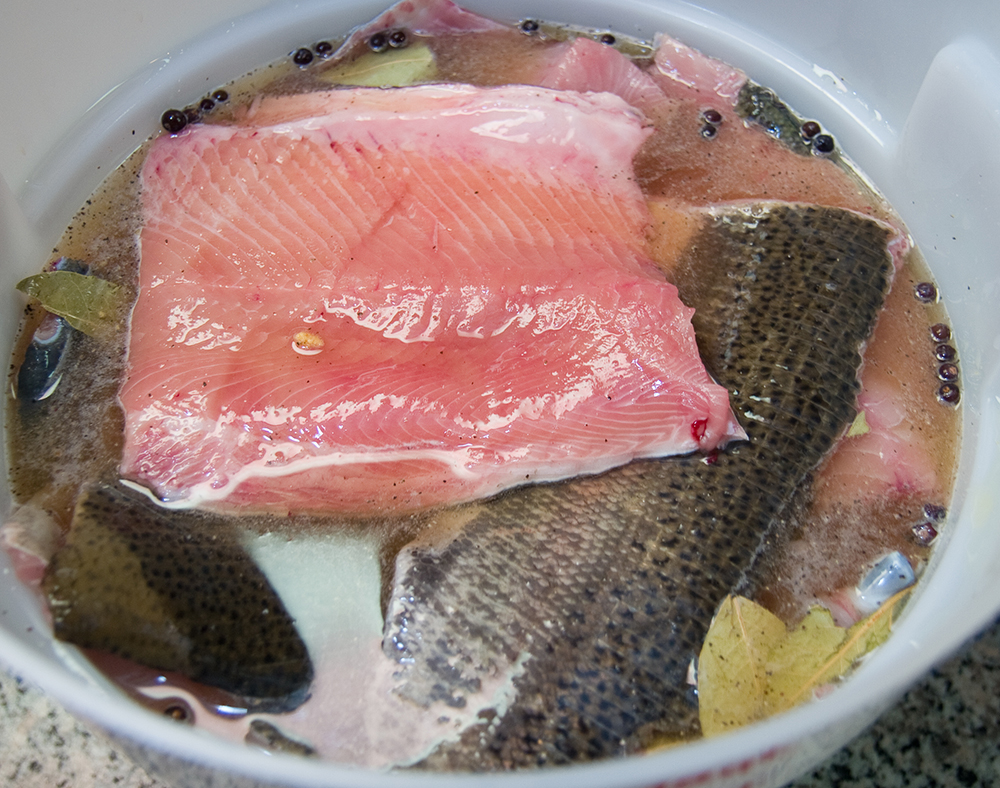
Add the fillets to the brine.
If fillets are not fully covered, add a plate to push them down into the brine. Return bucket to fridge.
Cure for 24 - 48 hours depending on thickness of fillets
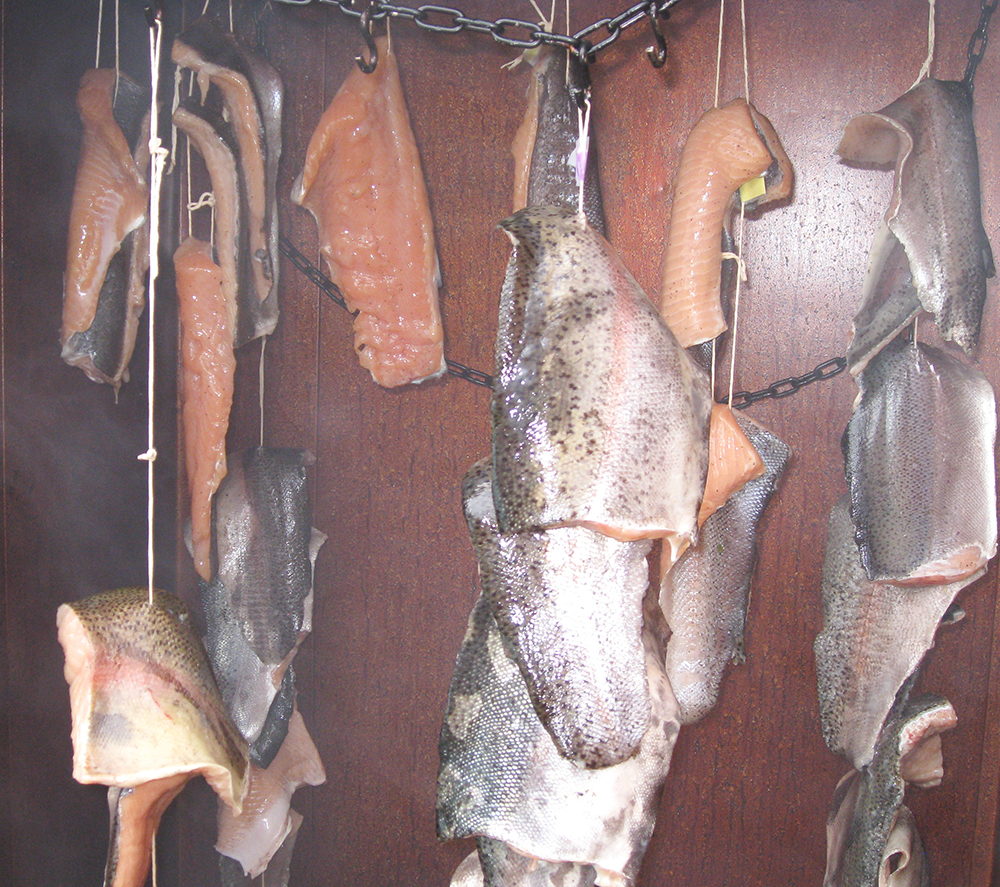
Take fillets out of brine and rinse for 20 min in cold water, then put them on a kitchen linen twine.
7. Cold-smoke fillets
Let fillets hang in the smoker without smoke in order to allow a salt equalization (12 hrs) or store dry (60-80 %) and cold (35-40 F) anywhere else.
Smoke until the fish has a glazed look, approx. 4 days.
Remove fillets from smoker, let them cool before vacuum sealing.
If the fish was not previously frozen, be sure to freeze it for a couple of days for parasite control.
Recipe Ideas
One of our favorite lunches is also very simple:
Sourdough toast (or bagels) with cream cheese, lettuce, onion, tomato and smoked steelhead trout.
We have also used flakes of smoked fillets (which pair well with lemon, dill and capers) in pasta, risottos, omelettes, quiches and as a pizza topping.
![]()
The baker, cheese maker and smoking expert.
No challenge is too big.
Over the years, Heiko has added a root cellar, orchard and bee hives to our "farm".
![]()
The gardener and cook
From asparagus to zucchini, garlic to potatoes, berries to pears.
Providing sustainable and nutritious food year around is a true challenge in the Pittsburgh climate.
![]()
The chicken lady
Sophia has been raising peeps since 2010.
Currently, she is in charge of our 22 chickens and 3 roosters.
![]()
The butcher
Deer, rabbits, chicken - she does it all.
Alexandra was also responsible for taking care of our meat rabbits.
spallek.com, LLC
Copyright © www.spallek.com


